BFPTOUCH for Hipercubo-AR
thingiverse
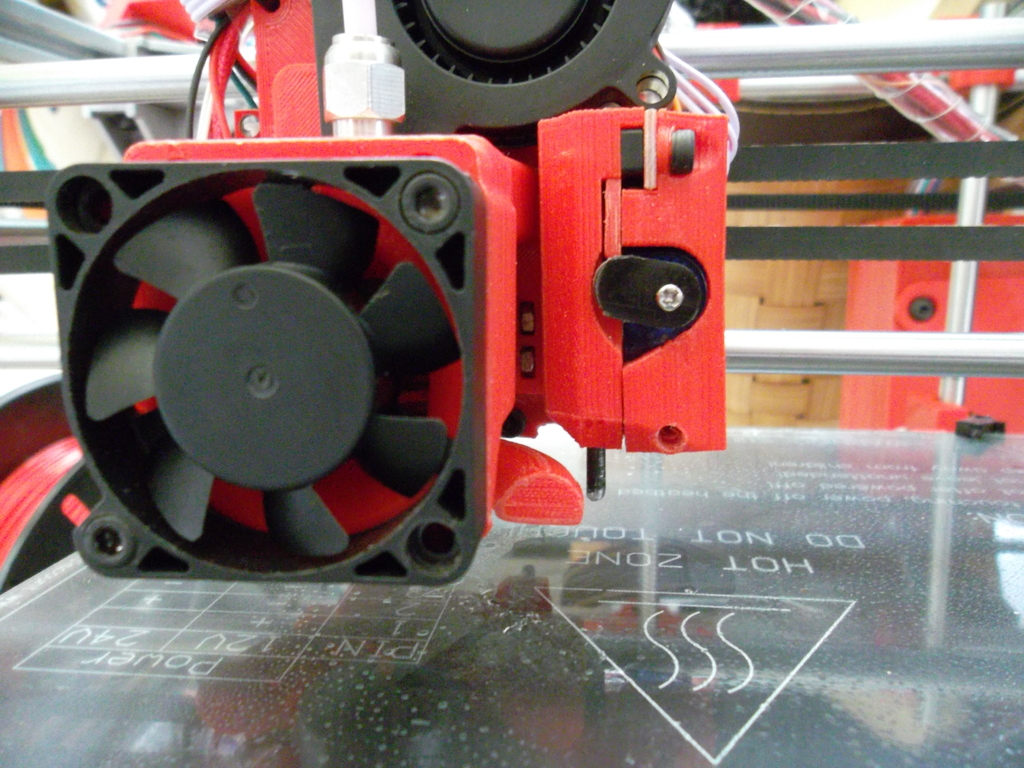
I adapt myself to fit securely onto the hypercube support -AR \r\nThe unnecessary hole for the screw head is eliminated. To use the palpator rod, a M3 screw with the head cut off and the tip rounded is used. When placing it over the flag, a small drop of glue is applied so that it fits snugly and does not move. It's essential to maintain constant distance.\r\n\r\nThe interior measurements of the lid are adjusted so that the flag moves smoothly, just like the thickness of the flag is fine-tuned.\r\n\r\nIt's crucial to sand everything well so that it moves freely; do not apply oil or grease.\r\n\r\nTest the assembly without adding the lever until its functionality is verified.\r\n\r\nSee the original for more data (https://www.thingiverse.com/thing:2890290)\r\n\r\nTo install it on the car, place the base under it and then assemble the sensor by attaching the lid and other components. This allows the entire assembly to have the necessary solidity.\r\n\r\n\r\nM851 Z0\r\nG28\r\nG1 X100 Y100 Z0 ;(enter your home coordinates). \r\nM211 S0\r\n\r\nWith the printer's panel or from the software, lower it until the nozzle reaches the platform (paper sheet). Note the Z value, for example -0.9. Then enter the following command.\r\n\r\nM851 Z-0.9\r\nM502\r\n\r\nSave the memory or enter that value in Marlin and you're done.\r\n\r\nI recommend enabling babystepping, especially when printing various materials. For example, nylon requires 0.1/0.2 more pressure than ABS.\r\n\r\nSee https://youtu.be/sJ7reGSuObY\r\n\r\nColor note.....Black (a bit of a joke, but it doesn't seem like much). \r\nThe servos are powered by 5V (especially if they use BFPTOUCH). \r\nThere is no regulator in the RAMPS; the Arduino's poor little regulator can barely handle it between the Arduino, end stops, etc. So you have to bring them from outside.\r\n\r\nIf you're using a PC power supply, use the ps-on and 5-standby by bridging the RAMPS only, but with 12V power supplies, you can't do that.\r\n\r\nLet's get to it; it's about putting an LM7805 from the 12V source to the servo power line. To make it simple, I put it on the same RAMPS.\r\nIt looks like this.....see the photos.
With this file you will be able to print BFPTOUCH for Hipercubo-AR with your 3D printer. Click on the button and save the file on your computer to work, edit or customize your design. You can also find more 3D designs for printers on BFPTOUCH for Hipercubo-AR.