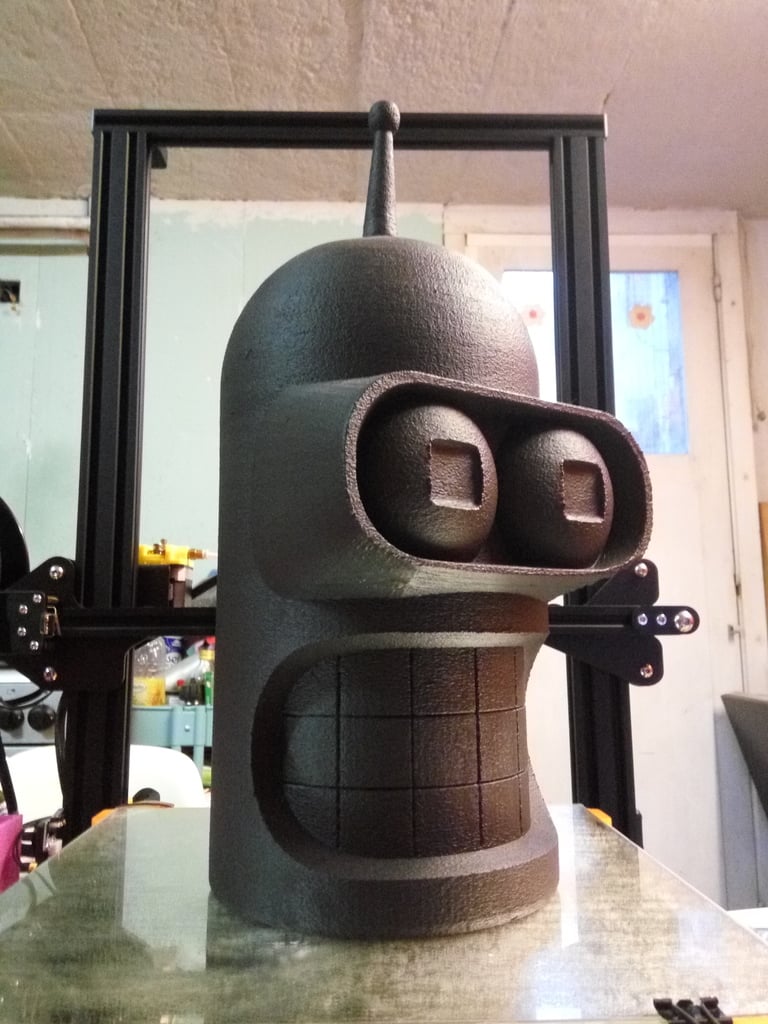
Bender head
thingiverse
*** Printing Overhangs *** To get a superior result on overhangs, it's best to print slowly. However, if you want to print a large model that will take forever, I made a feature request on the Cura github in early 2018 to include a function that can slow down print speed when overhangs are sharper than a certain angle. The people at Cura replied that they would integrate this option into a different setting they were working on for bridging and that it would appear in the next Cura, version 3.3. This has been out for months now, and you can see this model being used as an example: https://community.ultimaker.com/topic/22195-introducing-the-experimental-bridging-settings/ I found that the best way to print a model without supports is to print overhangs slowly, with as little "pressure" (this can be done by changing your line width or possibly by reducing flow) which should prevent corners from curling up, and with as much cooling as possible. If you print with enough walls and top layers, you can easily print a model without infill as well. If you print with enough walls and top layers, you can easily print this without infill as well. See the large silver Bender I posted in the "makes" section. ************************************************************************************** *** updates *** I tweaked the model twice. In V2, the head is a bit longer, the front edge of his goggles are of consistent thickness (unlike in V1), and the lips have a tiny slope, so that it's possible to print the entire model without supports. I printed a 27cm tall version of V2, perfectly without supports and without infill, with 0.3mm layer height and 4 walls (1.6mm). See the pink bender. Then I decided to further improve on that model, and make Bender's goggles more like the actual goggles in the cartoon. Not totally rounded around the eyes, and more flat on the side (see the comparison pictures between V1 and V3). I added two prints of the V3 model. Both printed with Cura's fuzzy skin option. The larger one (40cm) I painted with black outdoor paint. The fuzzy skin effect did cause small gaps on the top of the head (neither were printed with infill). These gaps did not occur with a normal print. ******************************************************************* I wanted to print a large model on my new CR-10, so I checked out the Bender head people are printing... but on closer inspection, I didn't really like that model much. The resolution of the mesh is low, making it blocky. The antenna is very abnormal and coarse in my opinion. The teeth do not match the fine lines of Bender's teeth in the cartoon. And his goggles don't actually stick out much... I understand all of these design decisions were made in order to print the model quickly and without supports, but I rather have a model I like than one I don't like but can print without supports or print a few minutes faster (Cura says there's a 15 minutes difference for a 15cm tall print between both models). So I designed a new model from scratch. And what program better suited to make a Bender model, than Blender! Either way, the small print (15cm) in the picture, was printed WITHOUT supports, with 4 walls. The taller one (20cm) had a problem with the extruder (you can see a line about 3/4th in the print), I printed that one with 3 walls and with supports. Both were printed with zero infill. I'm guessing for the larger prints, it's best to use supports, but maybe I need to test some more. I'm pleased with the model, I think it captures the essence of Bender better than the other model, but it may come at a price. RECAP (edit): You shouldn't need supports if your printer is dialed in and if you're using enough walls. The large (27cm V2 model) pink bender (see picture) was printed without supports, with 0% infill, and with 4 walls on a 0.3mm layer height. It took little under 10 hours to print this model and took about 180 grams of plastic. Feedback is much appreciated!! ************************************************************** V1 = original attempt, better with some supports V2 = improved on the original, doesn't need supports, even goggle edge thickness V3 = same improvements as V2 but with a new goggle design, more like the cartoon
With this file you will be able to print Bender head with your 3D printer. Click on the button and save the file on your computer to work, edit or customize your design. You can also find more 3D designs for printers on Bender head.
