Beginner 3D Printer/Design Guidelines
thingiverse
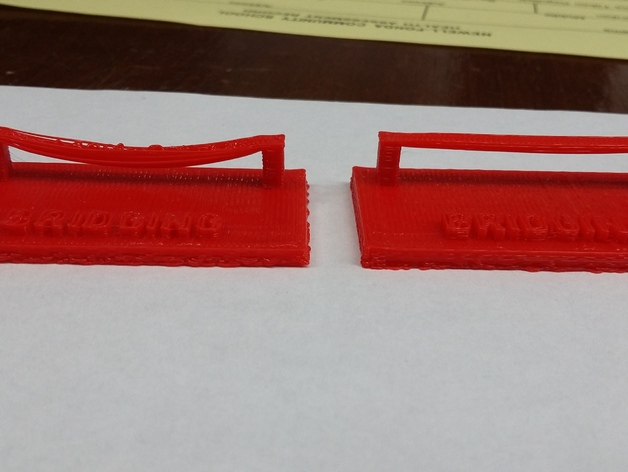
I teach Middle School students about 3D printing twice a year for our Shark Tank and MakerWeek presentations. Most students, especially when it comes to 3D printing, are going to be visual learners, so I created a quick set of guides for the students to follow while designing things in Tinkercad! Students learn to take overhangs, bridging, supports, brim, and print fans into account while designing objects in 3 dimensions! Print Settings: Printer Brand: MakerBot Printer: MakerBot Replicator Mini Rafts: Doesn't Matter Supports: Doesn't Matter Resolution: 0.3mm Infill: 20% Notes: Prints differ on their needs for supports, brim, and whether the print fan should be on or off. See Steps! for more details. How I Designed This: It was fun trying to exploit the issues people usually try to fix, to get prints that exaggerate problems so that students can see them clearly. Project: Beginner 3D Printer/Design Guidelines Objectives: To help students understand the basic principals behind 3d print designing. Also, to help introduce students to the custom settings of different print slicers. Audiences: I designed this with middle school students in mind, so very appropriate for ages 10-11 and up. In reality, this set can be used to teach anyone new to 3d printing the basic principals to keep in mind when creating a design. Preparation: You only need two things. A computer with a print slicer installed (Makerbot Desktop for Makerbot printers, Cura/Slic3r (Both available for free) for pretty much everything else) and a 3D printer! There are several other print slicers available, Skeinforge and Simplify3D to name a few, but unfortunately, I can only write about ones I've used so far. Students can take it one step farther by creating an account and logging into www.tinkercad.com to try and recreate one of mine (for practice, practice makes perfect!) or to make a totally new 3d print/design guideline tile! If your students are not familiar with www.TinkerCAD.com I have written up an easy-to-follow guide to getting everything started! Note: This is set up for a MakerBot Replicator Mini, but all you really have to do is change the grid to your printers dimensions. https://docs.google.com/document/d/1VEJfATPgF8YYEWAGB7b28KfXEL94DgwivdRWKE2l_IA/edit?usp=sharing Steps!: Steps are to print two of each tile with different settings: Bridging: Print one with the print fan on 100%, and print one with the print fan turned off. Overhangs: Print one with the print fan on 100%. and print one with the print fan turned off. Supports: Print one with supports, and print one without supports. Orientation: Print one with the print fan on 100%, and print one with the print fan off. Brim (Slic3r): Print one with a brim of 5mm, and print one without a brim. Results: Students should be easily able to duplicate some of these in Tinkercad, almost all of them are just modified squares (expect the text). This really isn't meant for grading, more so an introduction to how things get 3D printed and how to design things in 3 dimensions. Also, it helps get the students into the more custom features of print slicers, where as most of them would usually just use default profiles.
With this file you will be able to print Beginner 3D Printer/Design Guidelines with your 3D printer. Click on the button and save the file on your computer to work, edit or customize your design. You can also find more 3D designs for printers on Beginner 3D Printer/Design Guidelines.
