Bed barrier or rails for children's bed
thingiverse
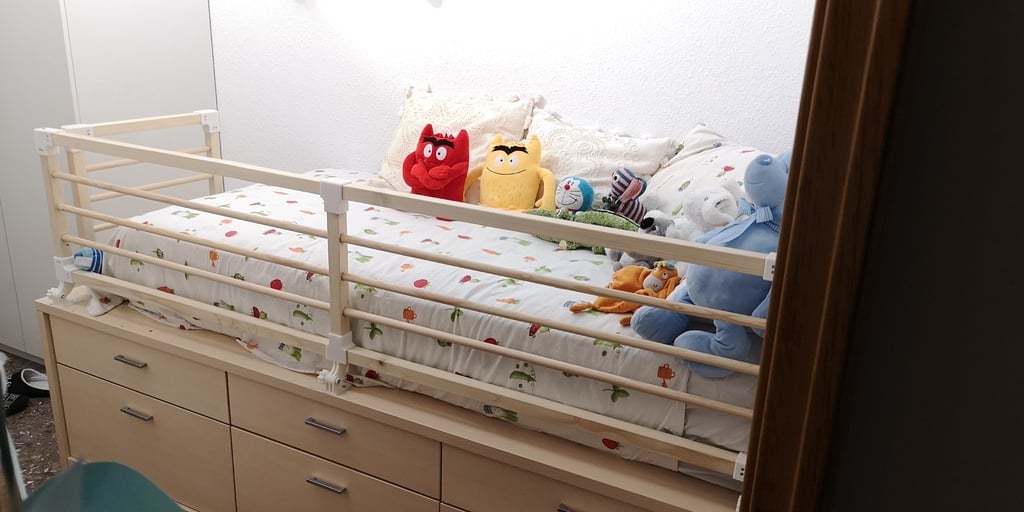
Hi Everybody, When my kid turned 2 years old, we bought a 60cm tall bed, but with the mattress it became an 85cm tall bed. So, we had to buy or make some bed barriers to protect him. The ones in the market were mostly expensive and short, didn't cover enough of the edges, and were a risk for a bed that tall. We took the first option: making them! Some key principles the design had to meet were: * Cover almost all the edges of the bed. * Be high enough. * Be resistant to tremendous kids. * And very important, it had to have the possibility to pivot down the barrier in order to make the bed. You'll find a set of pieces to use with 32x32mm wood battens: * Corners: High and low, with and without connections with laterals (to cover right and left, just invert the model in the slicer). * Middle pieces: High and low, with and without GoPro connections. * Bed restraints: GoPro kind of connection. * Bedroom wall connection: 2 pieces. One is a plastic connection to the barrier, the other one is a simple plate for being made with TPU and having the damping function. BOM: You'll also need screws. The number will depend on how long you make the barrier: 1) GoPro base: 5 wood screws of 4mm diameter, and 1 M6 screw and nut with hexagonal head. 2) The rest of the models use 4mm wood screws no more than 30mm long or 15 if you're going to put screws in both sides. Some of them have an extra hole of 5mm to put long screws that grab two wood battens. HOW TO PRINT IT: This may be critical. First, consider that once you put the wood battens, the lever force your kid can apply on the corners and restrains is huge. So, make the pieces very strong! That means: * Thick walls: Mine are 2mm thick, with 3.5mm walls, which means the walls of the corners don't have infill; all wall! * In case of infill: not less than 40%. * Material used: I use PLA because it's strong. Use the best and strongest you know. * And the most critical part: Make sure you've got spectacular layer adhesion. It may have to be printed slow, so be it! Huge temperature? Don't doubt it! The problem is that if your kid leans their weight against the barrier and it's not strong, it will break and your kid will fall down. In my first testing of the material, one reason for weak walls was choosing the wrong direction for the model in the printer, the direction of the layers. My suggestion: * All corners and middle restrains with GoPro kind of connector, make the connector be parallel to the bed. * The bed support with GoPro connector should be placed the same way it would be on the bed. * The corners with a lateral connector, the connector should be in vertical, because it will have to face huge lateral forces. This way, those forces will be contained with the layers in perpendicular, the right way. * The support for the wall: In the pictures you'll see that mine is broken. If you place the model in vertical in the printer, once you tighten the screws, the layers will separate. But if you place it in horizontal, the layers will be weak against the lever forces of the barrier. Sorry, but you'll have to try your best judgment here. Right now I can't think of anything else to tell you. Once I read questions and come up with something, I'll update the instructions.
With this file you will be able to print Bed barrier or rails for children's bed with your 3D printer. Click on the button and save the file on your computer to work, edit or customize your design. You can also find more 3D designs for printers on Bed barrier or rails for children's bed.