Bearing Spool Core
prusaprinters
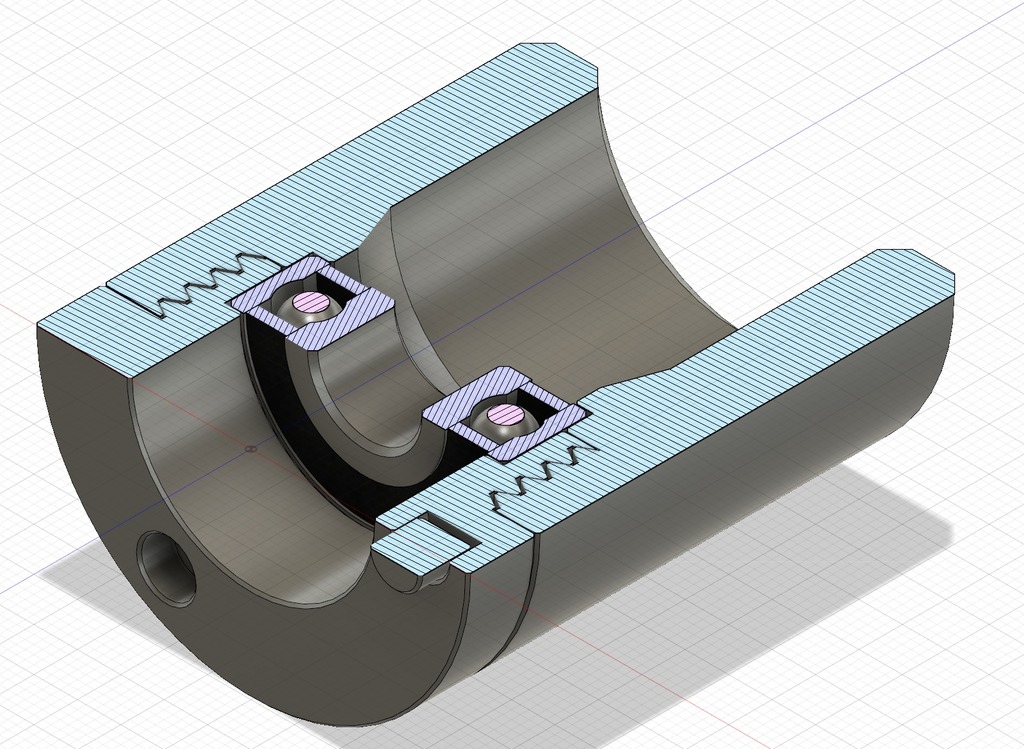
<p><strong>Update 30/7-2018</strong></p> <p>I wanted to make a version that wouldn't require registration pins or gluing parts together, so I've added files for a version that uses M3x10 screws and nuts, the countersunk holes are all hex shaped to keep the parts identical (less files to maintain) as well as deep enough to comfortably handle M3 nylon locking nuts without interfering with the threading.</p> <p>The updated file is only of the inner core, named<em>Inner_Core_screws.stl</em>.</p> <hr/> <p>Having played around with the bearing core from <a href="https://www.thingiverse.com/thing:2999102">MarcoZ76's EU version</a> of the SpannerHands MK6 bearing remix (originally done by <a href="https://www.thingiverse.com/thing:2959692">geakins here</a>), I decided that I wanted a more solid way to keep my bearings fixed within the roller core.</p> <p>Taking some basic measurements from my <a href="https://www.thingiverse.com/thing:3010872">previous remix</a> I decided to go away from the smaller inner diameter of the bearing core, to accommodate the use of any bearing with an outer diameter of 32mm and width of 10mm.</p> <p>This model is designed to be printed twice and then glued together, each half is made up of 2 parts, the outer and inner core, which screw together to lock the bearing in place within the bearing core.</p> <p>This design also made use of my <a href="https://www.thingiverse.com/thing:3013791">6201-2RS bearing</a> model to make sure my clearance/tolerance was correct (As seen in the cross section view).</p> <p><strong>Files included:</strong></p> <ul> <li>STL-files for quick printing, already aligned for printing with zero support.</li> <li>STEP-files for import into your favourite CAD software.</li> <li>Fusion360 archive file so you get my full, messy history of making this model.</li> </ul> <p>While this was remade from the ground up, I'm still counting it as a remix of the two models mentioned in the remix info. This bearing core works well with them, but can fit on any rod that would fit inside the bearings used (12mm inner diameter in my own case).</p> <p>Photos are of my final test prints (length cut down to save print time), your Outer Core's should be longer (and with chamfered edges).</p> <p>Remixes, comments and suggestions are very welcome.</p> <hr/> <p><em>Update Juli 22. 2018:</em></p> <p>After printing a full set of the files, I realized that the outer core was too long, when I extruded it in Fusion360 I didn't take into account the offset I gave it for the bearing spacing. It's been fixed now and the files have been updated.</p> <p>The images might need to be updated in the future to reflect this change, as it was noticeable once I fixed it.</p> <h3>Print Settings</h3> <p><strong>Printer Brand:</strong></p> <p>Prusa</p> <p><strong>Printer:</strong></p> <p>i3 MK3</p> <p><strong>Rafts:</strong></p> <p>No</p> <p><strong>Supports:</strong></p> <p>No</p> <p><strong>Resolution:</strong></p> <p>0.20mm</p> <p><strong>Infill:</strong></p> <p>20%</p> <p><strong>Notes:</strong></p> <p>I recommend using 20% infill as that is what all my prototypes and the final printed version was made with, you could probably go lower but I haven't tested that.</p> <p><strong>Additional recommendations:</strong></p> <ul> <li>3 perimiters</li> <li>5 top and bottom layers</li> <li>Gyroid infill pattern (if not available, use honeycomb)</li> </ul> <p><strong>Print Quantity:</strong></p> <ul> <li>2x Inner Core</li> <li>2x Outer Core</li> <li>3x Registration Pin</li> </ul> <h3>Post-Printing</h3> <p><strong>Add registration pins</strong></p> <p>The "Inner Core.stl" files have 3 holes on the end, put the 3 printed registration pins into these, I recommend gluing them in so they don't fall out during the next step.</p> <p><strong>Glue the two Inner Cores together</strong></p> <p>Once the registration pins are in place on one the the Inner Cores, use them to align the second Inner Core with the first and glue them together.</p> <p><em>Note:</em> The registration pins have a loose clearance to allow for final adjustment during this gluing, use your fingers to make sure the outer edges of the two Inner Cores are aligned.</p> <p><strong>Add bearings</strong></p> <p>Take your 6201-2RS bearings (or any other 32mm outer diameter and 10mm wide bearings), and slot one into each side of the Inner Core.</p> <p>The bearings should fit snugly.</p> <p>I do not recommend using glue to fix the bearings in, as that might seep into the bearings themselves and lock them up.</p> <p><strong>Screw the two Outer Cores on</strong></p> <p>Take the two Outer Cores that you printed, and screw them on the ends of the Inner Cores, the threads should align themselves.</p> <p>Tighten the threads fully to secure the bearings in place.</p> <p>Check and make sure that both bearings still roll smoothly, if not the outer shoulder of your bearing might be thinner than the model was made for, and the "lip" grabbing the bearing might be interfering with the seals on your bearing (or if it's a bearing with no seal, the balls themselves).</p> Category: 3D Printer Accessories
With this file you will be able to print Bearing Spool Core with your 3D printer. Click on the button and save the file on your computer to work, edit or customize your design. You can also find more 3D designs for printers on Bearing Spool Core.
