bCNC Pendant
prusaprinters
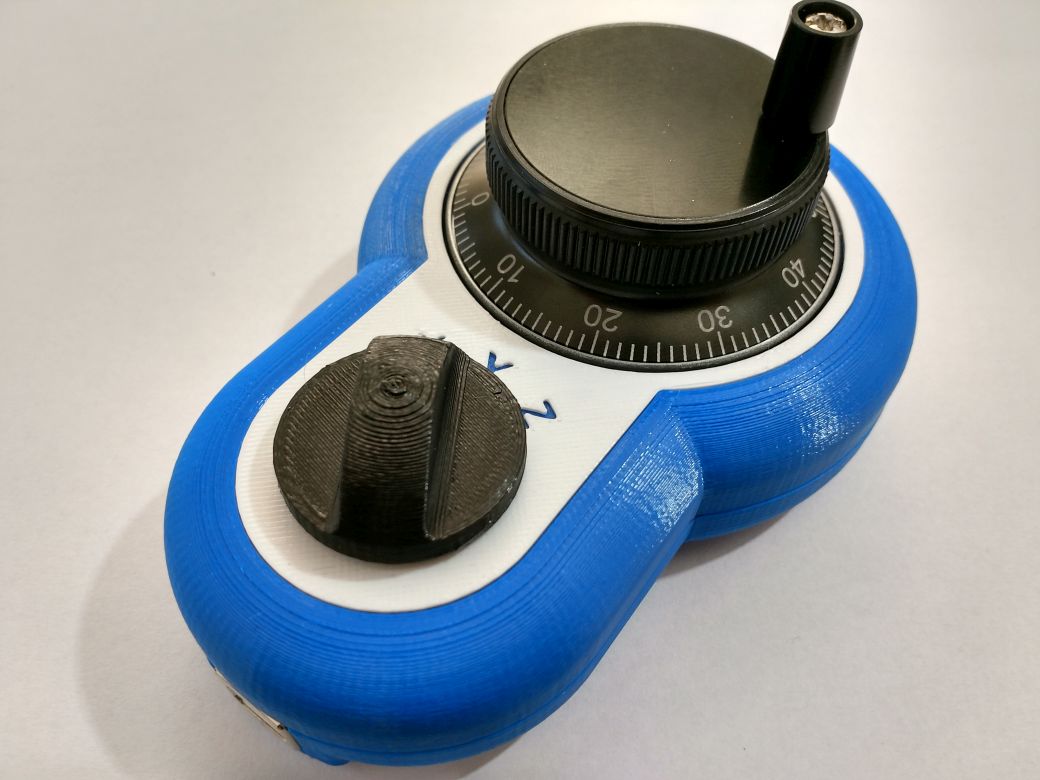
<p>I found on eBay one of those rotary encoders used in commercial CNC pendants (search for 'cnc hand wheel' or 'ZSS600-001-100B-5L') and came to the idea to create my own one.</p> <p>I am using bCNC to control my mini CNC. In bCNC you use the arrow and page-up/page-down keys to control the three axis. Take this and the fact that you can program an Arduino Pro Micro to act as an keyboard and the electronic side of this project is basically done.</p> <p>What was left to do was to design a case. I was constrained by the size of the rotary switch and the USB breakout board otherwise it might have gotten a bit smaller.</p> <p>See it in action: <a href="https://youtu.be/PTTVuVUZYM8">https://youtu.be/PTTVuVUZYM8</a></p> <p>I have included the OpenSCAD file which is somewhat parametric.</p> <h3>Print instructions</h3><h3>BOM</h3> <ul> <li>Rotary encoder<ul> <li>Search for 'cnc hand wheel' or 'ZSS600-001-100B-5L'</li> <li>If it has the terminals A, B, A̅, B̅, Vcc and 0V and is specified to work with 5V, it should be fine</li> </ul> </li> <li>Rotary switch with 3 positions (see picture, others might also fit)</li> <li>USB Type-B break-out board</li> <li>Micro-USB cable</li> <li>6 socket head screws M3x12</li> </ul> <h3>Arduino Pin-out</h3> <table> <thead><tr> <th>Pin</th> <th>Description</th> </tr> </thead> <tbody> <tr> <td>RAW</td> <td>Terminal Vcc of rotary encoder</td> </tr> <tr> <td>GND</td> <td>Terminal 0V of rotary encoder</td> </tr> <tr> <td>2</td> <td>Terminal A of rotary encoder</td> </tr> <tr> <td>3</td> <td>Terminal B of rotary encoder</td> </tr> <tr> <td>GND</td> <td>Common Pin of rotary switch</td> </tr> <tr> <td>4</td> <td>Pin of rotary switch for X</td> </tr> <tr> <td>5</td> <td>Pin of rotary switch for Y</td> </tr> <tr> <td>6</td> <td>Pin of rotary switch for Z</td> </tr> </tbody> </table> <p>(The internal pull-up resistors of the Arduino are used)</p> <h3>Assembly</h3> <ol> <li>Glue the top plate to upper part</li> <li>Cut a micro USB cable and solder it to the USB break-out board</li> <li>Glue the break-out board and the cable with hot glue to the lower part</li> <li>Solder the cables to the Arduino Pro Micro</li> <li>Plug the Arduino Pro Micro into the USB cable</li> <li>Screw the lower and upper part together (the screws should thread themselves), take care to not pinch any cable</li> <li>Upload the sketch to the Arduino Pro Micro</li> <li>Done</li> </ol> <h3>Troubleshooting</h3> <p>If your computer does not recognize the Arduino when connected via the break-out board switch the cables for D+ and D-.</p>
With this file you will be able to print bCNC Pendant with your 3D printer. Click on the button and save the file on your computer to work, edit or customize your design. You can also find more 3D designs for printers on bCNC Pendant.
