Battery Charge Indicator
thingiverse
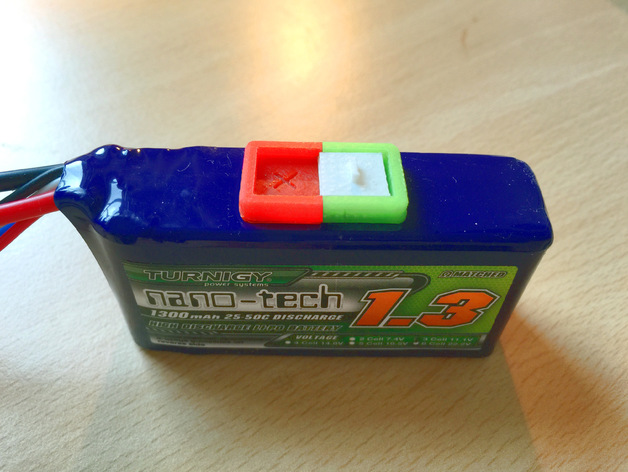
You can easily create a DIY battery charge indicator and attach it to your battery with a few simple steps. First, position the slide gauge over the charged side of the battery by moving the little lever in that direction. Alternatively, place it on the discharged side to reflect the battery's current status. No color variations needed - I've included both a tick and cross on each end so you'll always know whether your battery is powered up or not. Printing with PLA filament at 0.1mm layer height was my approach, but infill density doesn't greatly impact performance. To put it all together, just slide the gauge into one part of the indicator, then align the second half right next to it on the battery's surface so the lever glides smoothly between them. Use double-sided tape or general-purpose adhesive to secure both parts in place and complete the installation.
With this file you will be able to print Battery Charge Indicator with your 3D printer. Click on the button and save the file on your computer to work, edit or customize your design. You can also find more 3D designs for printers on Battery Charge Indicator.