Baseball Cap Face Shield
prusaprinters
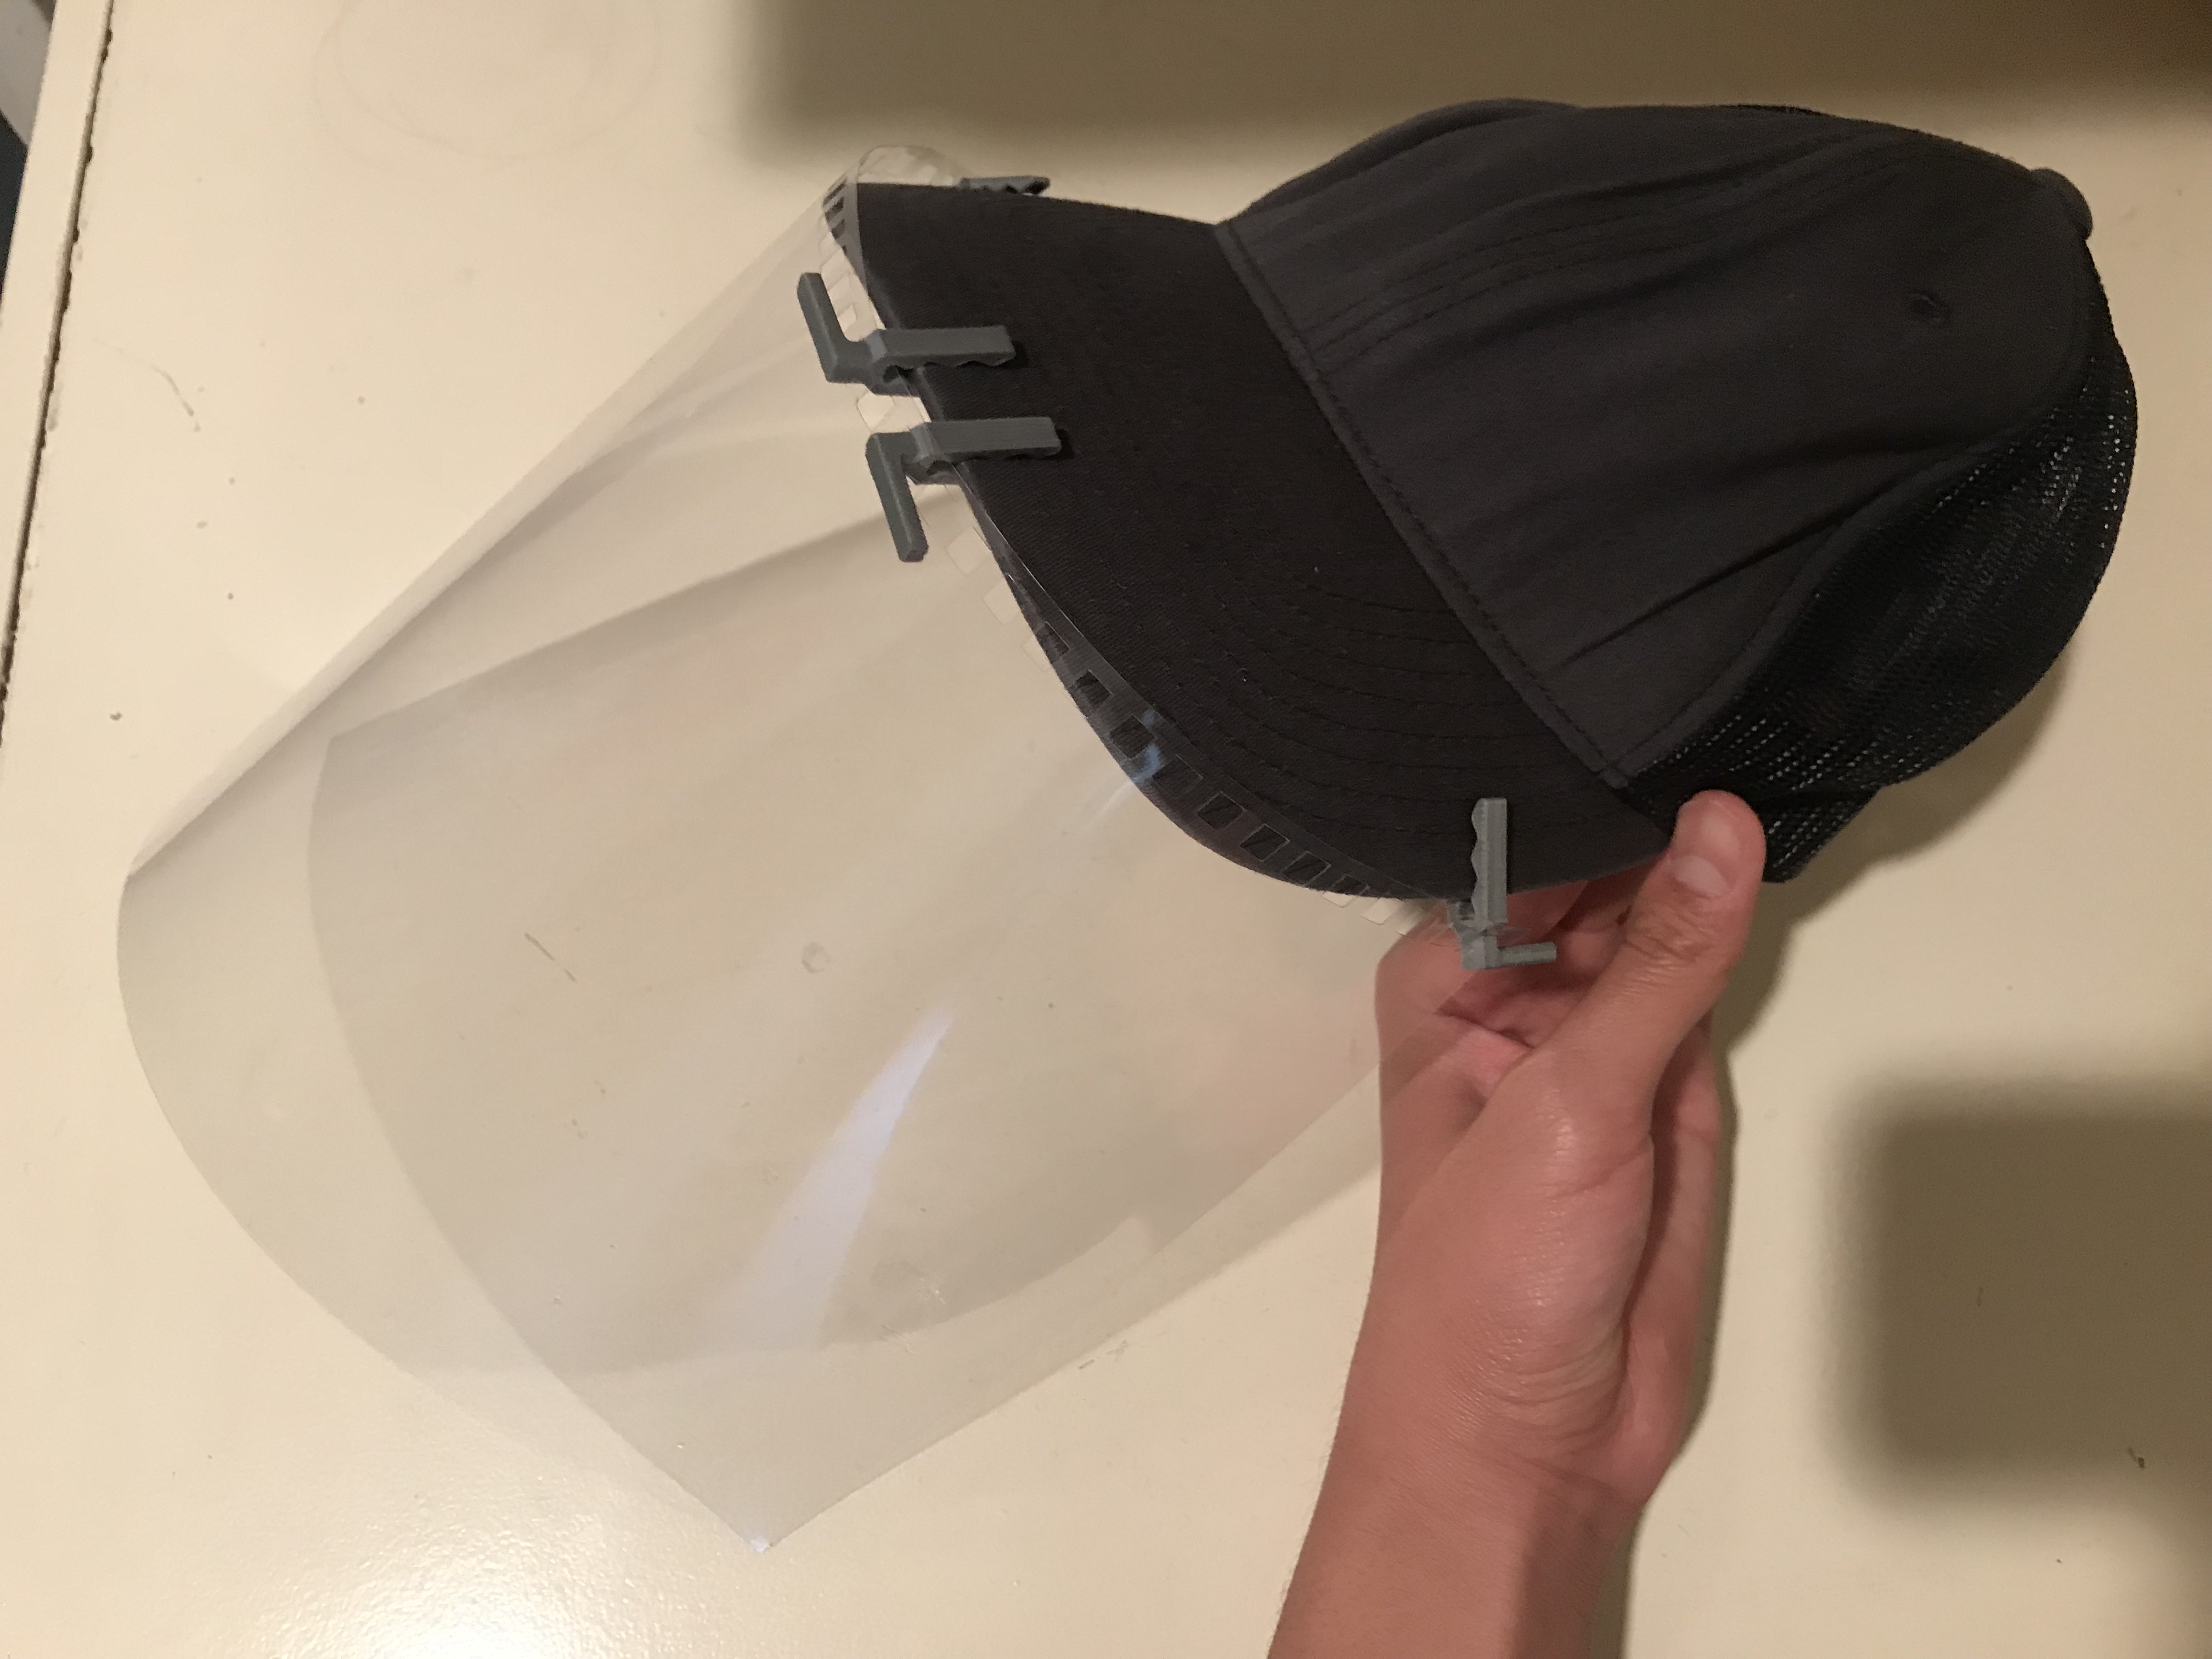
<p>Submission to the NIH 3D Print Exchange for Review:<br/> <a href="https://3dprint.nih.gov/discover/3dpx-013882">https://3dprint.nih.gov/discover/3dpx-013882</a></p> <p>This is intended to be used in a "casual" setting for every day uses. This is NOT intended to be used by medical personnel. Use at your own risk.</p> <p>This is a clip that attaches to any baseball cap bill (or any hat that fits) and a plastic sheet with hole punches in them. These hole punches can be 4mm, 6mm, or 8mm diameters (The 6mm version fits a standard U.S. 1/4 inch hole punch). Four of these are attached to one plastic sheet, with one on each of the top corners and two in the top middle. The corner holes can be adjusted further down than the middle holes to compensate for the height difference due to the hat arch.</p> <p>The clear plastic can be any clear plastic, such as a report cover or other common office supplies.</p> <p>If you have any suggestions or issues with this print, feel free to tell me in the comments. Due to the nature of this model, any design suggestions and issues will be dealt with accordingly and as soon as possible on my end.</p> <h3>Print instructions</h3><p><strong>Assembly Instructions</strong><br/> 1) Print at least 4 clips for your desired hole size.<br/> 2) On the top-center of your chosen plastic sheet, punch two holes. Make sure the holes are spaced apart to fit the clips.<br/> 3) Slide the clips into the center two holes.<br/> 4) Grab the hat you intend to use the shield with and clip the plastic and two clips onto it. These two clips on the plastic should be near the center of the hat bill.<br/> 5) Bend the plastic around the hat until the plastic wraps around the bill. On the left and right edges of the plastic, mark where the hat bill touches the edge. If the bill is curved, these markings should be lower than the center of the original 2 holes.<br/> 6) Punch two more holes near the edges at the same height of the markings made in step 5.<br/> 7) Insert the other two plastic clips into the left and right holes and clip them onto the hat.<br/> 8) Add more holes and clips as needed.</p> <p><strong>Print Settings</strong><br/> Material: ABS (PLA and other common materials should work as well, I used ABS as that was what I had on hand)<br/> Infill: 20%<br/> Layer Height: 0.2 mm<br/> Supports: None<br/> Print Orientation: As shown in the CAD rendering with the 3 versions</p>
With this file you will be able to print Baseball Cap Face Shield with your 3D printer. Click on the button and save the file on your computer to work, edit or customize your design. You can also find more 3D designs for printers on Baseball Cap Face Shield.