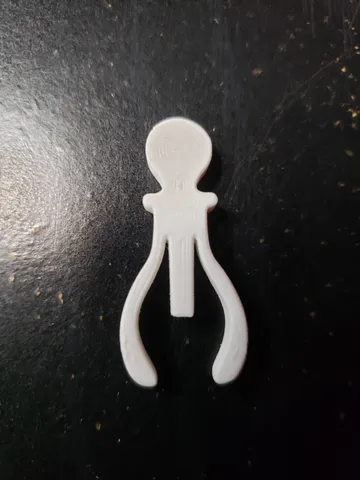
Barbie Doll Head Connector
prusaprinters
This connector is used to re-attach a Barbie doll's head to her body after the original connector has broken off inside of said head.It is recommend to print this solid and to use PETG for flexibility as you will need to squeeze the “wings” in order to insert into the doll's neck.If the piece deforms too much while you're trying to get it inserted, you can warm it up a bit and adjust the wings - or just print another one.Although the part isn't going to be visible under normal use, you may still wish to smooth down the edges with a bit of light sand-paper.Before you begin, assess your doll's condition. In my case, the head had been connected to the neck by a nub (which was part of the neck) but it had twisted off inside the head.I cleaned up the neck by removing the damaged portions, and either cutting away or sanding down the rough areas.The broken piece was still inside the doll's head, and would rattle when shook. It proved to be more trouble than it was worth to remove it, so I just filled the head with some cotton instead.Next, I used a pen knife to cut 2 mortises on either side of the neck to accept the tenons of the connector. This allows the connector to sit right at the top of the neck and provides a nice snug fit for the head. You will need to carefully determine what depth/size/etc. you need for your doll. Take it slow and adjust the size of the mortises very carefully. When you're ready, insert the connector into the doll by squeezing the “wings” and pushing it into the neck. The “wings” will expand again just inside the doll's torso at the shoulders. The tenons will then sit into the mortises you cut earlier.Next, squeeze the head a little to deform the opening and slide it over-top of the connector.You should be able to just barely see the joint when the head is on securely.Please note that the head part of the connector will be difficult to remove, but the body part, though snug, will pull out more easily. Under normal play conditions, the fitment should suffice, but you can always test it and, if the doll gets decapitated again easily, add some glue or 2-part epoxy.I was quite pleased that it only took two iterations for it to work.Not all dolls are the same, of course, but I expect this or some variation of it will be useful to a lot of folks. To help get you started, here's a link to my OnShape document which you may customize as needed:https://cad.onshape.com/documents/77eaf1b557aeb96ab0128eba/w/472a25b720105e58bb647c27/e/8eb76438901ab708b1ebae30 I wish you the best of luck on your repairs!Please post any makes! Cheers!&Always Be Printing
With this file you will be able to print Barbie Doll Head Connector with your 3D printer. Click on the button and save the file on your computer to work, edit or customize your design. You can also find more 3D designs for printers on Barbie Doll Head Connector.
