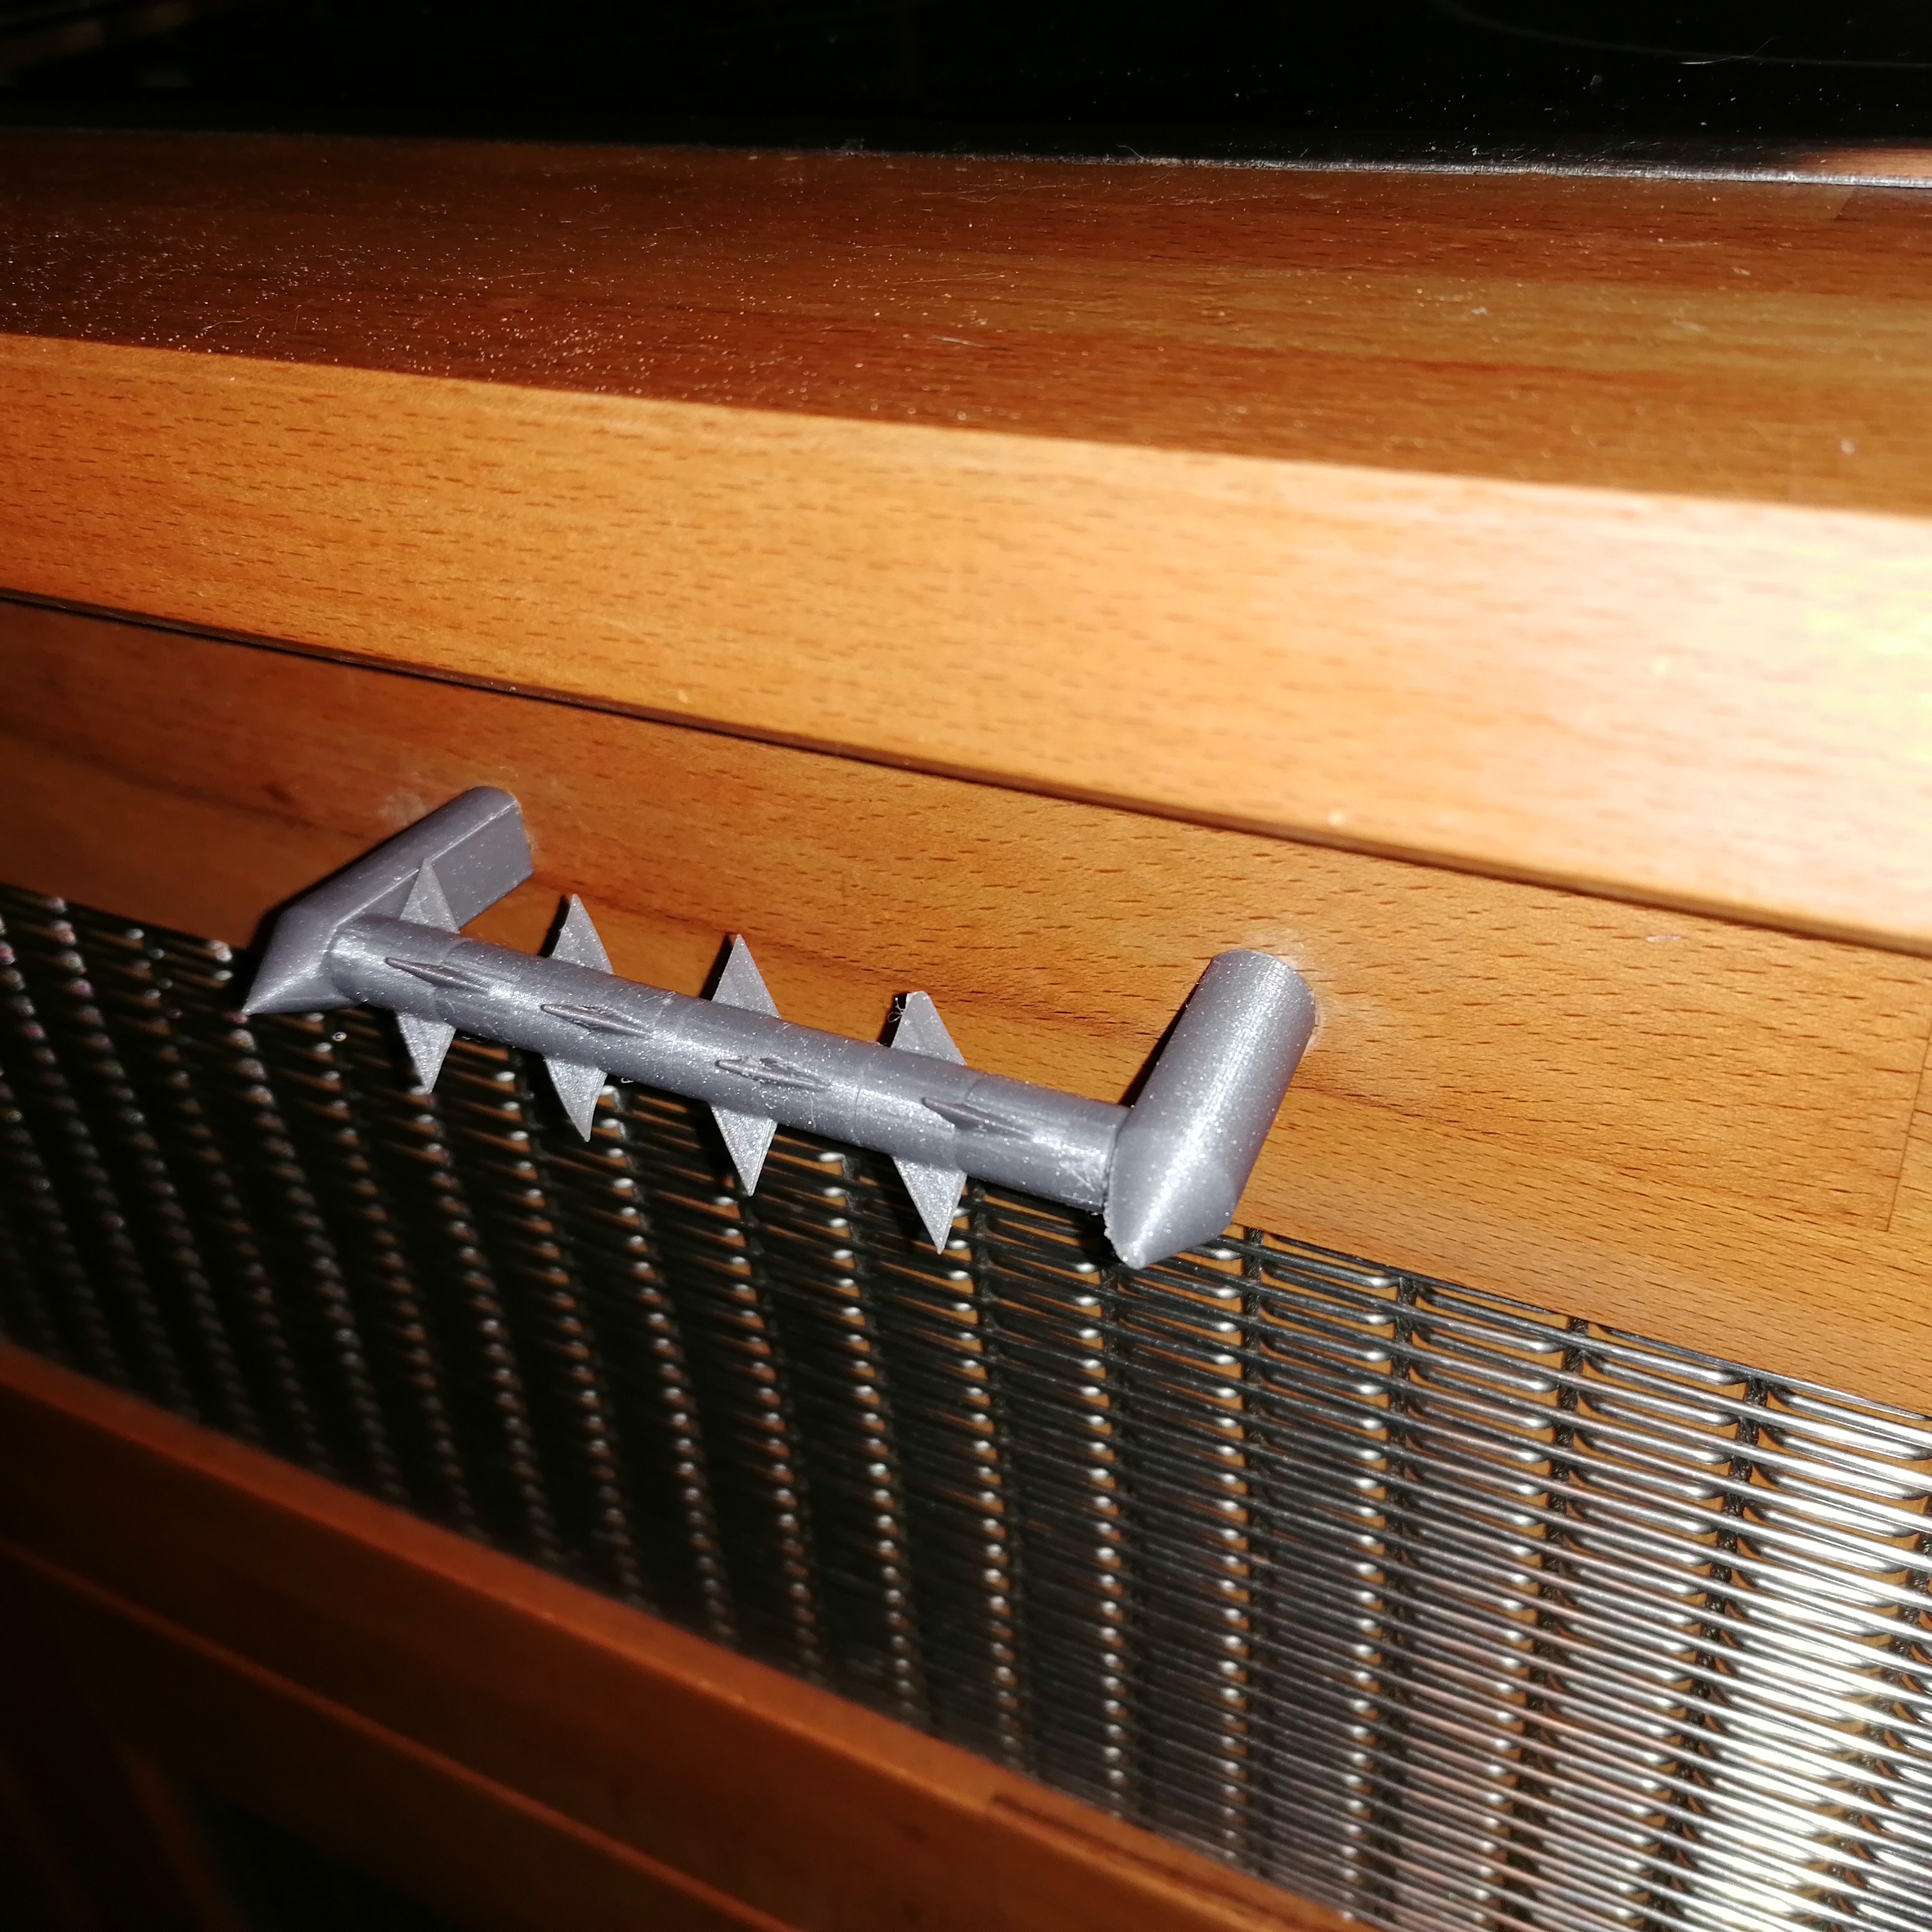
Barbed wire drawer handle to prevent access to the candy drawer :-)
prusaprinters
<p><strong>Warning</strong>: Although this handle is only made of plastic it can still cause injuries. Do me and yourself a favor and do not use this handle where small children can access it.</p><p><br>Parts stl:<br>Mounting bolt No1 with 4mm hole for Ruthex M3 threaded inserts,<br>Mounting bolt No2 with hole for M4 threaded screws,<br>Mounting bolt No3 with hole for 4mm wood screws/ Spax screws,<br>Mounting bolt No4 without hole (for self-drilling or for modifier in slicer)</p><p>Axis 100mm for length adjustment in the slicer,<br>Axis 200mm for cutting to length with hand saw</p><p>spike 10mmm length (If you use PrusaSlicer 2.5.0, you should turn off arachne in the print settings at least for the spiked parts.)</p><p>Washer 1mm, 2mm, 3mm, 4mm thickness.</p><p><br>Instruction: <br>The length of the axle is based on the hole spacing of your drawer/door. The axle length is calculated from the <strong>given</strong> <strong>hole spacing</strong> in mm <strong>plus</strong> 4mm.<br>For example, I have a hole spacing of 96mm on the drawer. That means I need an axis of 96+4 = 100mm. Note that if you want to change the axis length in Prusa Slicer, you have to open the lock icon to change only the length and not the circumference of the axis. </p><p><img src="https://media.printables.com/media/prints/307108/rich_content/d00f0906-65f0-4aeb-a81a-9d68a1438105/skalieren.jpg#%7B%22uuid%22%3A%22603002ba-196f-4298-a0dd-673549c287c2%22%2C%22w%22%3A400%2C%22h%22%3A287%7D"><br>You can also print a longer axis and then cut it by hand saw.<br>The length of the handle part to be fitted with the spikes is the <strong>hole spacing</strong> <strong>minus</strong> 8mm. So in my case 96-8 = 88mm. On the 88mm fit 8x the 10mm spine parts on it and there remains a rest of 8mm, which is closed with 2 washers a 4mm. (The washers are not a must. Without the washers the spike parts can be pushed back and forth).<br>I pushed the spiked parts each 90 degrees rotated on the axle and placed 2 washers each at the end of the axle.<br>2 mounting bolts are needed per handle. The thread depth of the bolts is about 20mm.</p><figure class="image"><img src="https://media.printables.com/media/prints/307108/rich_content/7679a5b8-5e3b-41ea-af56-3f8e3e95835f/druckbett.jpg#%7B%22uuid%22%3A%2284222d83-f21f-4afb-a941-1257e3e6dcf2%22%2C%22w%22%3A400%2C%22h%22%3A291%7D"></figure><p><br>If these instructions are difficult or misleading, please feel free to correct them in the Makes and comments.<br>Translated with www.DeepL.com/Translator (free version)</p><p>………………………………………………………………………………………………………………………………………</p><p>Stacheldraht-Griff um den Zugriff auf die Süssigkeiten-Schublade zu verhindern :-) </p><p>Stangengriff für verschiedene Längen in modularer Bauweise. Gedruckt in PLA mit 0,4er Nozzle, 0,15mm Quality, 100% Infill. Wenn sie den PrusaSlicer 2.5.0 benutzen, dann sollten sie zumindest für die Stachel-teile das Arachne in den Druckeinstellungen ausschalten.</p><p>Warnung: Obwohl dieser Griff nur aus Kunststoff ist kann er dennoch Verletzungen zufügen. Tun sie mir und sich selber den Gefallen und verwenden sie diesen Griff nicht, wo kleine Kinder darauf Zugriff haben.</p><p>Anleitung: <br>Die Länge der Achse richtet sich nach dem Lochabstand ihrer Schublade/ Tür. Die Achslänge berechnet sich aus dem <strong>gegebenen</strong> <strong>Lochabstand</strong> in mm <strong>plus</strong> 4mm.<br>Ich z.B. habe an der Schublade einen Lochabstand von 96mm. Das heißt, ich benötige eine Achse von 96+4 = 100mm. Beachten sie, dass wenn sie im Prusa Slicer die Achslänge ändern möchten, sie das Schlossymbol öffnen müssen um nur die Länge zu ändern und nicht den Umfang der Achse.<br>Sie können auch ein längere Achse ausdrucken und dann per Handsäge zuschneiden.<br>Die Länge des mit den Stacheln zu bestückenden Griffteils ist der <strong>Lochabstand</strong> <strong>minus</strong> 8mm. In meinem Fall also 96-8 = 88mm. Auf die 88mm passen 8x die 10mm Stachelteile drauf und es verbleibt ein Rest von 8mm, der mit 2 Ausgleichsscheiben a 4mm geschlossen wird. (Die Ausgleichsscheiben sind kein muss. Ohne die Scheiben lassen sich die Stachelteile hin und her schieben.)<br>Ich habe die Stachelteile jeweils um 90 Grad gedreht auf die Achse geschoben und die Ausgleichsscheiben jeweils am Ende der Achse plaziert.<br>Pro Griff werden 2 Befestigungsbolzen benötigt. Die Gewindetiefe der Bolzen beträgt ca 20mm.</p><p><br>Wenn diese Anleitung schwer- oder missverständlich ist, können sie diese gerne in den Makes und Kommentaren berichtigen.<br> </p>
With this file you will be able to print Barbed wire drawer handle to prevent access to the candy drawer :-) with your 3D printer. Click on the button and save the file on your computer to work, edit or customize your design. You can also find more 3D designs for printers on Barbed wire drawer handle to prevent access to the candy drawer :-).
