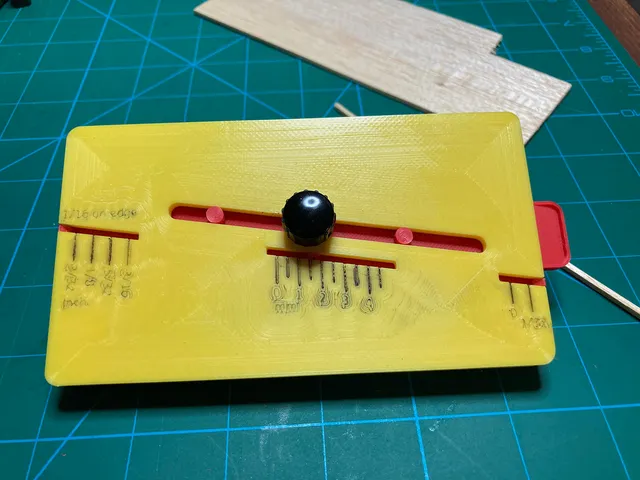
Balsa Stripper
prusaprinters
This tool should be able to cut balsa sheets up to 1/8" thick into strips. Set the thickness using the front side. Aligning the slide to the edges will be 1/16". Sliding left will reduce the strip width, sliding right will increase the width.Suggested print settings:Standard Quality 0.2Bottom Pattern Initial Layer: ConcentricConnect Top/Bottom Polygons: TrueInitial Layer Travel Speed: 35Infill Density: 40%Assembly:Additional parts needed:#11 x-acto knife bladedouble sided razor blade - cut into a 5mm wide strip with tin snips.2x 3mm screws. Longer is better. I went with 16mm1x 5mm thumb screw about 10mm long. Like this M5x10Tap the slide's hole with a 5mm tap. Tap the two holes on the back with 3mm.If you want, use a fine-tip permanent marker to ink the measurement values into the top and wipe away excess with rubbing alcohol.Place the slide piece into the top and ensure it slides easily. Be careful of the three small indicators; don't break them off.Snap the back onto the top piece. You can glue it but it shouldn't be necessary. Avoid gluing the slide. It should still slide easily.Don't install the thumb screw yet. Install one screw the strap piece into place on the side opposite where the spring goes. Rotate the strap into place to pinch the spring, and screw in the second screw. See photos for an idea of how long the spring should extend down.Loosen both screws a bit.Set the depth to zero (all the way to the left). See 2nd photo: using an X-Acto knife, carefully stab the tip of the blade into the top. Not all the way through. You want it even with the edge of the slide and perpendicular to the top. You can also align the blade so it is supported by the cut-out on the strap piece. Without removing the blade from the balsa cutter, loosen the blade from the X-Acto handle and remove the handle.Tighten both 3mm screws to secure the spring and blade.(optional, but much safer!) use a Dremel to carefully cut off the blade and spring even with the edge of the strap.Install the thumb screw.Your balsa stripper is now complete.Set the desired thickness on the front. Flip over, and slide a sheet of balsa under the spring and through the blade to cut strips.
With this file you will be able to print Balsa Stripper with your 3D printer. Click on the button and save the file on your computer to work, edit or customize your design. You can also find more 3D designs for printers on Balsa Stripper.
