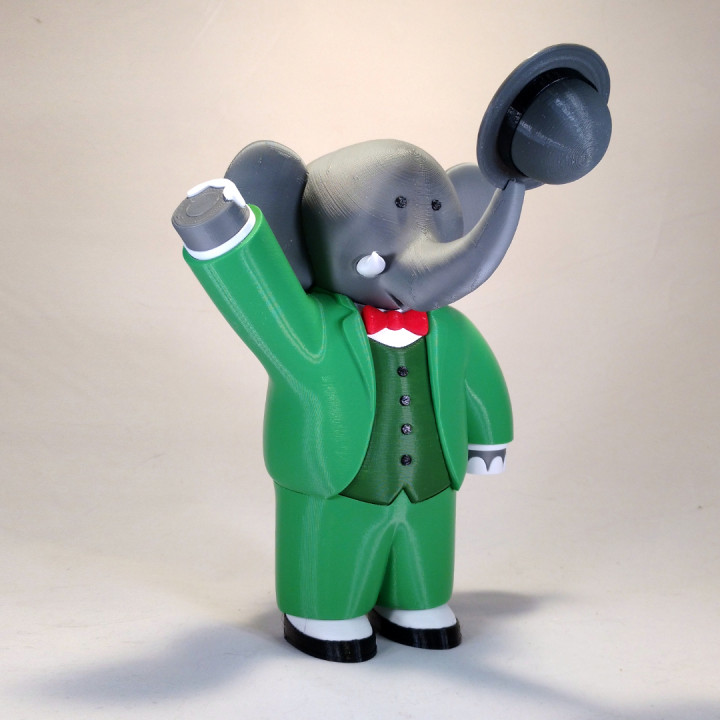
Babar the Elephant
myminifactory
Babar is a fictional character who first appeared in 1931 in the French children's book Histoire de Babar by Jean de Brunhoff. After a hunter kills Babar's mother, he escapes the jungle and experiences a series of adventures in the big city. When Babar returns to the jungle, because of his travels and contact with civilization, he is appointed king of the elephant kingdom. Two parts of this 3D printing model have built-in supports and therefore no other supports are required. Those two parts are also included without supports for those makers who prefer to use supports via their slicer. If you have the proper filament colors, no painting is needed. The assembled model is 230mm tall. Enjoy! Note: The built-in supports remove very cleanly, however I recommend removing them with pliers instead of a knife. Print Settings: Printer Brand: Prusa Printer: I3 MK3 Supports: No Infill: 2 shells, 10% infill Building the model: Grey: (eSun ABS - silver) - Head (includes supports for the mouth/trunk and the back of the head) - Head_nosupports (optional piece if you prefer your own supports) - Ear_left, ear_right - Hand_left, hand_right Dark Grey: (Paramount3D PLA - Graphite Grey) - Hat Red: (Bumat ABS - red) - Tie Dark Green: (Paramount3D PLA - St Andrews Green) - Vest Green: (Amazon basics PLA - green) - Jacket (includes supports under the right sleeve) - Jacket_nosupports (optional piece if you prefer your own supports) - Pants Black: (Praramount3D PETG - black) - Eyes - Buttons - Shoe_black_left, shoe_black_right - Hat_band White: (eSun ABS - white) - Shirt_left, shirt_right, shirt_middle - Tusk_left, tusk_right - Shoe_white_left, shoe_white_right - Toenail_left, toenail_right Yellow: (ABS from a sample pack) - Crown (optional) Printing and assembly tips: Printing tips: 1. No supports are required. However, the head and jacket contain built-in supports. The built-in supports are typically tight but remove very cleanly. I've included the same parts without supports if you prefer to add your own. Both are large pieces, so choose wisely! 2. Use your judgement for brims/rafts. Personally, I did add a large brim to the pants due to a print failure after a few hours. Better to add a brim to this part than waste your time with a potential failure. 3. I used a brim on the optional crown for the same reason as the pants. Assembly tips: 1. I used E6000 sticky craft glue to put this model together. 2. The hat does not need to be glued in. This is important so that he can either be holding his hat in his trunk or wearing a crown on his head (or both if he was trying to please everyone at the same time!). 3. I try and make the best models I can, however sometimes there is a small glitch. The head fits into the body nicely but a bit of the flat part shows in the back. You can minimize this with a little sanding if needed. My apologies. 4. Please take care with left/right pieces. If you lose track of the left/right, be sure to take time dry fitting them to get them right. 5. Ensure that the vest is snapped into the jacket before gluing other pieces around it. 6. Refer to the assembly diagram as well as the uploaded pictures for putting the model together. The model is meant to be glued. Do not hesitate to comment or ask questions, feedback is essential to making better models. Please upload your makes!
With this file you will be able to print Babar the Elephant with your 3D printer. Click on the button and save the file on your computer to work, edit or customize your design. You can also find more 3D designs for printers on Babar the Elephant.
