Axial Compressor (not very effective)
thingiverse
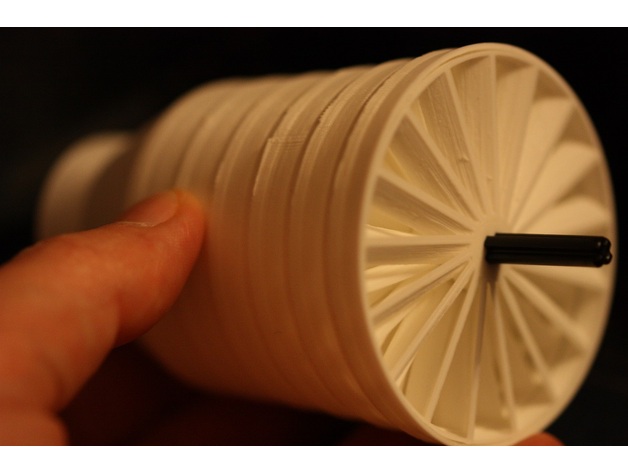
Who hasn't wanted to build their own jet engine? It turns out to be much harder than it initially appears. This attempt at an axial compressor requires a LEGO axle, and a motor to drive it. A LEGO Power Functions motor is sufficient to create a slight breeze from this setup. I've tried driving it with a power drill at 2,600 rpm. This created enough output pressure to inflate a balloon to the point where the rubber started to resist, which means hardly any pressure, much less than what can be achieved by blowing. Unfortunately, 2,600 rpm creates enough internal friction to partly melt and fuse the components when they stop, so I don't recommend it. So why am I publishing this project? Well, it works a little bit. Maybe someone can suggest improvements. And I think it's still quite cool. The SCAD source is available on GitHub, if anyone wants to give it a try. The compressor has 6 rotor and 6 stator elements, each of which attempts a 10% compression (way too optimistic!). The stator elements snap tightly into the case, while the rotor elements rotate freely between them. A LEGO axle runs down the central axis. If you intend printing this project, I've attached axlex.STL and axle_hole.STL as test components for testing the axle fit. Print Settings Supports: No Notes: I printed this project in PLA filament. Most components can be printed straight to the bed, but I recommend a raft for the case. Post-Printing Preparation The LEGO axle has to be able to rotate freely through the stators. I wrapped sandpaper around a thin screwdriver to free them up. After a test assembly, I also found that tiny differences between the stators caused friction on the axle, so a rolled-up tube of sandpaper was used to even them out. The rotors have to be able to grip the axle, but slide along it when pushed. Smooth off any rough or catching edges. Assembly Start by inserting Stator11 (the smallest one). Make sure it is fully and evenly clipped in. Place the axle through this. Now place Rotor10 on the axle, and push it down to meet the stator. It should spin easily. Insert the next stator using the axle to guide it. This makes it easier than the first stator. Continue inserting rotors and stators alternately until complete.
With this file you will be able to print Axial Compressor (not very effective) with your 3D printer. Click on the button and save the file on your computer to work, edit or customize your design. You can also find more 3D designs for printers on Axial Compressor (not very effective).