Automatic Laser Gun
thingiverse
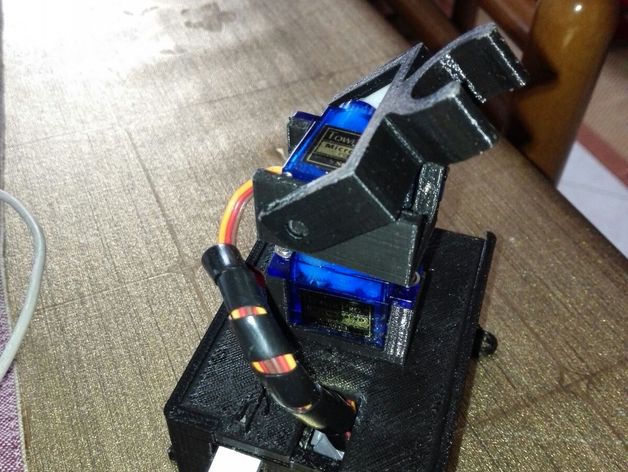
Laser Gun - ESP driver This is the driver for the Timed Laser Gun project (here the WebInterface), a remix of Remotely controlled torch robot by JJRobots. Timed Laser Gun project is an automatic toy to let you cat play with laser pointer. I used an ESP to control servo motors and RTC to provide correct timing to schedule events. Running on ESP NodeMCU To program ESP, use the Arduino IDE, then follow these steps: Go to File > Preferences, and change the URL of Board Manager with "http://arduino.esp8266.com/package_esp8266com_index.json", then click OK Now go to Tools > Board:Arduino one > Board Managers Search for "esp8266" and Click Install (it will take a while) After installation, go back to Tools > Board:Arduino one and click on "NodeMCU 0.9 (ESP-12E Module)" Now you can connect it and launch the Load process Build Hardware The hardware part is made by: 1 ESP8266 NodeMCU 2 Servo motor 9g 1 RTC I used an RTC to have a real timing and schedule events, but you can also use a Virtual RTC to simulate timer (obviously it will not be precise like RTC but you can every day sync with remote server and it will be enough). Here is the class I wrote and here how to use it: void setup(){ String TimeNow = "dd/mm/yyyy HH:mm:ss"; String d = TimeNow.substring(0,2); String h = TimeNow.substring(3,5); String m = TimeNow.substring(6,8); String s = TimeNow.substring(9,11); rtc_timer = Rtc(); rtc_timer.setup(d.toInt(),h.toInt(),m.toInt(),s.toInt()); } void loop() { rtc_timer.loopTime(); int seconds = rtc_timer.getSeconds(); int minutes = rtc_timer.getMinutes(); int hours = rtc_timer.getHours(); int days = rtc_timer.getDays(); // here you will use it } I removed soldered pins just to save space, but I think you can do it without desoldering, just force a little bit. Use this datasheet to build hardware, I made simple list of connection points: Servo X GND -> GND Vcc -> Vcc (+5) Sign -> D6 Servo Y GND -> GND Vcc -> Vcc (+5) Sign -> D5 RTC GND -> GND Vcc -> Vcc (+3) SDA -> D2 SCL -> D1 Battery (do not plug microUSB and connect battery simultaneously, I didn't try but I suggest to do not try) Positive -> Vcc (+5) Negative -> GND Here is the datasheet Here my result Then put all in base case, use 2/3 mm screws (I'm not sure) to fix ESP to base, and that's it, program it and enjoy it. Use Laser Gun For information about functionality of ESP, refer WebInterface documentation Print Settings Printer Brand: RepRap Printer: Prusa i3 Rafts: No Supports: Yes Resolution: 0.2 Infill: 20%
With this file you will be able to print Automatic Laser Gun with your 3D printer. Click on the button and save the file on your computer to work, edit or customize your design. You can also find more 3D designs for printers on Automatic Laser Gun.
