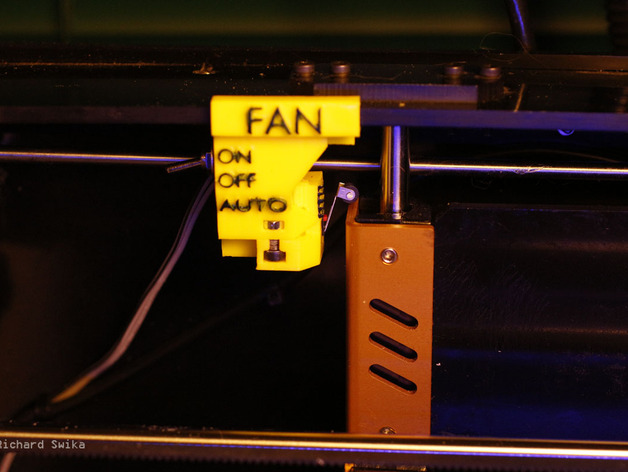
Automatic Cooling for Wanhoe Duplicator 4
thingiverse
I've been testing this automatic fan upgrade for my Duplicator 4, and it's made a huge difference in the quality of life around here. Now I can simply start a print on my Dup 4 and walk away knowing the active cooling fan will kick in automatically. No more being tied to the printer all day long. The new fan upgrade installs in series with my existing fan circuit and bolts right onto it using hardware that's already there. It's also micro-adjustable, so you can set it to turn on after a certain distance into the print, up to about 5mm or even more if you use a longer M3 bolt in the adjustment mechanism. The fan always turns on at exactly the same distance into the print, unlike when I had to do it manually. I've been pushing my printer hard lately, printing inventory for my online store. My prints are coming out better than ever, with consistent results. There's a manual override switch just in case I need to go back to full manual control. I always wanted to control my active cooling fan from G-code, but that requires soldering a surface-mount MOSFET (Q6) onto the Duplicator 4's MightyBoard. I'm pretty good at soldering, but Q6 is a surface-mount part and without the right equipment, I wouldn't dare risk damaging my MightyBoard and voiding my warranty. That would be a disaster. Plus, I almost always just turn my active cooling on full after the first layer. I have G-code control on my i3, but I never do more than 100% fan after the first layer. That could be done with a microswitch and 3D-printed mount. I could use an external wall-wart power supply and be totally isolated from my printer's electrical system. Complete assembly instructions can be found here: https://ricswika.wordpress.com/2016/01/24/automatic-cooling-for-wanhoe-duplicator-4/ Hardware Parts (Buy parts kit here) Sub-miniature Micro Switch With Lever Roller (Uxcell PN:s14073100am0209) SPDT On/Off/On 3 Position Mini Toggle Switch (Amico PN:s12101100am0009) Hex Nut Fastener, M3 Female Coarse Thread Hex Drive Cap Screw, M3x10mm or M3x15mm 3 ½” of heat shrink tubing 3 feet two-conductor hook-up wire (old speaker wire works fine) Print Settings Printer: Duplicator 4 Resolution: 0.2mm Infill: 35% Notes: Use 4 perimeters for strength. Use active cooling. In reprap tradition, this part can be used to print a better copy of itself. Post-Printing Complete assembly instructions: https://ricswika.wordpress.com/2016/01/24/automatic-cooling-for-wanhoe-duplicator-4/
With this file you will be able to print Automatic Cooling for Wanhoe Duplicator 4 with your 3D printer. Click on the button and save the file on your computer to work, edit or customize your design. You can also find more 3D designs for printers on Automatic Cooling for Wanhoe Duplicator 4.
