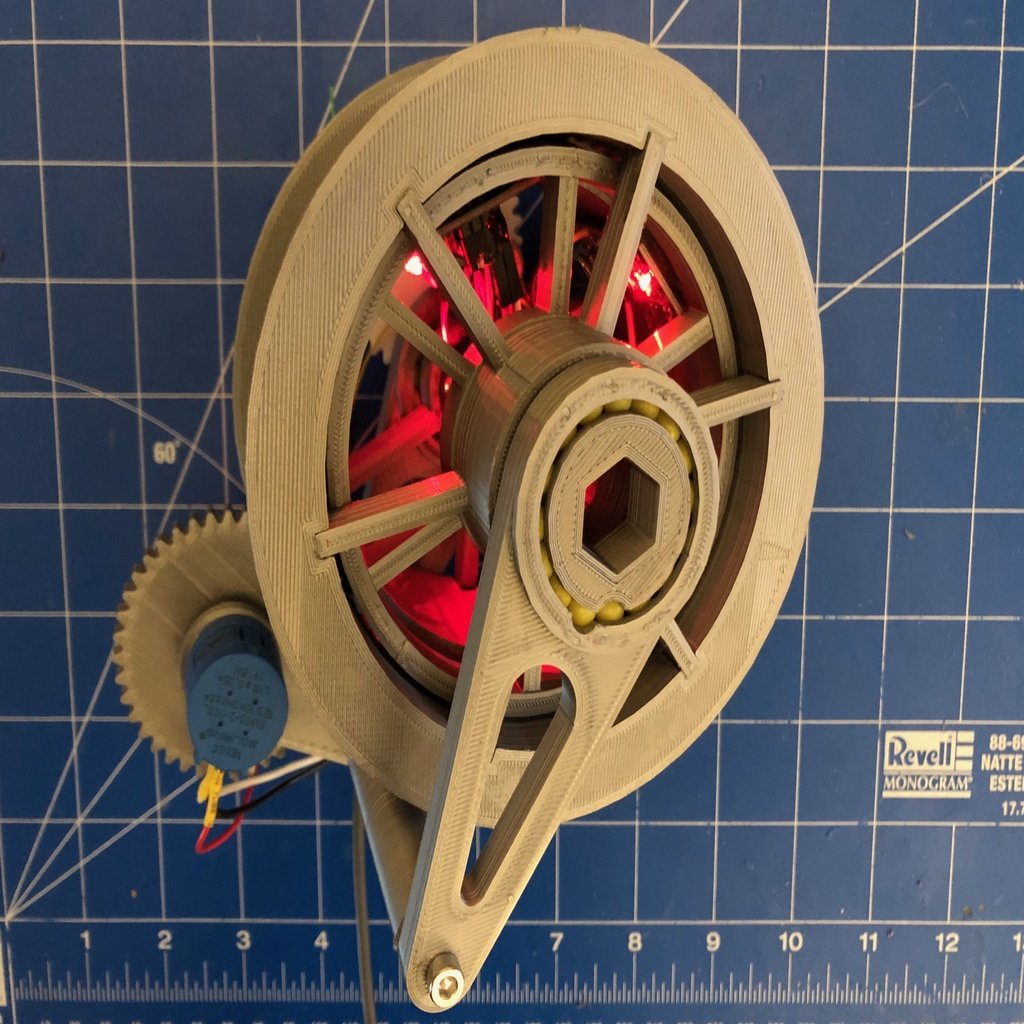
Auto-winding drum for weight-driven clock
thingiverse
This is a weight drum for a mechanical clock, incorporating an automatic winding system using a stepper motor and Arduino. It allows a clock to run fully weight-driven and continue running even while the weight is being wound by a motor. The weight cord is wrapped around the outer drum, with torque transferred to the inner drum via a freewheel. The inner drum is geared to a separate escapement mechanism powering the clock. The motor sits inside the inner drum and engages a gear on the outer drum. During winding, the motor turns the outer drum relative to the inner drum, transferring torque now to the inner drum via the motor instead of the freewheel. An external potentiometer measures the position of the outer drum to determine when to start and stop winding. I used it to drive A26's triaxial tourbillon (https://www.thingiverse.com/thing:2761730), connected to my planetary clock (https://www.thingiverse.com/thing:4055592). Fair warning, the motor's maximum power is roughly equal to the power required to drive the tourbillon/clock system, meaning the motor stalls quite a bit and sometimes can't make forward progress. I'd like to change it to a NEMA 14 or larger in the future (should be enough room). Components used: - Arduino Nano 5V - 28BYJ-48 stepper motor and driver board - 12.5mm slip ring. For sizing reference, I used this one: https://www.amazon.com/gp/product/B07H2SRMXP/ref=ppx_yo_dt_b_asin_title_o02_s00?ie=UTF8&psc=1 - 10-turn potentiometer. For sizing reference, I used this one: https://www.amazon.com/gp/product/B079JN626M/ref=ppx_yo_dt_b_asin_title_o02_s00?ie=UTF8&psc=1 - M3 screws, various lengths - 6mm Airsoft pellets Basic assembly info (I recommend reviewing the Tinkercad model before proceeding): 1. Connect electrical connections between Arduino, driver board, and slip ring (see below). 2. File all bearing races to remove any burrs. 3. Attach drivegear to motor. 4. Attach motor and freewheel to innerdrum with M3 screws. Do not tighten. 5. Attach slip ring flange to innerdrumrearspokes with M3 screws. Use the side where the spokes are flush with the inner ring. 6. Insert innerdrumrearspokes into framerear. Align the bearing insertion holes (on the side opposite the slip ring) and insert 6mm pellets. Ensure that the assembly turns freely. 7. Attach Arduino and driver board to innerdrum with hot glue. Use the larger diameter half of the slip wing (the one attached to the flange). 8. Insert innerdrumrearspokes assembly into innerdrum. If the fit is too loose, add a few dabs of hot glue. 9. Insert 6 pellets into the cutouts on freewheel. They should stay in place if the freewheel is oriented vertically, otherwise you can wrap them with a piece of paper before inserting them between outerdrum and freewheel (middle race on freewheel). 10. Adjust the position of the motor to achieve a proper mesh between drivegear and outerdrum. Tighten motor screws. 11. Insert freewheel into framefront and insert pellets. 12. Attach framebot using M3 screws. Do not tighten. 13. Attach pot to framebot and add positiongear. Secure with M2 setscrew. 14. Rotate framebot to get a proper mesh between positiongear and outerdrumgear. Tighten framebot screws. 15. Attach framerear to mounting surface and escapement mechanism. 16. Complete connections between potentiometer, slip ring, and power (5V). Arduino info: - See stepper.ino for example code. You will likely need to customize the values for RPM and turns. - There are many tutorials on connecting a stepper motor to an Arduino. Example: https://www.seeedstudio.com/blog/2019/03/04/driving-a-28byj-48-stepper-motor-with-a-uln2003-driver-board-and-arduino/ Tinkercad: https://www.tinkercad.com/things/gsawV8K9iF8-freewheel-drum https://www.tinkercad.com/things/1DgcbQbeJzv-freewheel-drum-assembly Freewheel design by Corona688: https://www.thingiverse.com/thing:207389
With this file you will be able to print Auto-winding drum for weight-driven clock with your 3D printer. Click on the button and save the file on your computer to work, edit or customize your design. You can also find more 3D designs for printers on Auto-winding drum for weight-driven clock.
