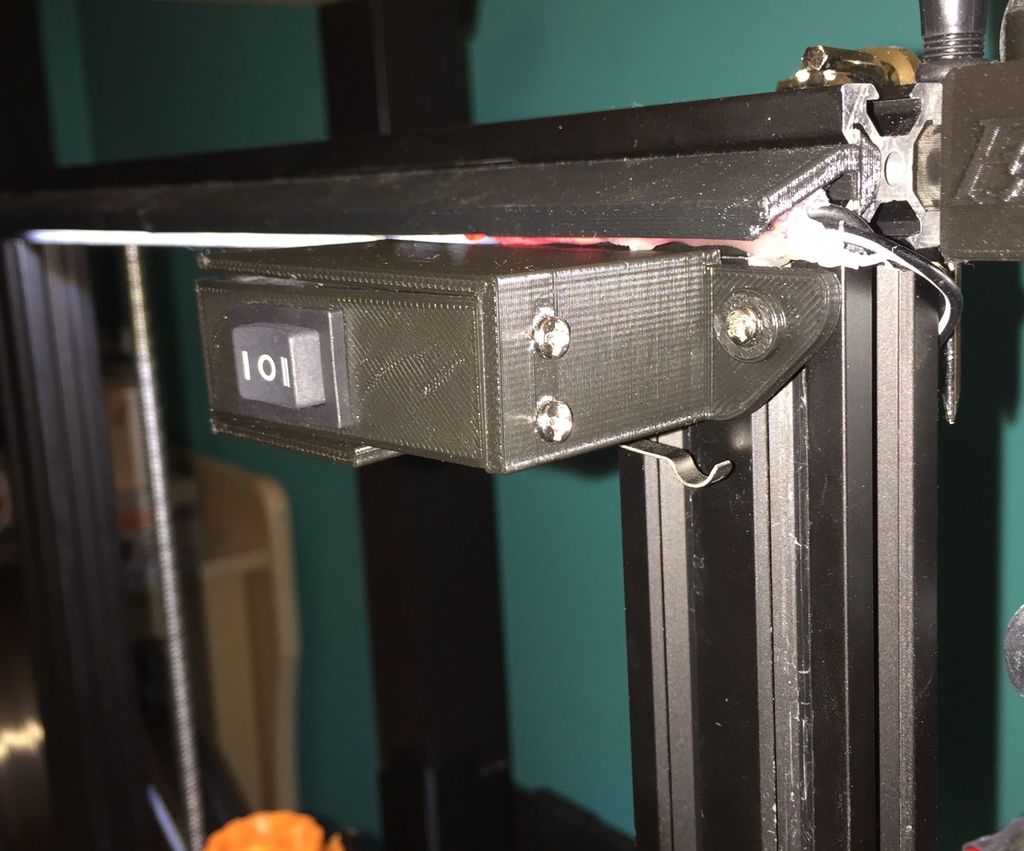
Auto Shutdown Switch Trigger System
prusaprinters
<p>Always was looking for an auto shutdown system but every one I looked at did not satisfy my needs.I needed a simple auto shutoff at end of print that I could control.</p> <p>This is what I came up with and am currently using.</p> <p>Parts needed:</p> <p>The models(2)</p> <p>A switch like this one:</p> <ul> <li>XV-15-1C25 - <a href="https://www.aliexpress.com/item/4000321317549.html">https://www.aliexpress.com/item/4000321317549.html</a></li> </ul> <p>and optionally like this:</p> <ul> <li><a href="https://www.aliexpress.com/item/32972252420.html">https://www.aliexpress.com/item/32972252420.html</a></li> </ul> <p>Note that this is a trigger system for End of Print. You can use it on the power line or the 24v line or safest connect it across a 24v relay. This system is simply the trigger.Up to you how you choose to use it.</p> <p>In the diagram uploaded, SW1 is the Black (optional) switch and SW2 is the XV-15-1C25</p> <p>You will also need some M3 screws for the box and a T-nut for fixing to the Al. frame.</p> <p>On my printer I have lights fixed at the top so I lose 10 mm of height.</p> <p>Also you have to add the foll. code to your End gcode :</p> <p>;AutoShutoff code</p> <p>M109 R 60 ;Cooling hotend to 40 degrees</p> <p>G90 ;Absolute Positioning</p> <p>G1 Z244 ;Goes up to Z 244 to trigger switch and turn off machine.</p> <p>M84 X Y E ; disable motors</p> <p>On my machine the SW2 is triggered at Z244. You will need to adjust this based on how high you are able to fix the box. Easiest test is to go up to say Z230 manually and then go up in increments of 1 till SW2 is triggered. Note Z and that is the value you will use in your end gcode.</p> <p>The two switches are wired in parallel. So if I want a shutdown I turn SW1 to off. So when the X axis rises at end of print, SW2 is triggered and printer is off.</p> <p>Note: Connect SW2 such that it is always on till the lever is triggered, then it goes off.</p> <p>If I DON'T want to trigger a shutdown, then I turn SW1 ON. That way the X axis will rise and trigger SW2 but will not trigger a shutdown.</p> <p>I have my minus lead wired into this trigger. The switches are 230v rated and the wire is insulated throughout so I have no problem. Anyway use this at your own risk.</p> <p>If you want a safer way then wire in a Relay to be triggered.</p> <p>My tallest print is now 240mm but I still have the printer Z set to 250.</p> <p>Sketchup files provided for thos that want to further mod.</p> <h3>Print Settings</h3> <p><strong>Printer Brand:</strong></p> <p>Creality</p> <p class="detail-setting printer"><strong>Printer: </strong> <div><p>Ender 3 Pro</p></div> <p><strong>Rafts:</strong></p> <p>No</p> <p class="detail-setting supports"><strong>Supports: </strong> <div><p>No</p></div> <p><strong>Resolution:</strong></p> <p>.2</p> <p class="detail-setting infill"><strong>Infill: </strong> <div><p>15</p></div> <p><strong>Filament:</strong> Generic PLA Black</p> <p><br/> <p class="detail-setting notes"><strong>Notes: </strong></p> </p><div><p>No supports are needed so rotate as needed.</p></div> </p></p></p> Category: 3D Printer Accessories
With this file you will be able to print Auto Shutdown Switch Trigger System with your 3D printer. Click on the button and save the file on your computer to work, edit or customize your design. You can also find more 3D designs for printers on Auto Shutdown Switch Trigger System.
