Auto-Rewind Spool Holder for RepRack
prusaprinters
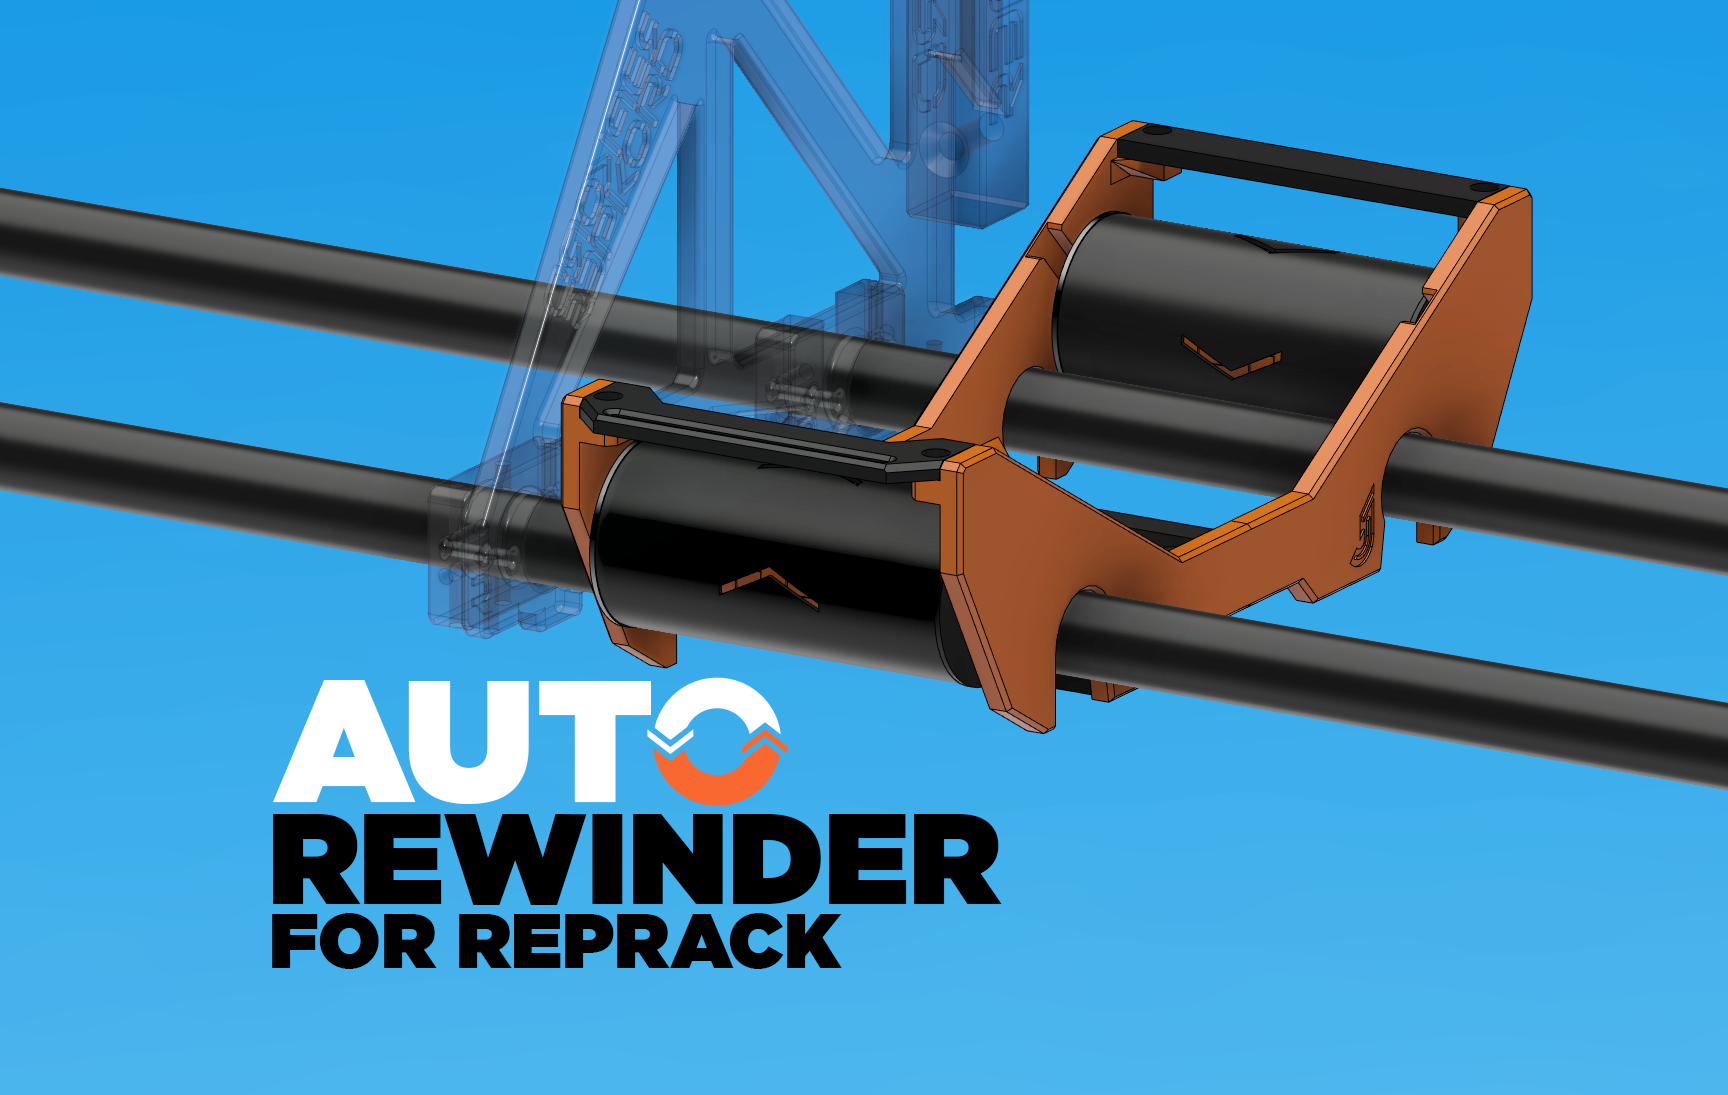
<p>I was looking for a quick and very easy way to swap filament on my RepRack, ultimately one thing led to another and I just ended up designing one. The Auto-Rewind Spool Holder for <a href="https://www.printables.com/model/129024-reprack-open-source-spool-holder-and-storage-syste">Repkord's RepRack</a> provides slight tension on your filament when feeding into your printer, reducing slack when retracting, especially in the case with multi-material print mechanisms such as the Prusa MMU.</p><figure class="media"><oembed url="https://www.youtube.com/watch?v=ic9dLWOwyYM"></oembed></figure><p><strong>HARDWARE</strong></p><p>• 8 - M3x8 screws<br>• 8 - M3 Nuts<br>• 4 - <a href="https://www.amazon.com/gp/product/B0771DLLR6/ref=ppx_yo_dt_b_search_asin_title?ie=UTF8&psc=1">608 Bearings</a></p><p><strong>INSTRUCTIONS</strong></p><figure class="image image_resized" style="width:75%;"><img src="https://media.printables.com/media/prints/292276/rich_content/fdddd374-db10-4194-8847-165f21d20bfa/pxl_20221009_213515897-a.jpg#%7B%22uuid%22%3A%220f3f8f6d-7d24-497c-9d2e-bb9eb4a1760d%22%2C%22w%22%3A2557%2C%22h%22%3A1963%7D"></figure><p>•The Auto-Rewinder consists of 3 main parts, a frame and two auto-rewinding cylinders.</p><figure class="image image_resized" style="width:75%;"><img src="https://media.printables.com/media/prints/292276/rich_content/5bf18588-d350-4bb8-bbaa-5aeb029d91b7/image.png#%7B%22uuid%22%3A%22f3034fee-9962-4409-99aa-9d0b8f41ba1e%22%2C%22w%22%3A2512%2C%22h%22%3A1407%7D"></figure><p>• Start by assembling the frame. There are a total of eight locations for pressing in M3 nuts. The easiest way to install them is but passing a screw through the opposite side of the hole and threading it into the M3 nut, pulling it into place, and then unthreading the screw. Repeat this eight times for each hole.</p><figure class="image image_resized" style="width:75%;"><img src="https://media.printables.com/media/prints/292276/rich_content/4241752a-a84e-4ed3-9ab6-b0d684596ed1/image.png#%7B%22uuid%22%3A%2249424a6c-95cf-4c10-89fa-3941da87602f%22%2C%22w%22%3A2060%2C%22h%22%3A1388%7D"></figure><p>• Screw the frame together using M3 x 8 screw, start with the larger beam for the bottom half and the two smaller beams for each end. Don't worry about orientation as the frame is symmetrical, but for whichever end is the front you will want to have the beam with the filament slot facing outward.</p><figure class="image image_resized" style="width:75%;"><img src="https://media.printables.com/media/prints/292276/rich_content/be1d7611-6f12-4c95-b2b1-bab38e9213b3/image.png#%7B%22uuid%22%3A%22ce07c86f-258e-4f7b-add6-a7672a9d3ec1%22%2C%22w%22%3A1159%2C%22h%22%3A899%7D"></figure><p>• Next we'll begin assembling the internals for one of the auto-rewind cylinder. You will notice</p><figure class="image image_resized image-style-align-left" style="width:27.66%;"><img src="https://media.printables.com/media/prints/292276/rich_content/a72b0b17-917e-4ef8-b6a7-091cea485978/image.png#%7B%22uuid%22%3A%225f6ab3e5-ab67-4e54-80ba-586f486e0fb1%22%2C%22w%22%3A979%2C%22h%22%3A839%7D"></figure><p> that most of them fit together light puzzle pieces, press these together first. Once assembled you will want to have the geared end on one side, the other side will have a coiled piece with a half circle slot in the inside that is different than the others. <br><i>Note: it's ok if these parts don't stay snapped together, once assembled in the cylinder they will be held together.</i></p><p> </p><figure class="image image_resized image-style-align-center" style="width:75%;"><img src="https://media.printables.com/media/prints/292276/rich_content/89619ad4-ba05-4987-978c-671eb27cce75/image.png#%7B%22uuid%22%3A%2261c0e8a7-bc38-44ae-b714-929768910dd1%22%2C%22w%22%3A2019%2C%22h%22%3A1254%7D"></figure><p>• Prep the cylinder shell by pressing bearings into place on each end. With the auto-rewind internals stacked vertically with the gear piece on top, slide the large cylinder shell over the internals. Carefully flip the cylinder so the open end is upright. To fully seat the internals you might have to shake and tap on the parts until the geared piece falls into place.</p><p>•Thread the cap to the cylinder shell on the open end of the cylinder.</p><figure class="image image_resized" style="width:75%;"><img src="https://media.printables.com/media/prints/292276/rich_content/aa429b88-e7fe-4e7a-990e-5b6c30ad338a/image.png#%7B%22uuid%22%3A%221ac651c4-91cf-4388-b94b-6745be434e78%22%2C%22w%22%3A1669%2C%22h%22%3A940%7D"></figure><p>• Now take one of the bars and slide it into the bearing holes of the cylinder. You might have to rotate it until it passes through the one internal piece with the half circle slot.</p><p>• Now assemble the second auto-rewind cylinder exactly the same way.</p><figure class="image image_resized" style="width:75%;"><img src="https://media.printables.com/media/prints/292276/rich_content/4e0ee21f-3c55-4715-8154-cdc805912d6d/image.png#%7B%22uuid%22%3A%22a6c3cdf5-3b5e-4edb-ad74-69610ebd7aa5%22%2C%22w%22%3A1967%2C%22h%22%3A1112%7D"></figure><p>• Slide the auto-rewind cylinders into place on each end of the frame, you will want the tab on the bay to face upward and the arrows on the cylinder to pint towards the backside of the frame (the side that will face the wall).</p><figure class="image image_resized" style="width:75%;"><img src="https://media.printables.com/media/prints/292276/rich_content/4c4fddac-0724-4106-892d-aa0e585d2061/image.png#%7B%22uuid%22%3A%226e5dafda-7f35-4632-92eb-8762e8c0b9fd%22%2C%22w%22%3A1837%2C%22h%22%3A1336%7D"></figure><p>• That's it! Now set the Auto-Rewinder on the RepRack. Set a spool on the rewinder and thread the filament through the beam with the slotted opening to feed downward toward your printer.</p><p><strong>TROUBLESHOOTING</strong></p><p>• Auto rewinder not rewinding: Spin the rewinder by hand, it should spin freely other than the coils inside tightening. If you feel resistance check the coils on the cylinders internals for print flaws, stringing, or even shifted layers.<br><i>Note: On a freshly assembled cylinder you might feel slight resistance but this should improve over time as resistant parts wear from use.</i></p><h5><strong>RECOMMENDED PRINT SETTINGS</strong></h5><p>Filament: PETG<br>Nozzle Size: 0.4mm (or 0.6mm for the frame)<br>Print Height: 0.2-0.35mm<br>Infill: 10-20%</p><p>Special thanks to <a href="https://www.printables.com/model/168-universal-auto-rewind-spool-holder-mm">Vincent Groenhuis</a><a href="https://www.thingiverse.com/thing:3338467"> </a>for sharing with us the auto-rewind spool design. I was hoping to link to his design originally but had to design my own version from the ground up in a more compact form to work with this design.</p>
With this file you will be able to print Auto-Rewind Spool Holder for RepRack with your 3D printer. Click on the button and save the file on your computer to work, edit or customize your design. You can also find more 3D designs for printers on Auto-Rewind Spool Holder for RepRack.