Auto bed-level for Ultimaker
thingiverse
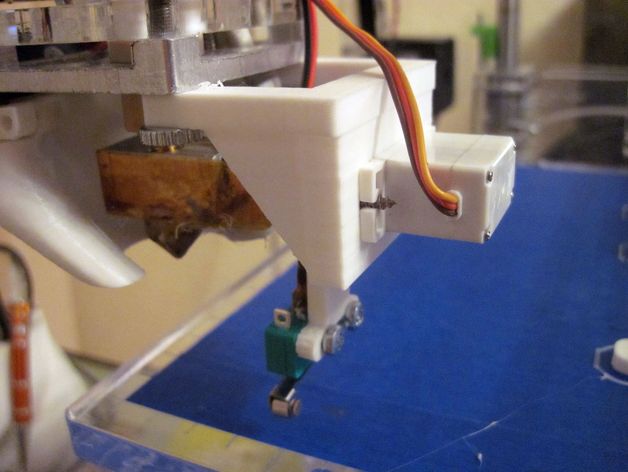
This auto bed-leveling system is compatible with Ultimaker printers, as well as derivatives like Joysmaker and Dreammaker. The setup involves mounting a z-min endstop to the print head for probing four bed points prior to printing, with movements adjusted according to alignment. A servo lifts the probe during printing. Watch it in action here: http://www.youtube.com/watch?v=x8eqSQNAyro. An updated firmware version is available at https://github.com/Bevaz/Marlin/tree/Auto_level_2.00, allowing interaction to set z-probe extend and retract angles via LCD controller, with the probe only extending once during bed probing. The latest Marlin synced firmware can be found at https://github.com/Bevaz/Marlin/tree/Auto_level_3.00. To build this system, you'll need a servo (sg90 or similar), microswitch, connectors, wires, and printed parts. Build steps include printing the servo mount and probe mount, wiring the servo and microswitch to the board, attaching everything to the print head, and adjusting the maximum clockwise position of the probe. Use Marlin firmware from https://github.com/Bevaz/Marlin/tree/Auto_level_2.00 with Cura's modified start GCODE: G28 X0 Y0; G28 Z0; G29; G1 X0 Y0 Z15.0 F{travel_speed};. Adjust macro Z_PROBE_OFFSET_FROM_EXTRUDER in Marlin Configuration.h or use the LCD module for offset settings. Interactively set z-probe extend and retract angles via LCD menu, saving them to EEPROM. Enjoy hassle-free bed leveling!
With this file you will be able to print Auto bed-level for Ultimaker with your 3D printer. Click on the button and save the file on your computer to work, edit or customize your design. You can also find more 3D designs for printers on Auto bed-level for Ultimaker.
