Atomic Fidget Spinner
pinshape
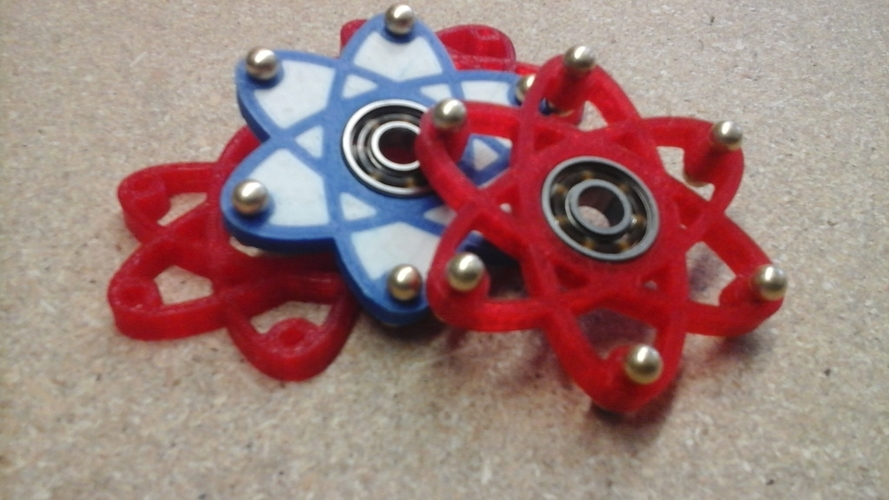
The wildly popular fidget spinner toy just got a nuclear makeover! This latest model prints in under an hour and delivers a seriously satisfying spin time. I've successfully printed this design using both ABS and PLA filaments, and included an extra file for dual-extrusion printer users to take their fidgeting game to the next level. By incorporating additional rotational inertia, you'll enjoy even longer spin times. Print Settings: Infill: 30% (hexagonal) Perimeters: 2 Layer Height: 0.3mm Raft for ABS, Oozewall for Dual-Extrusion Bill of Materials: 1 x 3D printed frame 1 x 608 8x22x7 Bearing (I used this one) 6 x 6-32 set screws, 0.5" long (the heavier, the better) 12 x 6-32 threaded brass balls (I used these) You can substitute the brass balls with an acorn nut – a more likely find at your local hardware store. Assembly: To assemble this fidget spinner, I employed a C-clamp to press in the bearing directly from the printer. Depending on the accuracy of your 3D printed part, you might need to sand a chamfer, enlarge the hole diameter, or add a small amount of retaining compound. Pressing in the bearing should require only moderate force – anything more and you risk splitting the atom, which is generally not good. To attach the electrons (brass balls), thread one ball onto a set screw until it reaches its maximum point, then slide that assembly through the 3D printed part. You may need to enlarge these holes slightly, depending on your printer's dimensional accuracy. Thread the opposing side and tighten firmly – finger-tight should suffice. Repeat this process five more times and you're ready to fidget like a pro!
With this file you will be able to print Atomic Fidget Spinner with your 3D printer. Click on the button and save the file on your computer to work, edit or customize your design. You can also find more 3D designs for printers on Atomic Fidget Spinner.