Astrocam staging adapter (and stage)
prusaprinters
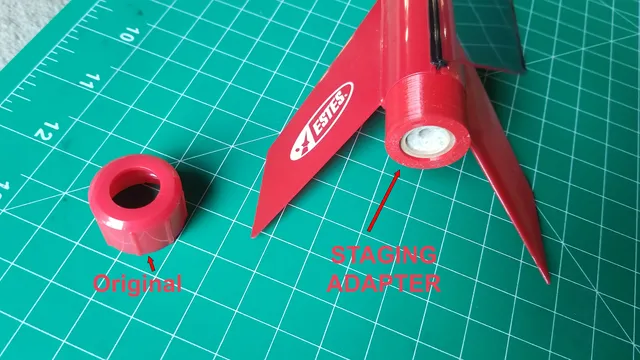
Astrocam Rocket - Staging AdapterThe default rocket that comes with the Estes Astrocam is single stage. A surprising oversite on Estes' part as staging is a exciting thing to capture with onboard video, plus you tend to get greater altitudes and again, more exciting videos. Regardless, this simple part replaces the original motor retention cap with one you can fit a BT-50 based first stage to to allow for easy staging. ---------First stage assembly instructionsAdditional Parts needed 68mm of BT-2035mm of BT-50 NotesI use the BT-20 to add a thermal layer between the motor and the printed fin can, and to allow for the motor to be replaced easily. The BT-50 section makes the coupling of the stage smoother and less problematic. The base uses the original Astrocam Rocket motor retention cap to hold the booster motor in place. The fins ‘notch fit’ into the fin can.Because they're all separate parts you can print each fin and the center different colors.I've included the source STEP file so you can design your own fins if you like. Assemblyput the BT-20 tube into the fin can basetrial fit the fins into each slotput a motor into the BT-20 to give the tube support before the next stepput CA glue into the slot for a fin then firmly insert the fin until it's flush at the base, wipe off excess, spray on a kicker if you're impatientput a small amount of CA on the upper shoulder and add the BT-50 tube
With this file you will be able to print Astrocam staging adapter (and stage) with your 3D printer. Click on the button and save the file on your computer to work, edit or customize your design. You can also find more 3D designs for printers on Astrocam staging adapter (and stage).