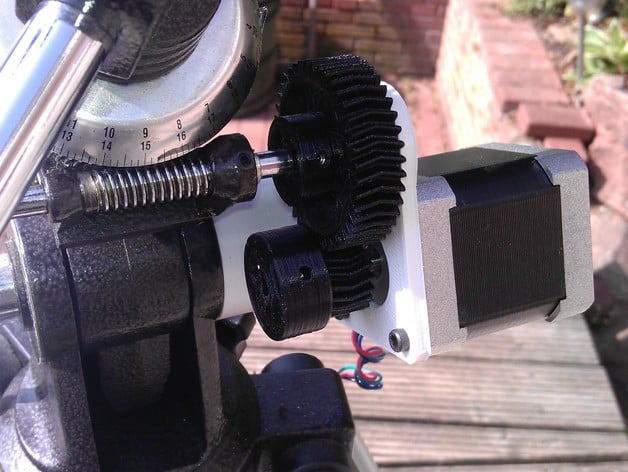
Astro Tracker for EQ1 mount
thingiverse
A tracking device for the old basic EQ1 mount of my new 114/900 Newtonian telescope. Parts List: Amount Name 1 Bipolar Stepper Motor 1 Arduino Uno or Similar Microcontroller Board 1 Stepper Driver Pololu A4988 Compatible Motor Controller 1 Potentiometer 10k or Similar Voltage Dividing Component 1 Capacitor 100μF, At Least 16V Electrostatic Energy Storage Device 1 605ZZ Ball Bearing High-Precision Rotating Element 1 M5x8 Allen Key Screw Adjustable Bolt for Mechanical Assembly 1 M5 Washer Flat Disc-Shaped Hardware Fastening Piece 2 M3 Grub Screws Machine Threaded Insert with External Flange 2 M3 Nuts Internally Threading Components Used to Secure Screws 4 M3x10 Allen Key Screws Machine-Threaded Bolts Utilized for Assembly 1 9-12V Battery Portable Electrical Power Source 3D Print Settings: Rafts: Unnecessary, Does Not Impact Print Quality or Accuracy Infill: Optimized at 40%, but 30% or More is Recommended Supports: Irrelevant, Unless Absolutely Necessary Post-Printing Instructions: Ensure the cogwheels catch smoothly without resistance or drag. Remove support structure from mounting plate if necessary for print integrity. Tap a M5 thread into the back of the bigger gear cogwheel for mechanical connection. Securely attach stepper motor to flat side of mounting plate using four M3x10 screws. Push M3 nuts into the top of each cogwheel and align with bore before adding grubscrews loosely. Gently push small gear onto stepper motor sprocket-facing towards motor direction. Push 605 ball bearing into opening on opposite side of mounting plate for precise rotational support. Join bigger gear with 605 ball bearing via M5x8 bolt, ensuring washer is placed between components for frictionless motion. Mount assembly to the EQ1 mount's side, following video demonstration for accurate placement and attachment. The first prototype used spare RepRap hardware consisting of a Ramps board, an Arduino Mega 2560, and a Pololu A4988 driver. Building the circuit on a breadboard is straightforward and utilizes existing component schematics. In the accompanying video, a Protoneer CNC shield is shown paired with an Arduino Uno and 12V fan for effective cooling. When using a CNC shield, place the stepper driver in the X-slot, and connect jumpers beneath it to enable microstepping at x16 precision. Attach potentiometer to the SCL pin, ensuring proper signal connection and leveraging available power lines for simplicity. Design Background: Conceived during winter 2014-15 utilizing Openscad, FreeCAD, Fritzing, and Arduino IDE.
With this file you will be able to print Astro Tracker for EQ1 mount with your 3D printer. Click on the button and save the file on your computer to work, edit or customize your design. You can also find more 3D designs for printers on Astro Tracker for EQ1 mount.
