Artillery Sidewinder X1 Umbau auf Alu-Guss-Platte mit GFK/FR4 Platte
thingiverse
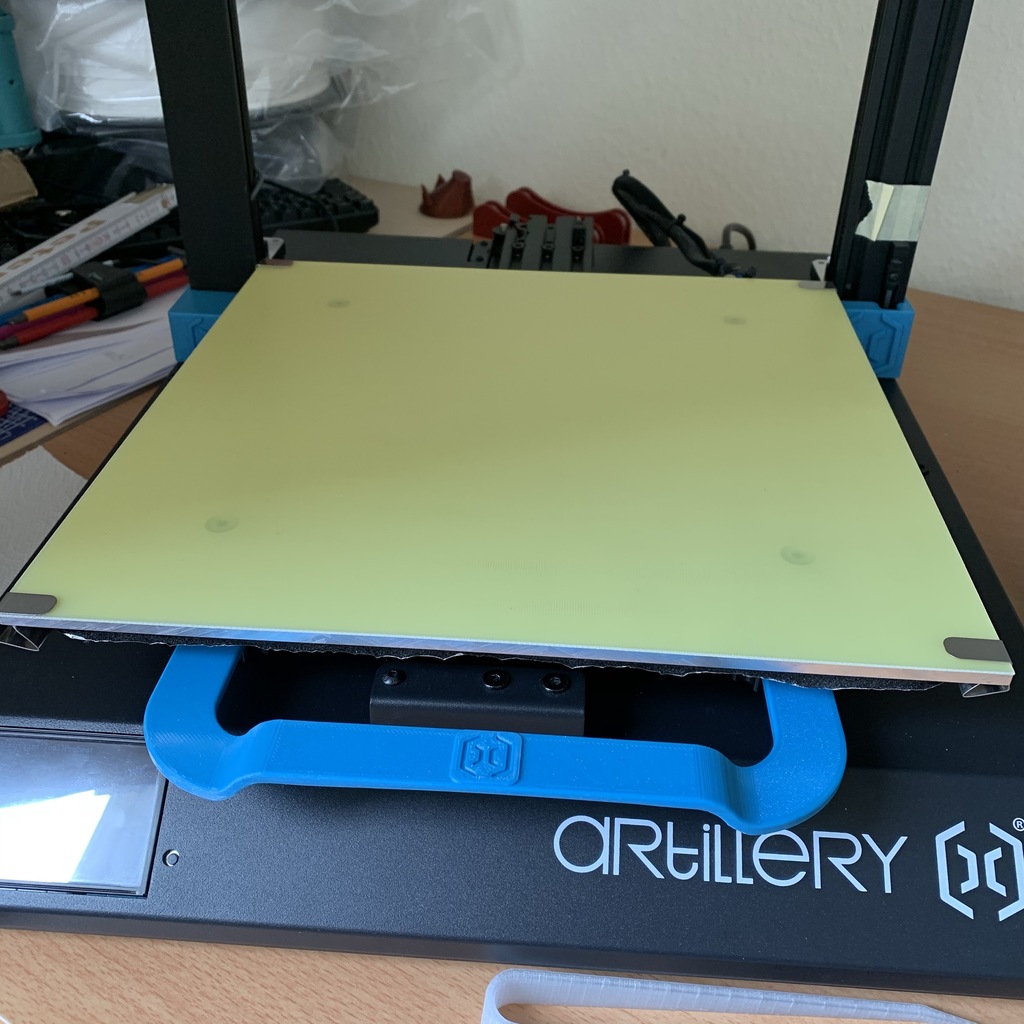
I am modifying the original glass print bed to a fine-machined aluminum cast plate. I purchased this here: and used kit 4 with GFK/FR4 plate 1 mm and flat clips. Here is a brief description of the process: 1. I removed the four adjustment wheels under the bed at the corners. I put the adjustment wheels and associated springs aside, as they will be needed later. 2. Heated bed (glass plate) on the slide and then heated it to 70 degrees for about 5 minutes. Be careful now, very warm! Then turn off the device. 3. Flip the hot glass plate and carefully remove the silicon heating pad with insulation from the corners. Again, be careful not to burn yourself when you're done. Put the silicon heating pad aside, paying attention to the adhesive side. 4. Preparation for grounding cable: I drilled a 2.5mm hole about 6cm from the right edge on the back of the aluminum cast plate and then cut an M3 thread. This is where you attach the grounding cable with an M3 screw. 5. Clean the underside (pay attention to the M3 hole! It should be on the left side now). Use Isopropanol to clean the underside (degrease). So, carefully reapply the silicon heating pad --> please pay attention to the hole on the back side where the grounding cable is attached. And press it firmly in place. If a lot of adhesive has come loose from the underside during removal, you will need to remove it with your fingers or Isopropanol. You'll then need to purchase a new adhesive pad: 3M 468MP double-sided adhesive tape adhesive film transfer adhesive tape 30*30 cm You can find this on Ebay/Amazon. Once done, you can now attach the four screws with nuts to the aluminum cast plate in the holes. Tighten the nut with a key. 6. Now you can place the aluminum cast plate on the slide, but don't forget about the springs! On the underside, reattach the large adjustment screws. You can also install a rear cable holder and a front handle if you like. No need to do this unless you want to. Find these on Thingiverse. 7. Creation of a grounding cable for the aluminum cast plate: About 50cm long, 2.5qmm cable (I used speaker cables). Attach ring cable shoes to both ends and fix them with shrink tubing. I wrapped part of the cable with a woven sleeve so it can be safely inserted into the housing. 8. Remove the underside cover. Attach the grounding cable with the ring cable shoe to the aluminum cast plate in the M3 hole on the back. Use a small spacer with a used one. Then carefully push the grounding cable through the cable guide from behind. 9. CAUTION IS ADVISED!!!! Now that the cable is in the housing, lay it out so you can reach the power supply. There's a grounding connector (yellow cable) there. Disconnect this and screw it back through the ring cable shoe with the old grounding cable again. Check everything 10 times or call in a professional if you're not sure. 10. Check everything one more time, then reattach the housing cover with screws. Important note: All modifications to the printer are at your own risk and responsibility. All electrical work must be performed by a trained professional and checked. !! Life-threatening !!
With this file you will be able to print Artillery Sidewinder X1 Umbau auf Alu-Guss-Platte mit GFK/FR4 Platte with your 3D printer. Click on the button and save the file on your computer to work, edit or customize your design. You can also find more 3D designs for printers on Artillery Sidewinder X1 Umbau auf Alu-Guss-Platte mit GFK/FR4 Platte.