Artillery Genius/Sidewinder BIQU LCD Mount
prusaprinters
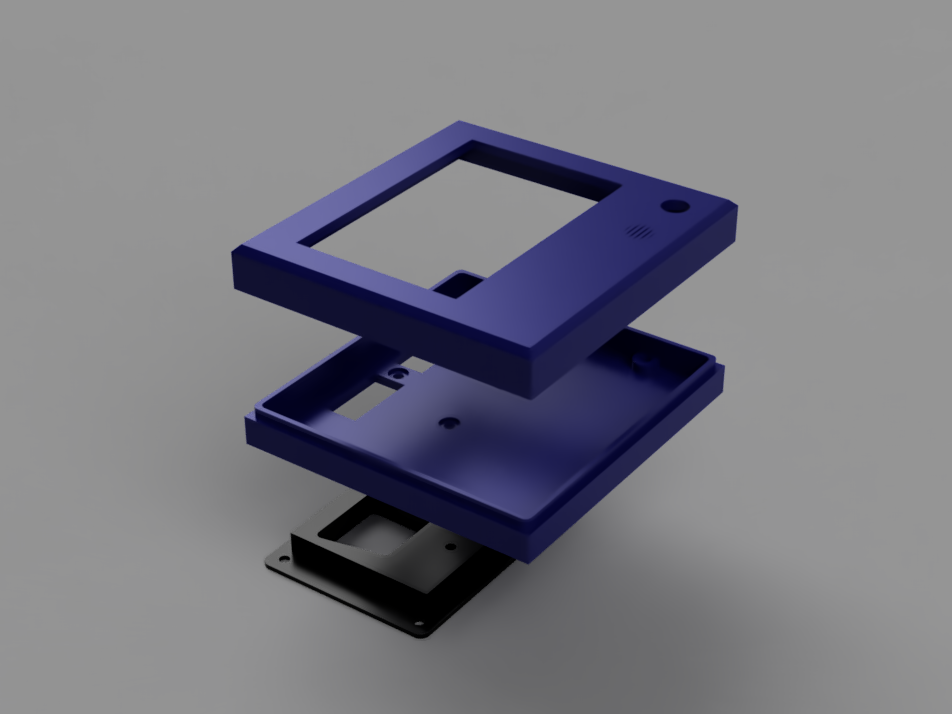
<p><strong>THIS IS A WORK IN PROGRESS</strong></p> <p>Case for the BIQU 12864 LCD screen and a mounting plate that fits in the stock TFT slot of the Artillery Genius and Sidewinder bodies.</p> <p>I printed this with Hatchbox Blue PLA because the color is similar to the Artillery blue, but I plan on reprinting in some sort of ABS for better heat resistance. PETG would work fine too, I don't really want the shininess of it.</p> <h3>Parts List</h3><ul> <li>3x M3 Nuts</li> <li>3x M3x10mm Bolts (these can be longer, they just stick into the printer body)</li> <li>4x M3x5mm Bolts (I used the ones originally holding the TFT into place)</li> <li>1x <a href="https://www.amazon.com/gp/product/B01FH8KTZU/">BIQU 12864 LCD Display</a></li> <li>1x <a href="https://www.prusaprinters.org/prints/52565-artillery-logo-rotary-knob">Artillery Logo Rotary Knob</a> (optional)</li> </ul> <h3>Build Instructions</h3><ol> <li>Print the parts.</li> <li>Use soldering iron (or a screwdriver and some force) to insert the nuts into the 3 hexagonal recesses in the <strong>Mounting Plate</strong>.</li> <li>Remove the old TFT from the printer, setting aside 4 M3 bolts.</li> <li>Using 4 M3 bolts from step 3 (or any 4 M3x5mm bolts), mount the <strong>Mounting Plate</strong> into the printer in place of the stock TFT. Make sure the LCD wires are connected and accessible before closing the printer.</li> <li>Screw the <strong>LCD Case Base</strong> into the <strong>Mounting Plate</strong> using 3 M3x10mm bolts.</li> <li>Hook up the LCD wires to the LCD.</li> <li>Place the LCD into the <strong>LCD Case Base</strong>.</li> <li>Close the case, the <strong>LCD Case Lid</strong> should be friction fit to the <strong>LCD Case Base</strong>.</li> </ol> <h3>Print instructions</h3><p>I used a 0.3mm layer height, but a more final print will likely be 0.2mm or 0.16mm for smoother edges. I also used 10% infill which is probably fine with 3 walls, but you could do more in the <strong>Mounting Plate</strong> if you're concerned about rigidity.</p> <ul> <li><strong>The walls & speaker grill are optimized for 0.5mm line width</strong>.</li> <li>Print everything with the largest flat side against the bed.</li> <li>Supports are needed for the <strong>LCD Case Base</strong> and <strong>Mounting Plate</strong> because of the hex nut recesses.</li> <li>Make sure the <strong>LCD Case Lid</strong> has at least 2-3 walls so the chamfer prints successfully.</li> <li>The full assembly is included just for reference, only print the 3 individual parts.</li> </ul>
With this file you will be able to print Artillery Genius/Sidewinder BIQU LCD Mount with your 3D printer. Click on the button and save the file on your computer to work, edit or customize your design. You can also find more 3D designs for printers on Artillery Genius/Sidewinder BIQU LCD Mount.