Artillery filament sensor reverse Bowden bracket
prusaprinters
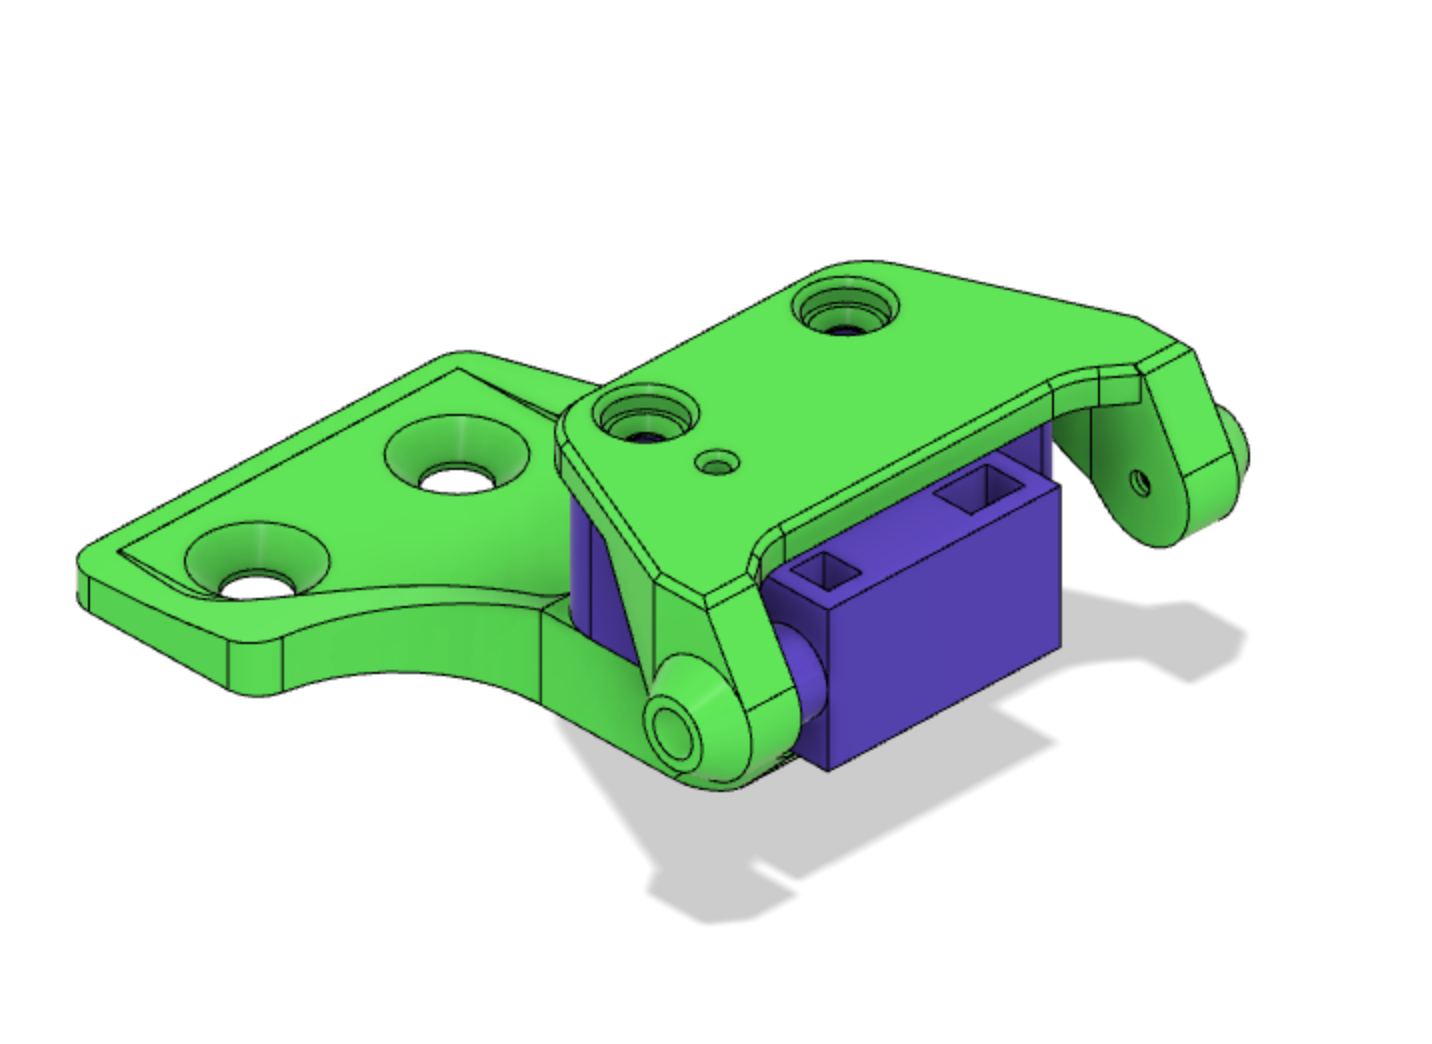
<p>Space is a bit tight in my enclosure, and I wanted to be able to use my filament runout sensors while still maintaining some flexibility in spool placement. A reverse-Bowden setup seemed to be just the ticket. </p><p>This is my solution so far. So far, so good! The PTFE tubes fit tightly but are still relatively easy to pull in and out to assist filament swaps. The filament is easy to pull through the PTFE tube and sensor in pretty much any orientation I try.</p><p>Additional things needed:</p><ul><li>2x M3 heat-set inserts</li><li>2x M3 20mm screws</li><li>short piece of clear filament (optional)</li><li>2x 10mm M5 screws (maybe)</li></ul><p>Tips:</p><ul><li>Use a 2mm drill bit to clean out the filament path, and a 4mm drill bit to carefully ream out the PTFE tube sockets. Wrap a piece of tape around the 4mm bit so you don't go to deep and bore clean through the bracket.</li><li>To work with the stock sensor cable run, you'll need to use the standoff_left version (it won't reach the right side). </li><li>I run my machines with the Z belt removed. if you use the Z belts on the SWX1, be careful – removing the M5 screws holding on the top-bearing bracket may cause you to loose your Z axis synchronization. </li><li>To increase visibility of the sensor status LED, snip off a short piece of clear filament and stick it in the little hole (you may need to waller it out a bit to fit, depending on your printer. You can use a soldering iron to melt the end a bit and stick it to the rest of the print.</li></ul>
With this file you will be able to print Artillery filament sensor reverse Bowden bracket with your 3D printer. Click on the button and save the file on your computer to work, edit or customize your design. You can also find more 3D designs for printers on Artillery filament sensor reverse Bowden bracket.