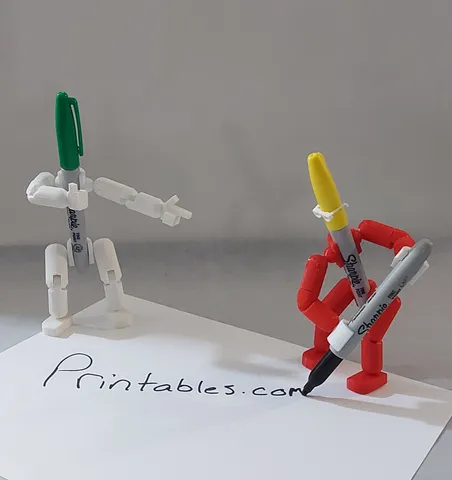
Articulated Sharpie Guy
prusaprinters
ARTICULATED SHARPIE GUYAs requested, here is my articulated version of the Sharpie Guy. I designed this based off the 3.5" G.I. Joe's from my childhood. I printed mine at a speed of 50, with a resolution of 0.2 mm. Assembly instructions below, assembly photo above. As always, any questions, don't hesitate to ask.Assembly:See numbered photo for reference.During assembly you'll want to keep an eye on your leg parts to make sure they're facing the right way. The upper part of the leg isn't perfectly circular at the bottom, one side has a long curve. On the lower leg you'll see one side, under the peg, is flat. The long curve on the upper leg and the flat part on the lower leg essentially make up the back of the knee so you'll want to watch that. See (1) in assembly photo for an example of the long curve and flat side.I would suggest a dab of super glue on the dowels that connect the two halves of each of the upper arms, upper legs and lower legs.The first thing you should do is attach part of each upper leg to the waist. See (2) in assembly photo. This will require a little force but shouldn't be too difficult. You'll notice the waist is slightly tapered where it grabs the sharpie so you want to keep the narrow end down and make sure you're putting the legs on the correct side. Once you have each piece snapped onto the waist, give them a twist so their orientation is the same as (3) in the photo. After you've done this, the long curve on each piece should be facing towards the back of the waist. We'll leave this piece for a minute and go assemble the lower leg.The lower leg is pretty straightforward as you don't have to worry about the foot pointing the right way as it has 360 degree rotation. Attach both halves of the lower leg to the foot as seen in (4) of the assembly photo.Here is where the orientation of your leg really matters. Connect the lower leg to the half of the upper leg that you've already connected to the waist, making sure that you're not only putting the right leg on the right side, but also making sure that the proper side of the lower leg (flat side) is facing the back. See (5). Glue the two dowels that connect the two halves of the upper leg. DO NOT glue the the pegs that connect the lower leg to the upper leg and allows the lower leg to move. Once you have both legs done, it's onto the arms.First, snap the forearm onto the elbow, there is only one way it can go, see (6). Next, take the two halves of the upper arm and connect them to the elbow and shoulder as seen in (7) to complete the arm. Repeat the process for the other arm and then attach both arms to the two halves of the chest piece as seen in (8), gluing wherever there are dowels.
With this file you will be able to print Articulated Sharpie Guy with your 3D printer. Click on the button and save the file on your computer to work, edit or customize your design. You can also find more 3D designs for printers on Articulated Sharpie Guy.
