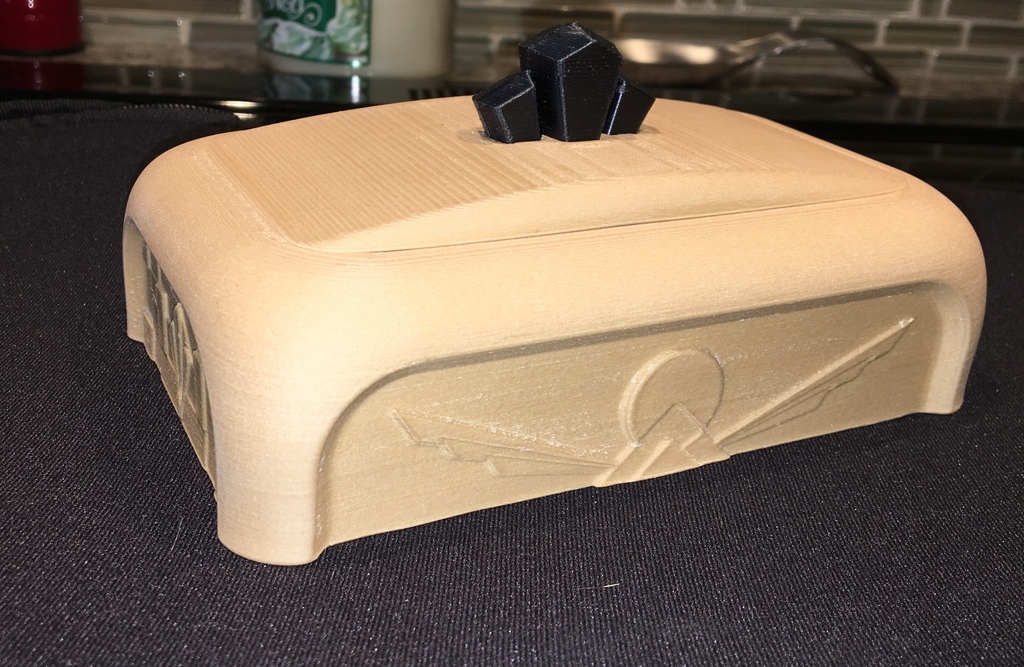
Art Deco Jewelry Box
prusaprinters
<p>My father is retired and in his spare time he makes jewelry boxes. He's been fascinated by 3D printing, and so I thought it would be cool to learn Fusion 360 to design and print a jewelry box to give to my mom for Christmas. It turned out great, she loved it, he thought it was the coolest thing ever, and I got to learn Fusion 360.</p> <p>The box is meant to be printed in separate parts and glued together. This allows you to have multiple colors or materials and makes it easier to print. The box is ~160x100x50mm.</p> <p>I've included the Fusion 360 file in case you'd like to make some changes.</p> <p>Please post your makes if you decide to print one.</p> <h3>Print Settings</h3> <p><strong>Printer:</strong></p> <p>Wilson TS</p> <p class="detail-setting rafts"><strong>Rafts: </strong> <div><p>No</p></div> <p><strong>Supports:</strong></p> <p>No</p> <p class="detail-setting resolution"><strong>Resolution: </strong> <div><p>0.2 layer height, 0.6 nozzle, 2 shells.</p></div> <p><strong>Infill:</strong></p> <p>15% grid</p> <p><br/> <p class="detail-setting notes"><strong>Notes: </strong></p> </p><div><p>I chose to print the box in Spools3D wood fill filament. It turned out really nicely, especially after some sanding. The embossing on the sides has been designed so that any parts that overhang too much have been chamfered or have a stepped support underneath and should print easily with adequate cooling. Printing time was about 6 hours at 60mm/s</p> The lid top was printed in the same wood filament. I used 4 perimeters in order to give more support to the terracing, but you can make adjustments to suit your aesthetic tastes. I used the concentric top infill pattern as well to give it a bit of visual impact. <p>The lid base was printed with the narrow part facing down so that the underside of the lid had a nice glassy surface, but you could also flip it around if your printer has trouble with overhangs. I chose AMZ3D gold PLA at 0.1 layer height. Printing time was about 1 hour.</p> <p>The lid handle was printed in Polyalchemy Elixir Abyss at 0.1 layer height. It's a rather small part, so pay attention to minimum layer time and ensure good cooling and appropriately slow speeds. Printing time was about 45 minutes.</p> <p>I've included a file for a gem shape that I originally intended to attach to the lid handle and print it in an emerald green filament, but I ran out of time, and I thought the handle looked good as is.</p> <h3>Post-Printing</h3> <p>I used gel superglue to attach the lid top and lid base. The gel gives me enough working time to get the base centered before it sets.</p> <p>The lid top has a cut out shape for the lid handle. You may need to clean up the edges a bit to get it to fit. It should be fairly snug. I ended up trimming off a bit of the bottom edge of the handle part and it fit perfectly. Use superglue to secure it.</p> <p>Since I used wood filament I wanted to see how well it would sand. I used an 80 and 120 grit foam pads and sanded the rounded edges until the layer lines were gone. It left a very smooth and soft surface. I didn't try staining it, but would really like to see how that would turn out.</p> <h3>How I Designed This</h3> <p>I used this as a project to learn Fusion 360 as well. A few YouTube videos later, and I was on my way. Lars Christensen has a great channel with lots of tutorials. I recommend anyone interested in learning Fusion 360 give it a try. <a href="https://www.youtube.com/channel/UCo29kn3d9ziFUZGZ50VKvWA">https://www.youtube.com/channel/UCo29kn3d9ziFUZGZ50VKvWA</a></p> <p>I started with a box shape using the golden ratio, and started adding some filets and chamfers, and sketched out some art deco designs on the sides as embossments.</p> </div></p></p> Category: Art
With this file you will be able to print Art Deco Jewelry Box with your 3D printer. Click on the button and save the file on your computer to work, edit or customize your design. You can also find more 3D designs for printers on Art Deco Jewelry Box.
