Arrow Through Gear Valentine's Heart With Stand!
thingiverse
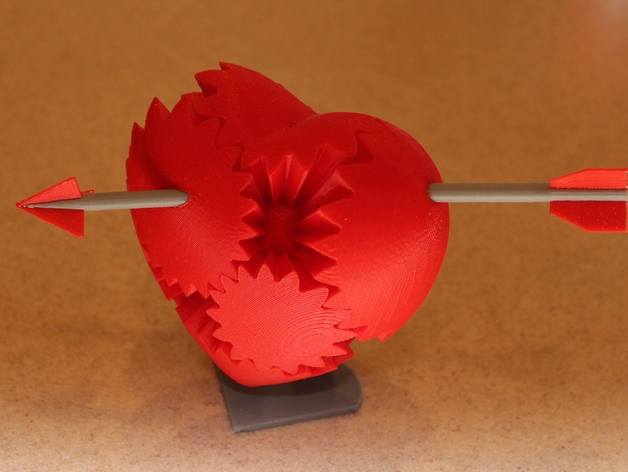
I had to resist simply copying Emmett's design, so I added Cupid's Arrow and a display stand to give it a personal touch. The arrow is available in both dual-extrusion (because I can do that) and one-color versions. However, the two tips and tails cannot be used individually. If you're only interested in printing a heart without the arrow or holes, I recommend checking out the remixed version from Emmett's original design at http://www.thingiverse.com/thing:670944. When it comes to printing, note that no rafts are required, but support is needed for the stand. The recommended print settings are red for the heart, 10% infill, and a .2mm layer height. The stand can be printed in gray, also with 10% infill and .2mm layer height. If you have a dual extruder, you can use the four STL files provided to create the tip and tail of the arrow. I've designed it with built-in supports that should snap off after printing. Single extruders, on the other hand, can print the one-color arrow. For assembly, check out Emmett's original heart design for tips on how to put everything together: http://www.thingiverse.com/thing:243278. Each component needs to be tested before snapping it into place; if it doesn't fit smoothly, something is likely amiss. Here's the step-by-step process for assembly: A) The center of the heart has "small" faces and "big" faces. Begin with a "small" face facing upwards and insert a pin into each face. B) Snap the V-notched middle of the top of the heart to the top small face. C) Find the end with a single tooth in the middle (the other side has two teeth surrounding an empty space); align this single tooth with one of the big faces. This will be the right side of the heart. D) Identify the lobe, which contains a hole for the arrow tail. E) Attach the "lobe" next to the single tooth on the V gear. The hole is closer to the top of the lobe, and the top two center teeth should fit snugly over the single tooth of the V bit; we'll call this the right side of the heart. F) Find both of these gears, which are relatively flat; they're a mirror image of each other. G) The "hole" gear is on the front left, with little teeth pointing towards the lower right and big teeth pointing upwards. Find where the teeth align neatly with the top V and snap it in place. It should fit smoothly if you got it right. H) Place the mirror of the hole gear in the back of the V. I) Locate the oval-shaped gear, which belongs on the left side; the bottom surface should have a single centered tooth. This gear should slide easily into the gap between the two previous gears. J) The pointy gear is the next piece to attach. I believe it's symmetrical. Align the longer side with the heart. K) Finally, attach the two smallest round gears. The smallest teeth face towards the center of the heart. If you can't make them fit, they're likely in the wrong orientation. Add Arrow: The arrow should slide into place and form an imaginary straight line. It doesn't matter which end is which. You might need a dab of glue to keep it snugly in place. Stand: Assembling the stand requires some finesse. Clean off the supports, then gently slide the stand between the gears in the back of the heart. You may need to wiggle the gears slightly. Be aware that the stand blocks access to the gears, so you'll have to remove it if you want to play with the heart. If you're interested in supporting my projects, check out and share my Working Lego R2-D2 YouTube channel at http://www.youtube.com/MyL3G0 - I make a few pennies off the ads. Copyright 2015 - Creative Commons Attribution - Non-Commercial (by-nc) license.
With this file you will be able to print Arrow Through Gear Valentine's Heart With Stand! with your 3D printer. Click on the button and save the file on your computer to work, edit or customize your design. You can also find more 3D designs for printers on Arrow Through Gear Valentine's Heart With Stand!.