Arduino Pov " PERSISTENCE of VISION
thingiverse
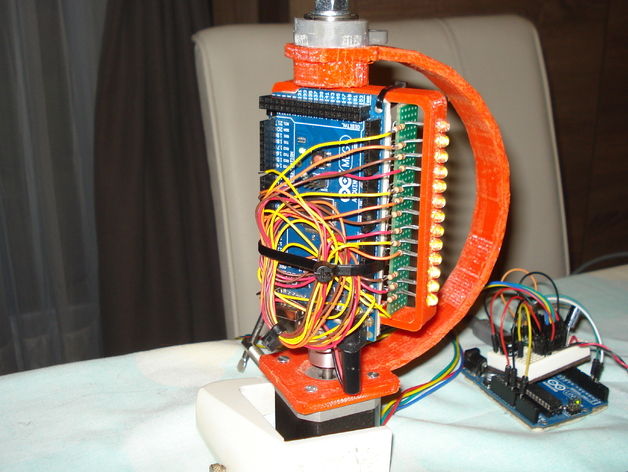
I stimulate DIY enthusiasts. How I Designed This Point of View I started with this link: http://www.instructables.com/id/Drive-a-Stepper-Motor-with-an-Arduino-and-a-A4988-/. With this link, I set up the stepper driver. This link, http://howtomechatronics.com/tutorials/arduino/how-to-control-stepper-motor-with-a4988-driver-and-arduino/, is where I learned about speed control. I considered using 13 LEDs, but I don't know why; many online POV programs work with 5,6,7,8, or 10 LEDs. I'm not a skilled programmer. Normally, I'd use two Arduino Uno boards, but one was lost due to an incorrect connection. That's why the POV uses an Arduino Mega - it also works with an Arduino Uno. Since I originally planned to use an Arduino Uno, I kept the 13 LEDs. The threaded rod is 8mm in diameter and 150mm long; the two bearings are 608ZZ. The total height of the project is 220mm high. The outer arch has a 150mm diameter, while the inner rectangle measures 95mm high by 70mm wide by 15mm thick - with about 3mm clearance. This project is still under construction. My next steps will be to find a good program, calibrate it to reduce vibrations, and design better support for the POV so it won't fall while running.
With this file you will be able to print Arduino Pov " PERSISTENCE of VISION with your 3D printer. Click on the button and save the file on your computer to work, edit or customize your design. You can also find more 3D designs for printers on Arduino Pov " PERSISTENCE of VISION.