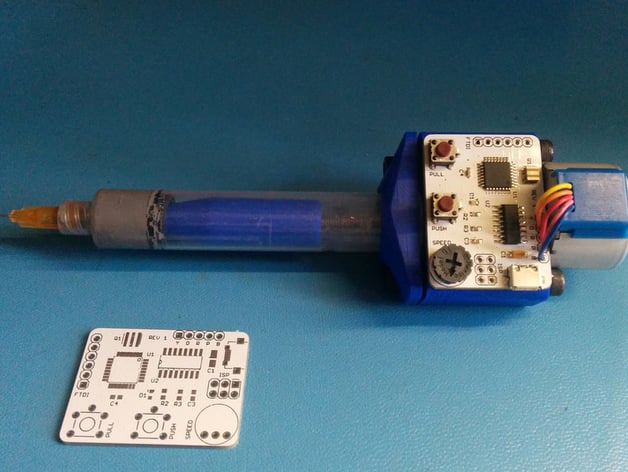
Arduino Motorized SMT Solder Paste Dispenser
thingiverse
This motorized solder paste dispenser for soldering SMT boards draws inspiration from this item on thingiverse http://www.thingiverse.com/thing:384680. Find its home directory on github at https://github.com/zapta/misc/tree/master/paste_injector where it includes hardware and firmware designs of a compatible controller board, which is Arduino compatible - in fact, it even looks like an Arduino Pro Mini to the Arduino IDE. Check out this schematic for further reference: https://github.com/zapta/misc/raw/master/paste_injector/eagle/paste_injector_schematic.pdf BOM information can be found at https://github.com/zapta/misc/blob/master/paste_injector/eagle/paste_injector_bom.csv and an EEVBLOG discussion thread is available at http://www.eevblog.com/forum/reviews/solder-pasteflux-manual-syringe-applicator/150/ This project successfully prints out using both PLA and ABS with standard slicing parameters - three layers, twenty percent infill. These hints may be of use: Print the motor axis coupler with a high extruder temperature for strong interlayer bonding. You can buy step motors in many eBay sellers, but remove any unnecessary ULN2003 driver PCBs they come with since they're not needed here. Make sure to minimize the free play on the motor axis when attaching the coupler by pulling out the motor shaft using a sharp knife while pushing the coupler toward it - just before tightening the coupler screws will do. For threading inserts, use a standard soldering iron and apply heat; it helps. Do not press too hard or you'll clog up the internal hole. Preferably tapered ones as specified in the BOM will give the best results, especially with the plunger rod insert which might get clogged otherwise. Insert threaded inserts without force by letting the heat do its job; this improves adhesion. When attaching them, apply thin and sticky solder paste such as Chip Quik T5 - and for PCB sticking issues, dilute it with IPA if necessary. Make sure there are no air bubbles in the syringe or the rate of flow control becomes more difficult to use. For dispensing purposes, hold both the syringe (right hand) and PUSH button (left hand), as two-handed usage gives more stability. Attach the PCB to the motor mount using a strong tape like Scotch Exterior Mounting Tape. Secure buttons with this extra support. Only attach it where needed - small pieces will suffice for good bonding. The tape works best if covered over both sides of the PCB, especially under the button area for even distribution and maximum stickage. You'll also find a small conical part below the rubber seal; just glue this onto the model when done with printing before you insert it into place - eliminating that pesky air pocket once again, by which I mean remember those annoying bubbles? Store your solder paste at room temperature if possible or even better yet refrigerate but don't put electronics inside (no problem), or use both and not remove screws off this case either so there isn’t risk inserted; just take one apart only then close lock tight until usage after done cleaning. You can get these caps anywhere too - including those Amazon places like ebay.
With this file you will be able to print Arduino Motorized SMT Solder Paste Dispenser with your 3D printer. Click on the button and save the file on your computer to work, edit or customize your design. You can also find more 3D designs for printers on Arduino Motorized SMT Solder Paste Dispenser.
