Arduino Handheld Game Console Case
myminifactory
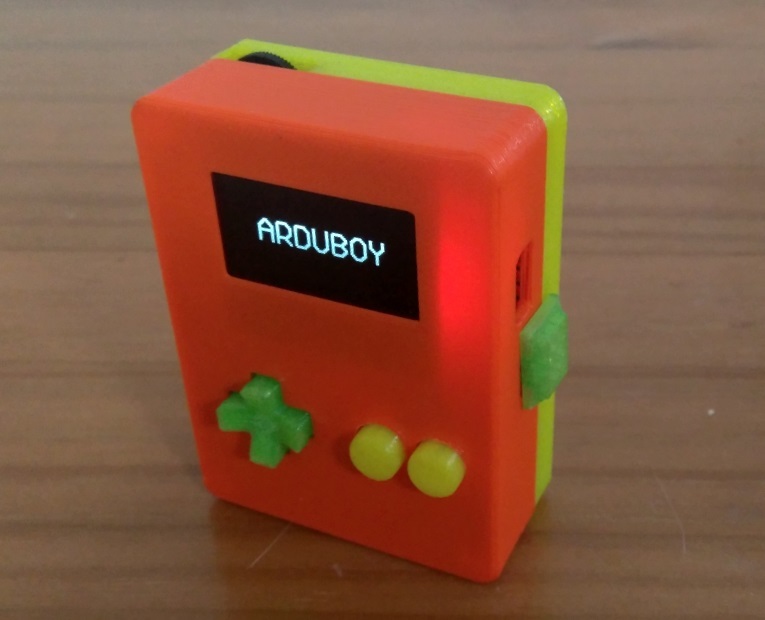
Hello!\r\nI often create unusual projects using Arduino boards.\r\nRecently, I made an Arduboy clone with buttons, a screen, a speaker, and a Pro-micro soldered onto a 70x50mm board. The circuit is powered by two small 3V batteries or via USB.\r\nFor any questions about electronics and connecting the components, visit the Arduboy Community (https://community.arduboy.com). You'll find plenty of information and talented individuals who develop games, software, hardware, and are eager to help.\r\nAfter building the Arduboy clone, I designed a simple case for it.\r\nThere are two versions: one with a cross-hat for direction buttons and another with four round buttons.\r\nThe top and back pieces are attached using two M2 screws (you can also use 2.5 screws).\r\nI used the following components:\r\nArduino Pro Micro\r\nOLED 1.3''\r\nSpeaker\r\nPotentiometer to control speaker volume\r\nSwitch buttons (repurposed from broken mice) available at a low cost on eBay or electronics stores.\r\nThe total cost of electronics is between €10-15, and most were purchased from Chinese sellers on eBay.\r\nAlso, the Screen uses the SSH1106 driver, which isn't compatible with the original Arduboy library. However, you can easily find a modified version in the community for different microcontrollers and screens.\r\nEasy to print, no supports required, just print, assemble with two screws, and enjoy!\r\nDesigned using 123DDesign software; I've included the original file, so feel free to remix or modify it as needed.\r\nHave fun!
With this file you will be able to print Arduino Handheld Game Console Case with your 3D printer. Click on the button and save the file on your computer to work, edit or customize your design. You can also find more 3D designs for printers on Arduino Handheld Game Console Case.
