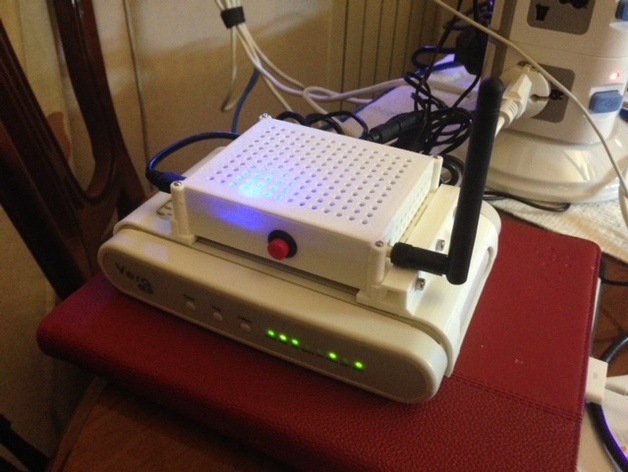
Arduino gateway for vera3 micasaverde
thingiverse
This box must be affixed permanently to a Vera3 unit for two reasons: ensuring continuous battery power availability and holding an Arduino gateway as described in this project link - http://forum.micasaverde.com/index.php/topic,16170.0.html. A 3D photo illustrates the setup before incorporating the Arduino. Watch a brief demonstration here - http://www.youtube.com/watch?v=yUruDvIdTR8. To assemble the model: 1. Position all models without support for printing on a Replicator 2. 2. Place box001 bottom down, using small helper discs at the corners. 3. Arrange box002 face down, while standing box003 and box004 left or right. 4. Position box005 bottom down, excluding p6002.1_vera_gateway_sborka_001.STL as it's non-functional. 5. Insert Arduino Nano and radio module into box001 using self-tapping screws (M1.2). 6. Solder a few single wires between the Arduino and radio following this guide - http://code.mios.com/trac/mios_arduino-sensor/wiki/ConnectingRadioModule. 7. Insert the battery into box001. 8. Heat and stick star nuts M2 (8 pieces) from top and bottom into box001, and M3 (3 pieces) into box005. 9. Screw box002, box003, and box005 onto box001. 10. Apply double-sided tape to precisely attach box003, box004, and box005 to Vera, ensuring battery wires are on the back side of Vera3. 11. Tighten M3x3 screws to secure box004 to the rest of the assembly. 12. Connect the Arduino's USB to Vera and the battery to Vera3 using plastic sticks to hold wires in place on box001. 13. The red button is for future use.
With this file you will be able to print Arduino gateway for vera3 micasaverde with your 3D printer. Click on the button and save the file on your computer to work, edit or customize your design. You can also find more 3D designs for printers on Arduino gateway for vera3 micasaverde.
