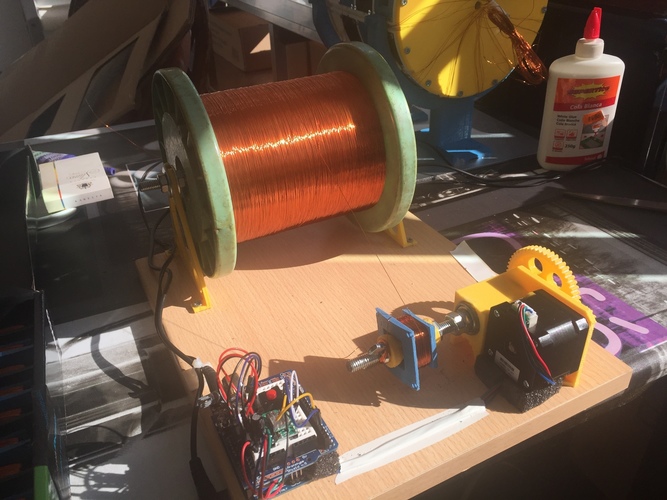
ARDUINO controled coil winder with nema 17
pinshape
It's a fantastic project for anyone who loves electronics. I've looked everywhere and couldn't find anything remotely controlled, so I decided to create it myself. This design was inspired by the user Irondmax from Thingiverse. Here are the parts you'll need: * Arduino control board - I used LEONARDO, but any board will work fine * Push-on/off switch connected to power + 12v of the NEMA * Pololu controller stick * 100k potentiometer to adjust the velocity of the stepper motor * 100mf 60v capacitor * Protoboard * Prototype wires or anything else you need The code is as follows: /* Simple Stepper Motor coil winding by Nelujones */ // Define pin numbers const int stepPin = 3; const int dirPin = 4; int customDelay, customDelayMapped; void setup() { // Set the two pins as outputs pinMode(stepPin, OUTPUT); pinMode(dirPin, OUTPUT); digitalWrite(dirPin, HIGH); // Enable the motor to move in a particular direction } void loop() { // Get custom delay values from the speedUp function customDelayMapped = speedUp(); // Make pulses with custom delay, depending on the Potentiometer, from which the speed of the motor depends digitalWrite(stepPin, HIGH); delayMicroseconds(customDelayMapped); digitalWrite(stepPin, LOW); delayMicroseconds(customDelayMapped); } // Function for reading the Potentiometer int speedUp() { int customDelay = analogRead(A0); // Read the potentiometer // Convert read values of the potentiometer from 0 to 1023 into desired delay values (300 to 4000) int newCustom = map(customDelay, 0, 1023, 300, 4000); return newCustom; }
With this file you will be able to print ARDUINO controled coil winder with nema 17 with your 3D printer. Click on the button and save the file on your computer to work, edit or customize your design. You can also find more 3D designs for printers on ARDUINO controled coil winder with nema 17.
