Arduino Acrylic VU tower
thingiverse
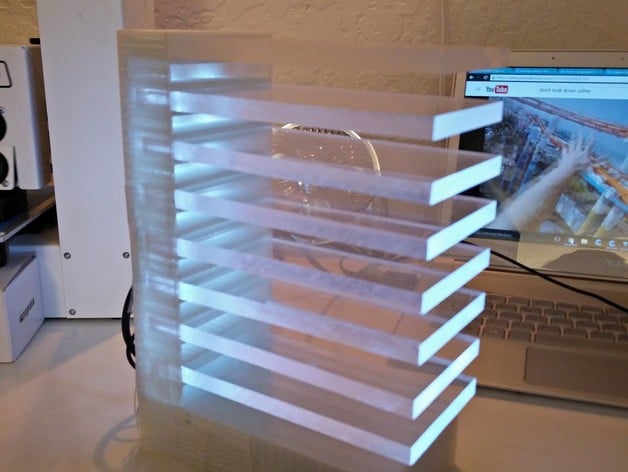
For some reason I had an issue uploading the video to Thingiverse. Anyways, I designed this acrylic VU Tower that plugs into an audio port and a speaker. It's pretty cool and works well. You'll need 3/8" thick slabs of acrylic, 3"x5", which are friction fit so it's going to be tight. I printed two acrylic holders and Krazy Glued them together, then glued the base to it. To assemble this project, you will also need an audio splitter, an extra audio cable with 2 wires (also known as a Y-splitter or stereo extension cable), 5mm LEDs, which fit perfectly, Source code for the Arduino I found online by Kenny Vanpaemel and tweaked it to work with mine. The Arduino code is quite simple: int led[10] = {3, 4, 5, 6, 7, 8, 9, 10}; // Assign the pins for the LEDs int leftChannel = 0; int left, i; void setup() { for (i = 0; i < 8; i++) pinMode(led[i], OUTPUT); Serial.begin(9600); } void loop() { left = analogRead(leftChannel); Serial.println(left); left = left / 10; if (left == 0) { for(i = 0; i < 10; i++) digitalWrite(led[i], LOW); } else { for (i = 0; i < left; i++) digitalWrite(led[i], HIGH); for(i = i; i < 8; i++) digitalWrite(led[i], LOW); delay(0); } } It should work. Enjoy Printing Settings Printer: Prusa I3 Rafts: No Supports: No Resolution: 0.2mm Infill: 30%
With this file you will be able to print Arduino Acrylic VU tower with your 3D printer. Click on the button and save the file on your computer to work, edit or customize your design. You can also find more 3D designs for printers on Arduino Acrylic VU tower.