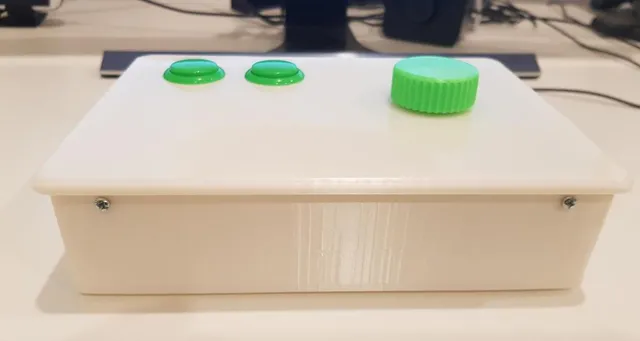
Arcade Spinner using a Mouse
prusaprinters
Parts 1 x Mouse (I used a Logitech M90) 1 x Ball bearing 8mm x 12mm x 3.5mm Ball Bearing 2 x Sanwa OBSF-30 buttons 1 x PG7 cable gland 6 x Screws for box - Self tapping 15mm long with a diameter of 3.5mm 2 x Small screws to attach mouse Other: blue masking tape, small washer and wire The bottom part of the box contains stands to support a Logitech M90 mouse. You will need to adapt these or improvise to support a different mouse. The ball bearing should snap into place into the lid of the box. Push the spinner top into the ball bearing until there is about 3mm of clearance between the top of the lid and the bottom of the spinner handle. Apply a tiny bit of super glue to the bottom part of the shaft where it meets the inner part of the ball bearing. To position the bottom part of the spinner, I glued a tiny washer onto the mouse and only slightly positioned the bottom spinner piece into the shaft of the top spinner piece and let it slide into the correct depth as I positioned the lid on the box. I found using blue masking tape improved the mouse detecting the movements and I glued a few coins onto the spinner bottom to add some weight. Print Settings Printer Brand: Creality Printer: CR-10 Mini Rafts: Doesn't Matter Resolution: .2 Infill: 20% Category: Toys & Games
With this file you will be able to print Arcade Spinner using a Mouse with your 3D printer. Click on the button and save the file on your computer to work, edit or customize your design. You can also find more 3D designs for printers on Arcade Spinner using a Mouse.
