Arcade Prototype Controller
prusaprinters
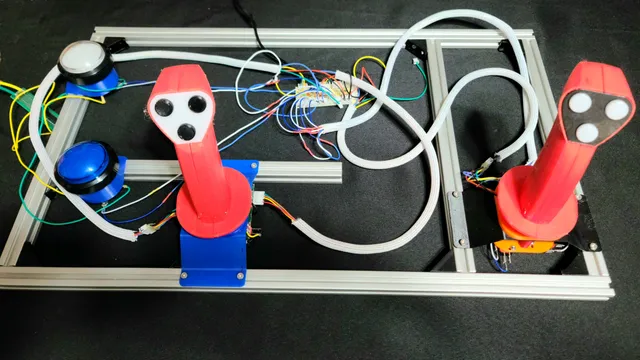
The Arcade Prototype ControllerIntroWhen the controls line up with gameplay mechanics it really amplifies the experience. For that reason, I've started to build special setups for playing different games on stream. Eventually, I would also like to build my own arcade game (cabinet and all), though that's still a little ways off.In the meantime, this is the system I've been using for setting up various control schemes using the same materials over and over. Base MaterialsFrameThis is a 20-series-based system. Everything is designed to be attached to 20-series aluminum extrusion.This system is designed around M4 Bolts/T-Nuts to attach mounts. M4 T-Nuts can also be used to assemble parts of the frame as there is relatively little force acting on the frame directly.ElectronicsI'm currently running the APC off of a generic “Zero-delay” arcade usb encoder board. Some games work straight off the encoder, but sometimes I need to go through the XBox 360 Controller Emulator (x360ce) to create custom key bindings.I've found that the input wires that comes with the Encoder are extremely short and needed extending. I've also created additional hookup wires/wire harnesses from scratch using 22 gauge (you could definitely go lighter, 22 gauge is simply easier for me to use), JST-XH Connectors (2.54mm headers), and Quick Connect Terminals (the size varies depending on what you are hooking up, so make sure to measure; I happened to need 4.8mm and 6.3mm myself).InputsI use both manufactured products off the web (e.g.- 3-inch Arcade Buttons) and inputs built from scratch using microswitches and momentary switches. For the prebuilt inputs I've designed 3D printed mounts to attach them to the 2020. AssemblyI started out with a rectangular 2020 frame connected with corner brackets, but am in the middle of mounting only the top and bottom parts to a finished sheet of MDF (I just happened to get a sheet of MDF for free, otherwise the base would have been whatever I got ahold of). A network of 2020 extrusions then gets attached to the top and bottom extrusions via corner brackets and T-Nuts in order to get the controls where I want them.Then, as said before, inputs are mounted in position using custom printed mounts and T-Nuts.Inputs are then plugged into the Encoder and the Encoder's USB plug is connected to the computer. Some inputs require additional power (i.e.- they have additional leds): you'll need to have another power source available for these. 3D Printed Mounts and InputsThe CollectionCorner Brackets for connecting extrusionMounts for 3-Inch Arcade Buttons3D Printed JoystickPCB VersionFlight/Twin Stick AttachmentBi-Directional Rotating ControllerDigital Sliders Additional InfoI've designed many of these things live on YouTube, and also use the controller while streaming various games.
With this file you will be able to print Arcade Prototype Controller with your 3D printer. Click on the button and save the file on your computer to work, edit or customize your design. You can also find more 3D designs for printers on Arcade Prototype Controller.
