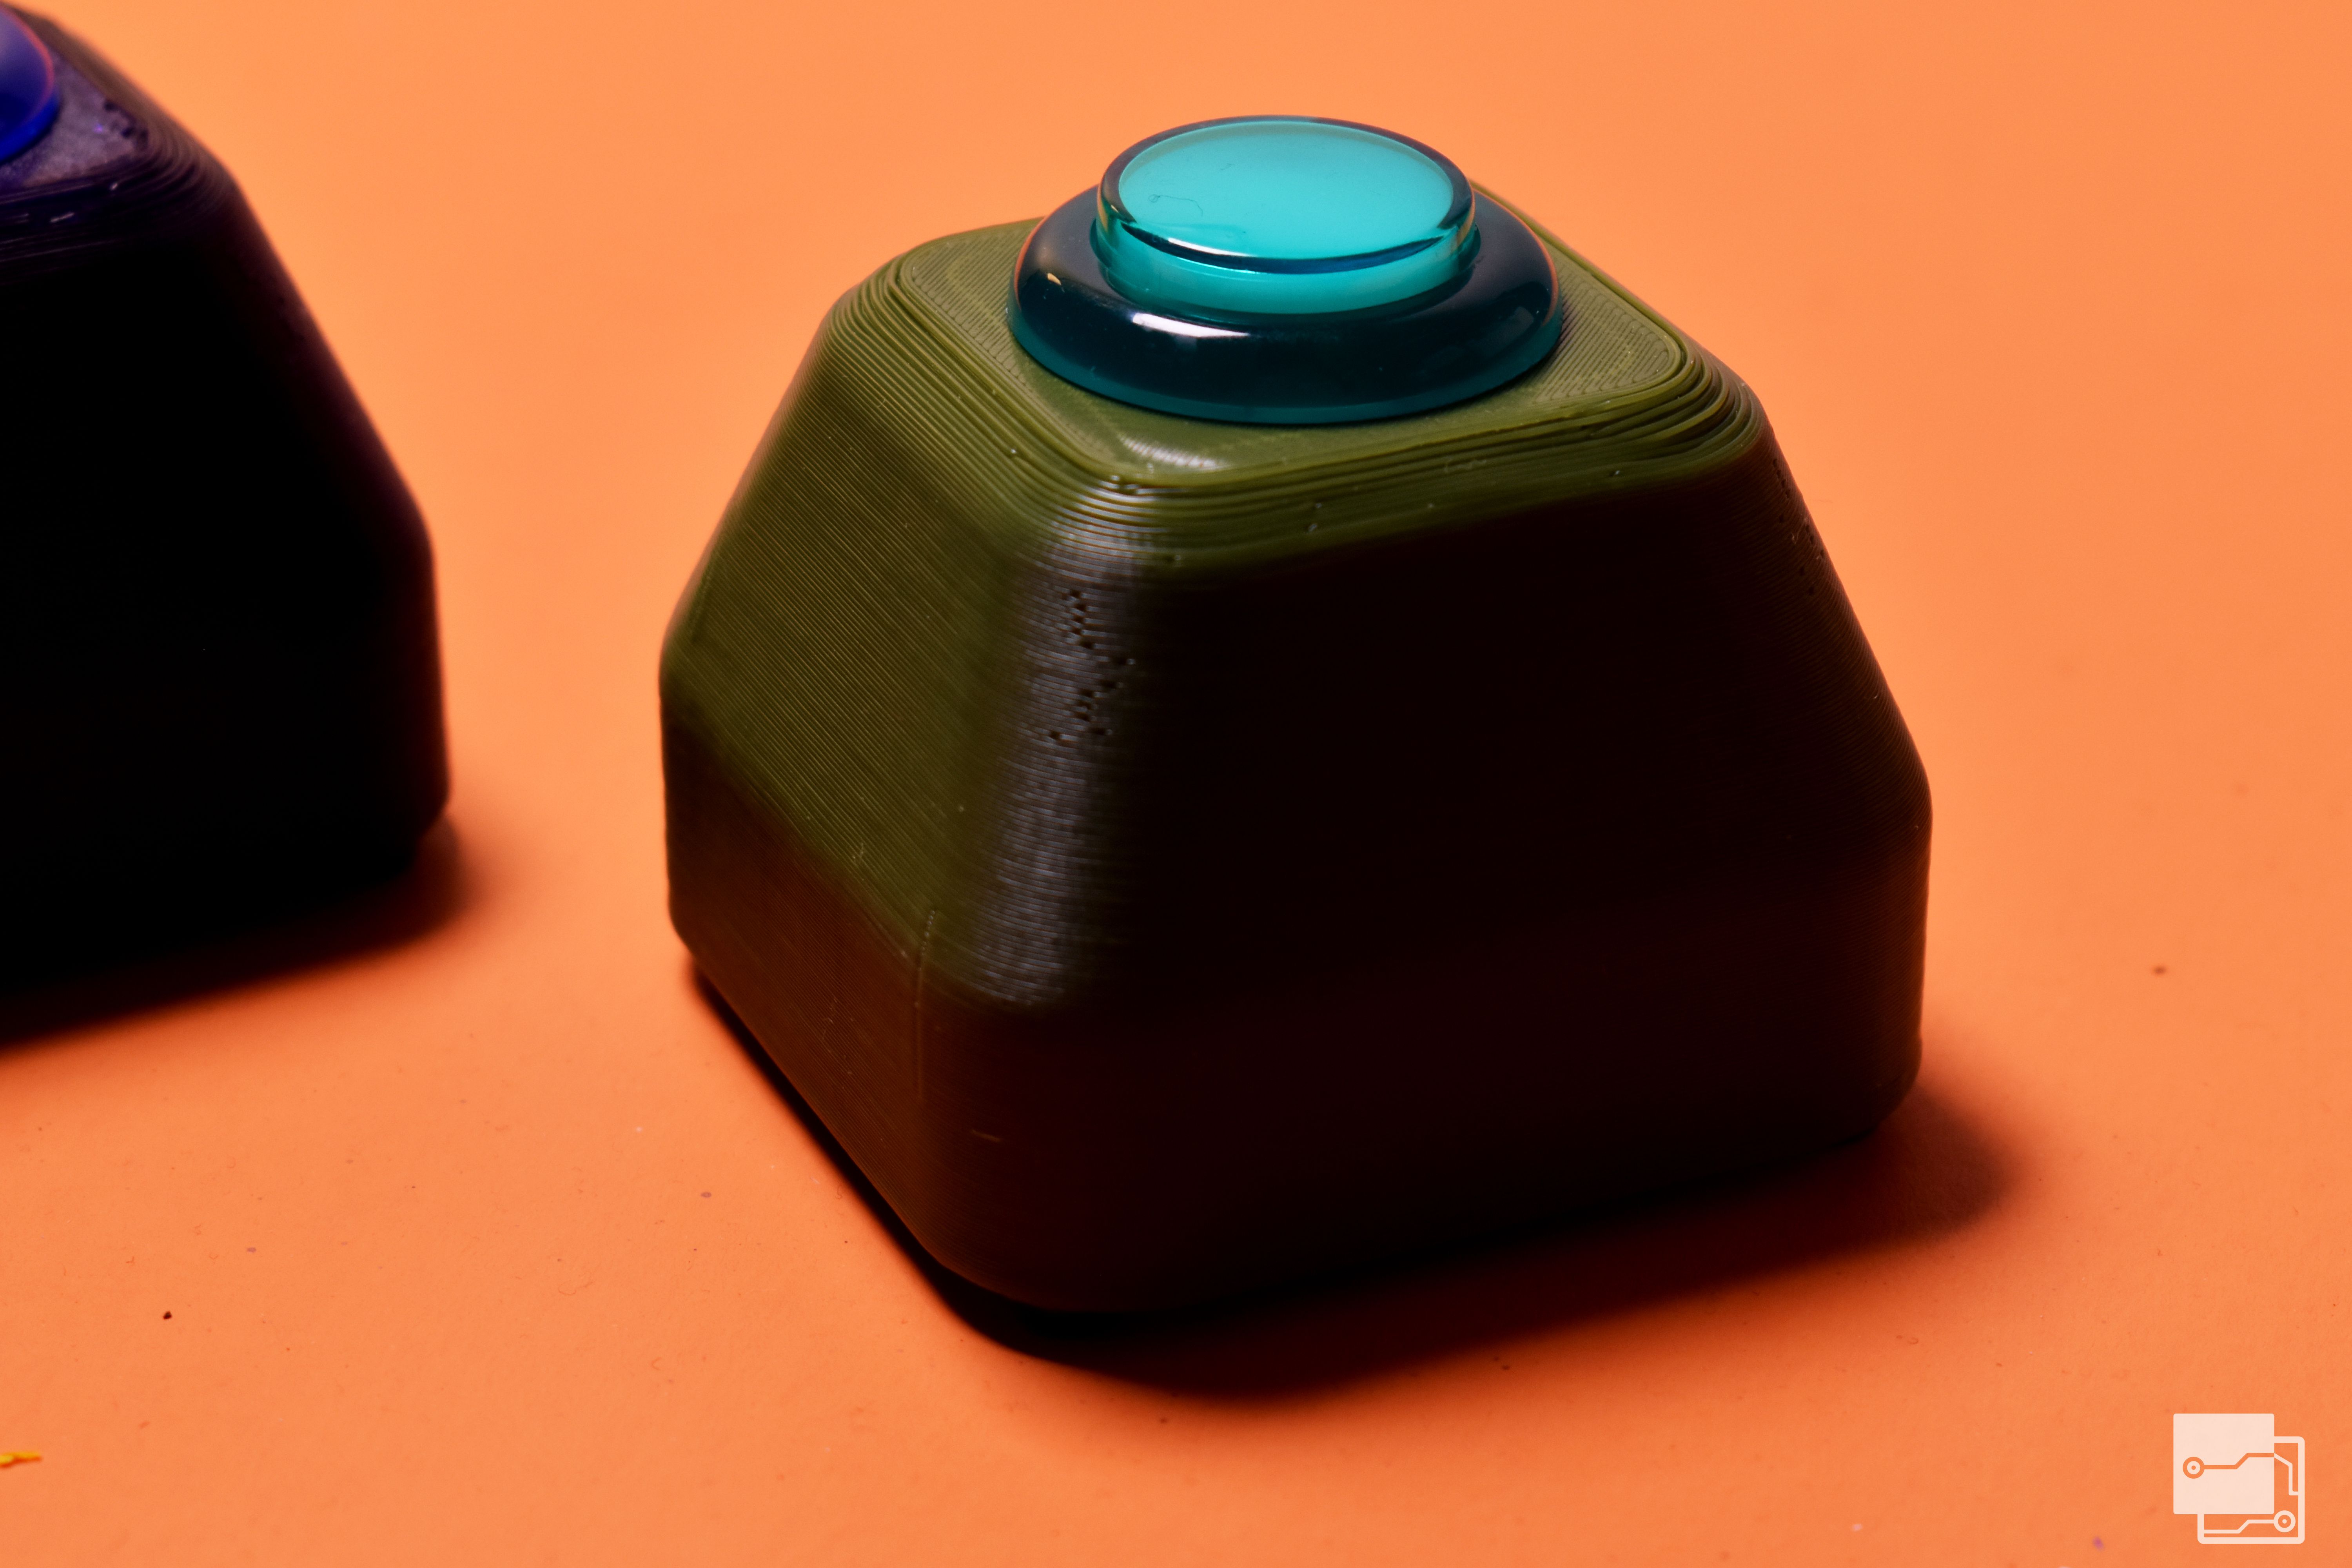
Arcade IoT Button
prusaprinters
<h3><strong>What is it?</strong></h3><figure class="image"><img src="https://media.prusaprinters.org/media/prints/75450/rich_content/80d75bfc-4bcf-4013-8cae-917eadfdcd7d/chr_6627.jpg#%7B%22uuid%22%3A%223582ff57-7856-4746-8b6c-c2b11f94c64e%22%2C%22w%22%3A6000%2C%22h%22%3A4000%7D"></figure><p>Enclosure for <a href="https://www.adafruit.com/product/3490">30mm Arcade Button with LED</a>. They are sold by adafruit or digikey. But I think you can find them in other places too.</p><h3><strong>Why make it?</strong></h3><p>Initial idea was just a secret santa gift but then I made multiples of these for other people and at home. Since it has a mounting for ESP32 it can be made as an IoT button therefore the sky is the limit.</p><h3><strong>Additional use cases</strong></h3><p>You can use this as just a regular button and connect button/LED wires directly to a microcontroller.<br>Can use ESP32 to have WiFi connectivity + your custom project<br>For basic functions <a href="https://esphome.io/">ESPHome</a> is probably the easiest way to setup IoT button.<br>Or it can be used with <a href="https://www.home-assistant.io/">Home assistant</a></p><h3>Time tracking example</h3><p> </p><figure class="image"><img src="https://media.prusaprinters.org/media/prints/75450/rich_content/ec88122f-c8df-47e7-a0a0-ed2f0cd6e827/demo-lower.gif#%7B%22uuid%22%3A%22643ea292-a7b8-497e-97b0-6716e080a1d7%22%2C%22w%22%3A480%2C%22h%22%3A320%7D"></figure><p>I like to track time of various tasks or activities. Therefore, having this button on a table where I can just bash it to start the timer and then bash again to stop and send me a message with time delta in human readable time.</p><p>Basic data workflow.</p><p>Button press to ESP32.<br>ESPHome Publishes message to Mosquitto MQTT server.<br>In node-red I subscribe to the message and start counting the time.<br>Once pressed again node-red calculates the delta.<br>Prepares a text message and activates a python script which sends it to telegram chat via telegramBot.</p><p>Button - ESP32 - MQTT - Node-Red - Telegram</p><p>This guide should work for raspberrypi setup or any other debian based server.</p><p> </p><h4><strong>BOM</strong></h4><p>1x Enclosure<br>1x ESP32 Board<br>2x 2 position headers 0.1in spacing<br>4x ~6cm wires<br>4x <a href="https://www.digikey.ca/en/products/detail/harwin-inc/M20-1160042/3728123?s=N4IgTCBcDaILZgAwFoCMqBsjEBYIF0BfIA">CONN SOCKET 22-30AWG CRIMP GOLD</a><br>4x <a href="https://www.digikey.ca/en/products/detail/3m/SJ61A1/1768456">Bumper feet</a><br>Shrink tube</p><h4>Assembly</h4><p> </p><p>1. Before printing check what is your ESP32 size and adjust it in FreeCAD under <strong>Enclosure</strong> Body and <strong>ESP back holder</strong> feature<br> </p><figure class="image"><img src="https://media.prusaprinters.org/media/prints/75450/rich_content/ec7f8832-2c64-409c-9046-ec50ac1ecfdf/pxl_20210909_194407599.jpg#%7B%22uuid%22%3A%22ca1f8014-222d-4107-9b7b-3bfe320bb4c3%22%2C%22w%22%3A2592%2C%22h%22%3A1944%7D"></figure><figure class="image"><img src="https://media.prusaprinters.org/media/prints/75450/rich_content/624a3eff-32c0-4b89-9a90-7b8684fd9fd8/pxl_20210909_194357458.jpg#%7B%22uuid%22%3A%22deb83446-0204-4cc8-9422-ddb887e0cfac%22%2C%22w%22%3A2592%2C%22h%22%3A1944%7D"></figure><figure class="image"><img src="https://media.prusaprinters.org/media/prints/75450/rich_content/2f558ebc-9f82-49d0-9f79-9a040b7e339f/selection_615.png#%7B%22uuid%22%3A%222be23d4f-70b2-4d32-b161-548b378f27df%22%2C%22w%22%3A805%2C%22h%22%3A557%7D"></figure><figure class="image"><img src="https://media.prusaprinters.org/media/prints/75450/rich_content/84d4d419-7a38-4f41-97af-e0d5282e4a2f/selection_613.png#%7B%22uuid%22%3A%2250322492-991e-4e38-8edf-eaa866c1b3d9%22%2C%22w%22%3A1590%2C%22h%22%3A684%7D"></figure><figure class="image"><img src="https://media.prusaprinters.org/media/prints/75450/rich_content/81925709-e804-4b89-9b44-303daa4e06ee/selection_614.png#%7B%22uuid%22%3A%22770704e1-04f3-44cd-9c42-c6d04e4fe0e4%22%2C%22w%22%3A1296%2C%22h%22%3A603%7D"></figure><p> </p><p>2. Print. No support needed.</p><figure class="image"><img src="https://media.prusaprinters.org/media/prints/75450/rich_content/055b4e34-10d8-4370-9b24-de9939b3c476/3dprint-buttonlower.gif#%7B%22uuid%22%3A%222bb01dec-4fcf-4f19-bce8-2c1a27cd7837%22%2C%22w%22%3A480%2C%22h%22%3A320%7D"></figure><p> </p><p>3. Cut wires<br>4. Strip wires</p><figure class="image"><img src="https://media.prusaprinters.org/media/prints/75450/rich_content/40e43e58-d59b-45b5-81e8-26395053f9ea/2_strip-wires.gif#%7B%22uuid%22%3A%220d1263b0-ee44-4d2d-8b5a-7afad876f5b4%22%2C%22w%22%3A360%2C%22h%22%3A240%7D"></figure><p>5. Crimp wires</p><figure class="image"><img src="https://media.prusaprinters.org/media/prints/75450/rich_content/76c6146e-8762-4dd6-9c52-09c13c723004/4_crimp-wires.gif#%7B%22uuid%22%3A%2230537fd6-e7bd-4fd7-9fff-8c8120a19f8f%22%2C%22w%22%3A360%2C%22h%22%3A240%7D"></figure><p>6. Insert into housing</p><figure class="image"><img src="https://media.prusaprinters.org/media/prints/75450/rich_content/cd79b341-96c1-4bdb-9b3c-b7010d36ca5b/5_insert-into-housing.gif#%7B%22uuid%22%3A%22fc2b5816-70a5-4ce7-875c-bbc4ebc9827c%22%2C%22w%22%3A360%2C%22h%22%3A240%7D"></figure><p>7. Insert shrink tube</p><figure class="image"><img src="https://media.prusaprinters.org/media/prints/75450/rich_content/0d1d1f0b-188c-4330-b0e9-201babbd2953/6_shrink-tube.gif#%7B%22uuid%22%3A%22f63bd01a-b25a-428b-a9d6-ea29c55c9f06%22%2C%22w%22%3A360%2C%22h%22%3A240%7D"></figure><p>8. Solder Push Button and LED wires</p><figure class="image"><img src="https://media.prusaprinters.org/media/prints/75450/rich_content/d27245a6-473b-4f2e-b242-1286cef95281/7_solder-button.gif#%7B%22uuid%22%3A%229cd2ff2d-9882-4a68-8aa2-ade285587723%22%2C%22w%22%3A360%2C%22h%22%3A240%7D"></figure><p>9. Heat shrink tubes</p><figure class="image"><img src="https://media.prusaprinters.org/media/prints/75450/rich_content/ce12438e-341b-4637-ad3d-c777dba555f4/7b_heat-shrink-tubes.gif#%7B%22uuid%22%3A%22615553e2-b7aa-4af8-91fd-3399aa3d4fbe%22%2C%22w%22%3A360%2C%22h%22%3A240%7D"></figure><p>10. Insert Nut into Enclosure</p><figure class="image"><img src="https://media.prusaprinters.org/media/prints/75450/rich_content/78559dcf-d8a9-43d5-a02b-eb4630be2d54/8_insert-nut.gif#%7B%22uuid%22%3A%224f342118-25ea-4211-8a12-a46618bea305%22%2C%22w%22%3A360%2C%22h%22%3A240%7D"></figure><p>11. Insert Button and make sure wires pass through the nut</p><figure class="image"><img src="https://media.prusaprinters.org/media/prints/75450/rich_content/bc2dc1eb-63ab-47da-9c1b-ed87420c96a2/9_insert-button.gif#%7B%22uuid%22%3A%22d310521b-096e-4b72-8afb-95bde530450d%22%2C%22w%22%3A360%2C%22h%22%3A240%7D"></figure><p>12. Turn the nut until tightened</p><figure class="image"><img src="https://media.prusaprinters.org/media/prints/75450/rich_content/d50535e3-82fa-4887-9610-3988e20a3b61/10_screw-nut.gif#%7B%22uuid%22%3A%2274b93a85-2152-474b-bdeb-79492aa8ab8e%22%2C%22w%22%3A360%2C%22h%22%3A240%7D"></figure><p>13. Choose GPIO Pins. On ESP32 Dev kit I am using <strong>pins that have GND next to them</strong></p><p> </p><figure class="table"><table><tbody><tr><td>Name</td><td>Pin</td></tr><tr><td>LED</td><td>21</td></tr><tr><td>Button</td><td>19</td></tr></tbody></table></figure><p> </p><p>14. Connect to ESP32 pins.</p><figure class="image"><img src="https://media.prusaprinters.org/media/prints/75450/rich_content/5264b8fb-ac00-428d-925c-5a9275d88629/11_connect-esp.gif#%7B%22uuid%22%3A%222892413d-1f0a-40ef-8279-559da202478a%22%2C%22w%22%3A360%2C%22h%22%3A240%7D"></figure><p>15. Insert ESP32</p><figure class="image"><img src="https://media.prusaprinters.org/media/prints/75450/rich_content/0c6bd19b-1f11-4fc0-961a-66b0a0d7fcff/12_insert-esp.gif#%7B%22uuid%22%3A%222a12b413-a19b-4c6f-adba-64a4a3cae87a%22%2C%22w%22%3A360%2C%22h%22%3A240%7D"></figure><p>16. Add rubber feet</p><figure class="image"><img src="https://media.prusaprinters.org/media/prints/75450/rich_content/b3d61bc0-d2c7-4faa-8170-a3b2769fbcae/13_rubber-feet.gif#%7B%22uuid%22%3A%2231038d69-2056-4b15-a1f8-c0b126620862%22%2C%22w%22%3A360%2C%22h%22%3A240%7D"></figure><h4>MQTT Broker</h4><p>Install or know IP of your MQTT Broker.<br>I used <a href="https://mosquitto.org/download/">Mosquitto broker</a></p><h4>ESPHome firmware setup</h4><p>Check out how to setup ESPHome.<br>And use this template.</p><p>1. Navigate to IoT_files directory<br>2. Setup python environment (tested on Python 3.7.7)</p><pre><code class="language-plaintext">python3 -m venv env</code></pre><p><br>3. Activate environment</p><pre><code class="language-plaintext">source env/bin/activate</code></pre><p><br>4. Upgrade pip</p><pre><code class="language-plaintext">pip install --upgrade pip</code></pre><p>5. Install esphome</p><pre><code class="language-plaintext">pip install esphome</code></pre><p><br>6. Create <strong>secrets.yaml</strong> file with content of your wifi credentials</p><pre><code class="language-plaintext">ssid_name: "xxxxxxxxx" ssid_psw: "xxxxxxxxx" ap_ssid_name: "xxxxx" ap_ssid_psw: "xxxx"</code></pre><p> </p><p>7. Update IoT_files/arcade_button.yaml Board from <a href="https://platformio.org/boards?count=1000&filter%5Bplatform%5D=espressif32">platformio list</a><br>or try running esphome wizard and find your board in that list<br>8. Setup <a href="https://mosquitto.org/download/">MQTT broker</a> and update broker IP in <strong>arcade_button.yaml</strong><br>9. Update binary_sensor and output pins<br>10. Compile and flash firmware</p><pre><code class="language-plaintext">esphome arcade_button.yaml run</code></pre><h4>TelegramBot python script</h4><p>Create Bot using <a href="https://core.telegram.org/bots#6-botfather">BotFather</a><br>Once bot is created you will have bot API token.</p><p>On the same server as node-red setup python env or re-use esphome env</p><p>Install telegram bot libraries</p><pre><code class="language-plaintext">pip install python-telegram-bot</code></pre><p>Run command to find out your chat_id with your token<br>Add telegram bot to a channel type anything in the channel and bot will respond with it's ID</p><pre><code class="language-plaintext">python3 telegram_chat_id.py --token abcd:123456798</code></pre><p>Then close the script <strong>Ctrl+C</strong></p><figure class="image"><img src="https://media.prusaprinters.org/media/prints/75450/rich_content/551ff2e9-8039-4383-886b-bd98f179ce3c/chat-id.gif#%7B%22uuid%22%3A%221ecc60a5-bb8f-4f28-95ed-72c0246fc6de%22%2C%22w%22%3A720%2C%22h%22%3A480%7D"></figure><p> </p><p>Get full path for python env and oT_files/telegram_notifications.py. We will use them in next step</p><h4>Node-red Flow</h4><p>Install node-red from <a href="https://nodered.org/docs/getting-started/raspberrypi">getting started guide</a></p><p> </p><pre><code class="language-plaintext">bash <(curl -sL https://raw.githubusercontent.com/node-red/linux-installers/master/deb/update-nodejs-and-nodered)</code></pre><p>Import IoT_files/node-red-flow.json</p><p>Make sure MQTT node is connected to your server</p><figure class="image"><img src="https://media.prusaprinters.org/media/prints/75450/rich_content/1d0b842f-e393-4127-a1d6-85424453e9cb/selection_622.png#%7B%22uuid%22%3A%221f69a555-38e6-4ead-a8f4-43197973e7bc%22%2C%22w%22%3A1855%2C%22h%22%3A947%7D"></figure><figure class="image"><img src="https://media.prusaprinters.org/media/prints/75450/rich_content/123f7332-02ec-4ab1-b38a-8f6081b10f01/selection_623.png#%7B%22uuid%22%3A%2298589ffd-28a3-4ccb-a1d9-c92e5d4df20e%22%2C%22w%22%3A669%2C%22h%22%3A887%7D"></figure><figure class="image"><img src="https://media.prusaprinters.org/media/prints/75450/rich_content/d612c3e5-579e-4907-8e47-d3976926b7bd/selection_624.png#%7B%22uuid%22%3A%221a3cf228-eb02-4787-8ab9-942a592c95a0%22%2C%22w%22%3A694%2C%22h%22%3A829%7D"></figure><p> </p><p> </p><p>Modify <strong>Setup variables </strong>nodes with your Chat ID, bot token and path to python env and script.</p><figure class="image"><img src="https://media.prusaprinters.org/media/prints/75450/rich_content/70ccf01e-3d5f-4697-bd52-38eb9e31fd65/selection_625.png#%7B%22uuid%22%3A%22f0483255-a51e-4e1b-ab18-728e182f8f03%22%2C%22w%22%3A1456%2C%22h%22%3A885%7D"></figure><h4>Test it out!</h4><p> </p><p>Latest updates are on <a href="https://gitlab.com/Open-Hardware-Designs/arcade-iot-button">GitLab</a>.</p>
With this file you will be able to print Arcade IoT Button with your 3D printer. Click on the button and save the file on your computer to work, edit or customize your design. You can also find more 3D designs for printers on Arcade IoT Button.
