Arc generator ESD test device
thingiverse
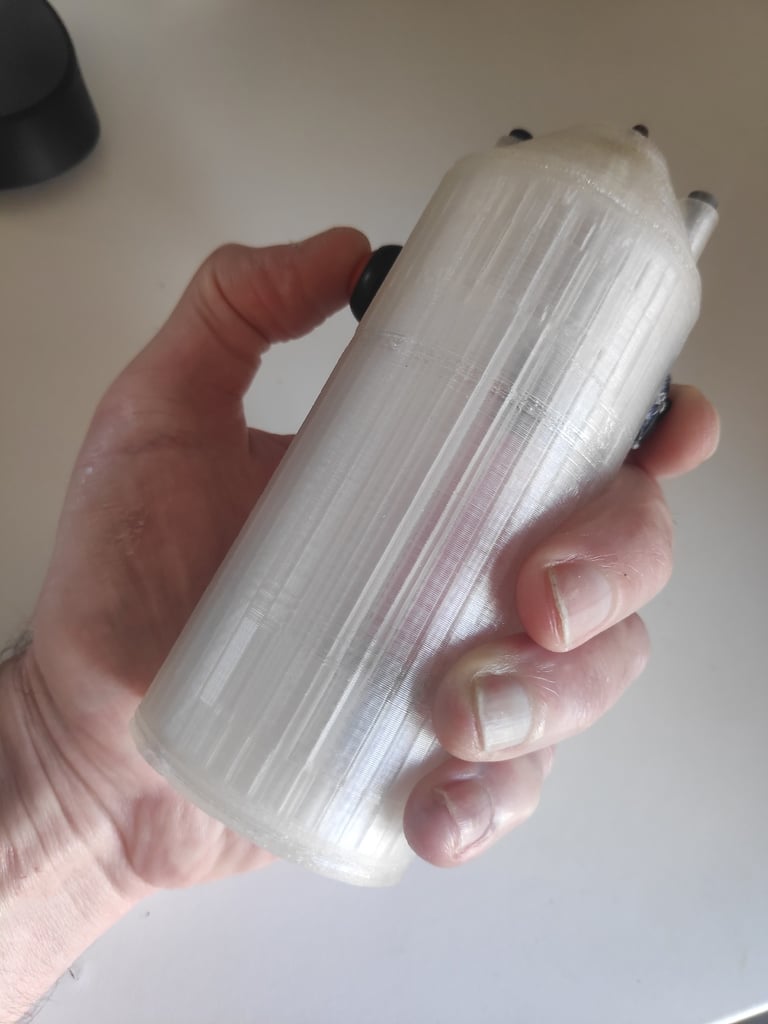
This is a list of materials and tools needed to build a taser gun using a 3D printer. Here are the instructions: **Materials Needed** * 18650 Li-ion battery * Heat Shrink Tube Kit Set * Electric plug metal parts (for arc ends) * Top part (printed with 3D printer) * Switches (2) * Charging part (printed with 3D printer) * Allen screws **Tools Needed** * Soldering iron TS100 * Blue wire cutter * Hot air blower * Ball end Allen set * Creality Ender 3 3D printer **Instructions** 1. Print all the listed parts. 2. Attach electric plug metal parts to top part using a plier and heat from a gas stove (see attached images for reference). 3. Follow wiring diagram and be careful when soldering wires to 18650 Li-ion battery, as they don't like too much heat. 4. Use shrink tubes on switches. 5. Use 2 switches as safety feature - one to switch it on/off and the other to trigger the taser and avoid accidents. 6. Use Allen screws to attach charging part and top part. **Note**: The author is encouraging readers to share their builds with him, using a heart symbol (❤️).
With this file you will be able to print Arc generator ESD test device with your 3D printer. Click on the button and save the file on your computer to work, edit or customize your design. You can also find more 3D designs for printers on Arc generator ESD test device.