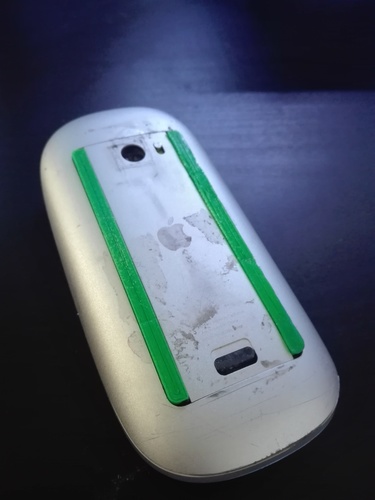
Apple Magic Mouse - Bottom rail - REPLACE PART
pinshape
Apple Magic Mouse users need to replace the bottom rail periodically due to wear and tear on this component. To do so, follow these steps carefully. Firstly, ensure your Magic Mouse is turned off before you begin. Next, locate the tiny screws that hold the bottom rail in place using a flashlight if necessary. Remove these screws with a Torx driver. Now, gently pry the old bottom rail out of its position while being mindful not to damage any surrounding components. Once removed, discard the old part and inspect the area for any remaining debris or dust. Clean this area thoroughly before installing the new bottom rail. To do so, place the new rail into its correct position and secure it with the Torx screws you removed earlier. Finally, turn your Magic Mouse back on and test it to ensure everything is working as expected.
With this file you will be able to print Apple Magic Mouse - Bottom rail - REPLACE PART with your 3D printer. Click on the button and save the file on your computer to work, edit or customize your design. You can also find more 3D designs for printers on Apple Magic Mouse - Bottom rail - REPLACE PART.
