Apple Keyboard Risers
thingiverse
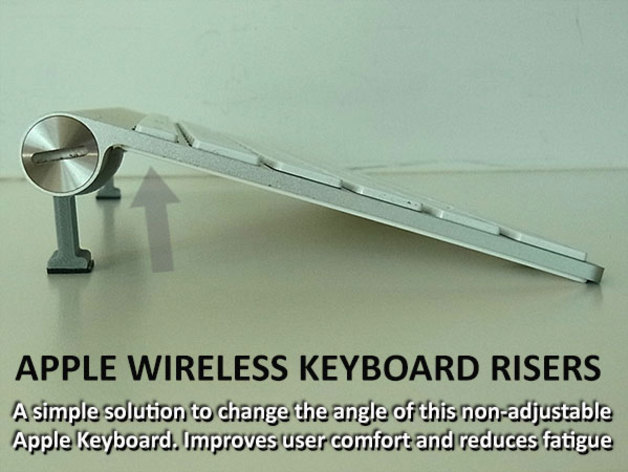
Human: There is a simple way to change the angle of your Apple Wireless Keyboards (Model as pictured). The standard angle is only 6 degrees (approx.) which means the keys are very flat and your fingers need to push down from almost directly overhead, making typing more tiring on your hands/wrist. Many people prefer their keyboard to angle back further as they find the higher angle makes pushing keys easier and typing is more comfortable. The Apple Keyboard Risers are quick and easy prints that allow users to raise the back of their keyboard by 10/15/20/25mm to suit their personal angle of preference (.stls for each of these sizes provided). Changing your Apple Keyboard angle is a breeze... first determine the best set for your personal preference by placing objects temporarily under the back of your keyboard to raise it up. Find things approx. 10/15/20/25mm (so the same as the options provided) to see which angle you find most comfortable, download the file and print two. Installation is easy... on an accurate well-set-up machine they should be a firm/tight push-on fit. Install one on each end just inside the standard keyboards rubber pads. Rotate the Apple Keyboard Risers forwards, so more underneath the keyboard, until they cannot rotate further. They have been designed to stop from rotating by the underside of the keyboard and have been slightly angled so they will not rotate backwards during use. The standard Apple Keyboard has rubber pads underneath that help stop it from sliding during use. As these pads will no longer make contact with the surface the keyboard is being used on, it's recommended to stick some thin rubber/non-slip pads onto the bottom of your Apple Keyboard Risers. Suitable adhesive-backed material should be easy to find at any hardware store. The Apple Keyboard Risers have been trialed with a number of Mac users with very positive feedback. Most users seem to prefer the 15mm and 20 mm options. They are quick and easy to print, as well as using very little filament. Please refer to the print settings and images for additional information. They need to be printed with high infill to ensure they are strong and will last well. Note: If you like this check out the rest of my practical and fun designs. Print Settings: Printer Brand: MakerBot Printer: MakerBot Replicator 2 Rafts: Doesn't Matter Supports: No Resolution: Standard/0.20mm Infill: 3 Shells / 50% infill recommended Notes: 3 shells and 50% or more infill is recommended to ensure the Apple Keyboard Risers hold firmly onto the back of the keyboard and will last well. Post-Printing: Simple installation Stick some thin rubber pad material onto the base of your Apple Keyboard Risers. Make sure it's well stuck as, like the original keyboard rubber pads, this will stop any movement during use. Suitable adhesive-backed material should be readily available at hardware stores etc.
With this file you will be able to print Apple Keyboard Risers with your 3D printer. Click on the button and save the file on your computer to work, edit or customize your design. You can also find more 3D designs for printers on Apple Keyboard Risers.
