AOSHIKE TPA3116 Subwoofer Amplifier Case
prusaprinters
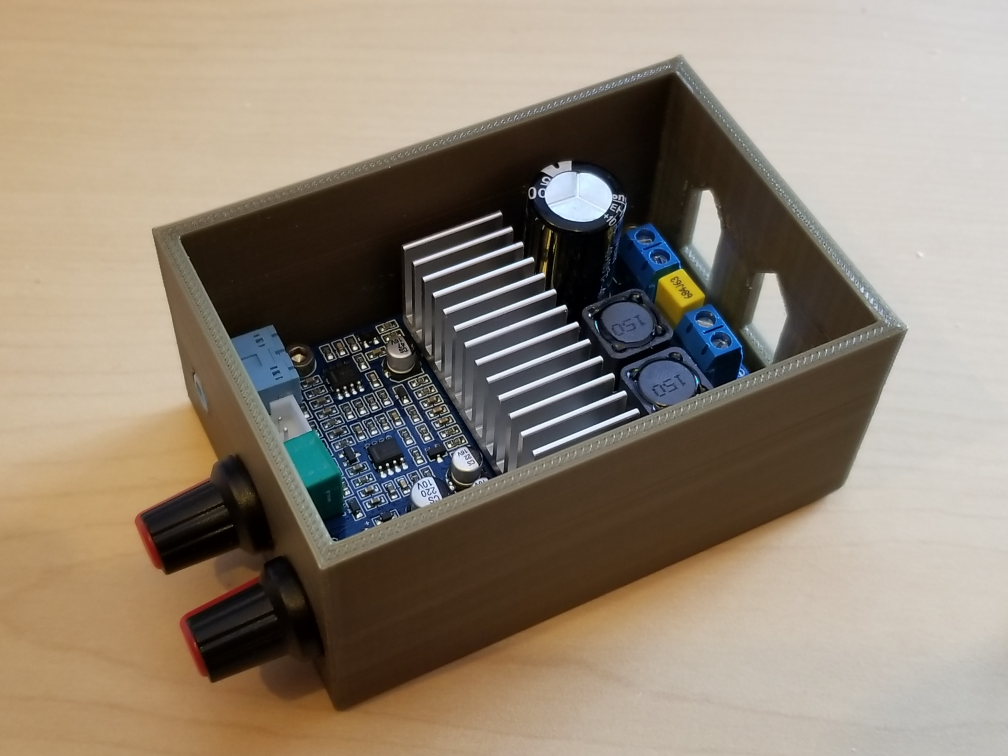
<p>I am converting a passive subwoofer to active, and so got this amplifier from amazon:<br/> https://smile.amazon.com/gp/product/B01N5DGK37/</p> <p>It comes as a bare board, so I needed a case, this is it.</p> <p>The first run fit pretty well, I had to use a round file to cleanup the wholes and the 3.5mm jack needed to come a bit towards the volume knob. the 4 posts for the mounting screws needed just a touch more space too, but they did work. I made really minor tweaks to these in the models and re-uploaded. but it was useable as it was originally.</p> <h3>Print instructions</h3><h3>Category: Audio Print Settings</h3> <p><strong>Printer Brand:</strong> FlashForge</p> <p><strong>Printer:</strong> <a href="http://amzn.to/2F3xKW3">Creator Pro</a></p> <p><strong>Rafts:</strong> No</p> <p><strong>Supports:</strong> No</p> <p><strong>Resolution:</strong> .2</p> <p><strong>Infill:</strong> 35%</p> <p><strong>Filament:</strong> AMZ3D PLA Bronze<br/> <strong>Notes:</strong></p> <p>I used 3 bottom, 3 tops and 3 outer layers. I don't think its especially sensitive though.</p> <h3> Post-Printing</h3> <p>May need to file the knob holes a little bit to fix the top of the circle depending on how well your printer can print overhangs on circles.</p> <p>Also when installing the board its best to tightly screw down the volume knobs nuts to "set the plastic positions" then loosen them back up, put in the 4 mounting screws and then re-tighten the volume knob nuts.</p> <h3> How I Designed This</h3> <p>Designed in FreeCad</p>
With this file you will be able to print AOSHIKE TPA3116 Subwoofer Amplifier Case with your 3D printer. Click on the button and save the file on your computer to work, edit or customize your design. You can also find more 3D designs for printers on AOSHIKE TPA3116 Subwoofer Amplifier Case.