Anycubic Mono X - X6K SLA Printer Heater
prusaprinters
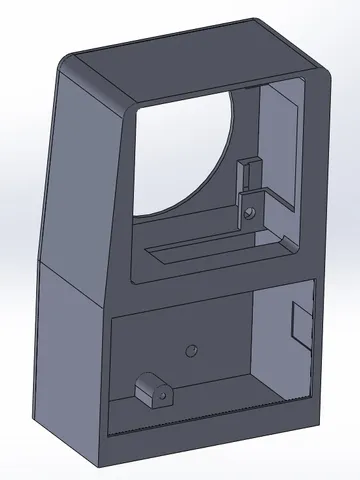
This is a heater designed for the Anycubic Mono X and X 6K. It utilizes the original glass filled nylon housing of the 12V PTC 100W heater as I felt this was a safer option due to its heat resistant properties. This isolates the heating element from having direct contact with the PLA plastic. As the lid of the Mono X is tapered, I have designed a taper into the housing on one side to create more clearance between the Z axis linear bearing and the heater housing. The housing has been designed to make the support material easier to remove. This design uses the common Digital Temperature Controller 12V Part Number W3230. Sorry but order of photos will not upload as edited. Thingyverse is broken!!!!!! Print Settings Printer Brand: Creality Printer: CR-10S Rafts: No Supports: Yes Resolution: .20 Infill: 20% Filament: Esun PLA Black Instructions ============ Instructions Instructions 1. Print the housing and back cover at 20% infill faced down. 2. Disassemble the heater unit. 3. Cut the mounting tabs off the sides of the heater unit housing and sand the sides smooth. 4. Cut the wires off the heater element terminals leaving three tabs to solder new wires to. 5. Solder and join a red (+ve) wire to the two outer tabs in a direction parallel to the heating element. This is so it will fit into the housing. 6. Solder a black (-ve) wire to the middle tab the same way as the +ve wires. 7. Insert the heating element into the housing from the front and thread the wires through the channel on the left hand side of the housing. See photos. 8. The PTC 100W heating unit came with a spacer. Place the spacer as shown in photo. 9. Insert the outer cover of the PTC Heater into the housing and align the spacer as shown in the photos. 10. Install the fan assembly as shown in the photos insuring the wires feed through the provided open channel. 11. Insert the four original housing screws that came with the unit and secure as per the photos. 12. Remove the rear cover from the Temp Controller and unplug the temp sensor. 13. Depress the retaining tabs and remove the wires from the plug of the temp sensor. 14. Thread these wires through the opening in the back cover and push the wires back into the plug. 15. Plug the temp sensor back into the PCB and click the cover back into place. 16. Wire the temp sensor as per the provided diagram. 17. Screw the back cover into place with 3 x 10mm self-tappers. 18. Secure completed unit with industrial double sided tape as shown in the photos assuring clearance from the X axis linear bearings. Use good quality tape here as you do not want this mounting to fail. 19. Remove the double fan cover from the back of the printer. 20. Run the heater unit supply wire as shown in the photos. Take care not to interfere with the lid sensor on the printer. 21. Loosely thread the heater supply wire through the hole in the bottom plate of the printer. Insure this does not interfere with the wiring to the lid sensor or the stepper motor. 22. Screw the fan cover back into place. 23. I used a 10amp 12V DC output AC power supply which was switched via the AC cord so as to isolate both the power supply and the heater unit when not used. See photos. 24. I set the temp sensor to turn on at 25 Deg Cel and turn off at 26 Deg Cel. I turn the heater unit on 1 hour before printing to allow the metal structure of the printer to heat up to ambient temperature. This reduces the amount of cycling of the heater to maintain constant temp during the printing. Category: 3D Printer Accessories
With this file you will be able to print Anycubic Mono X - X6K SLA Printer Heater with your 3D printer. Click on the button and save the file on your computer to work, edit or customize your design. You can also find more 3D designs for printers on Anycubic Mono X - X6K SLA Printer Heater.
