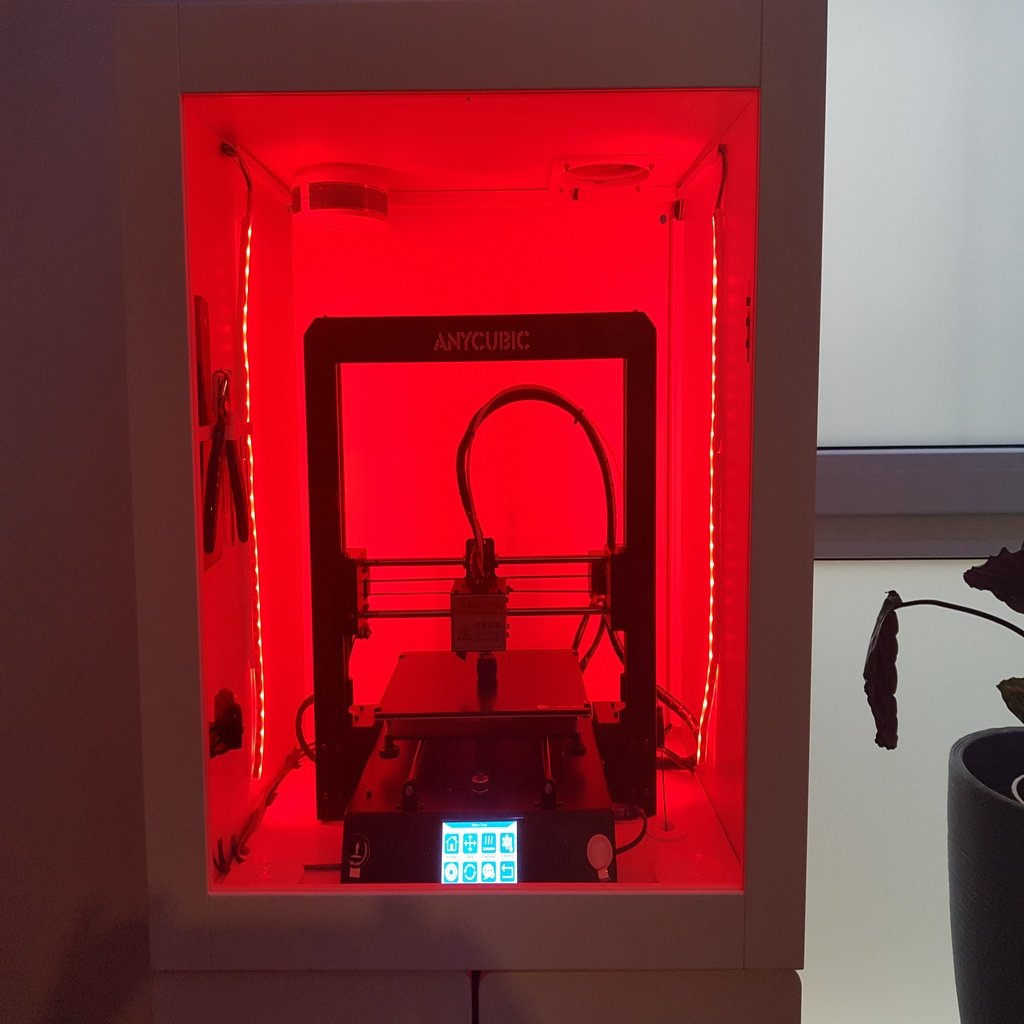
Anycubic i3 Mega - Ikea Stuva Enclosure / Gehäuse
thingiverse
ANYCUBIC I3 MEGA - IKEA STUVA GEHÄUSE/ENCLOSURE (WIP) ========================================================== There are many instructions for building a 3D printer housing on the net. For me, the following features were important: cheap, easy, fast, suction, lighting, storage, noise reduction, and optics. Since the device is in my office, the exhaust air had to be removed. Many blow the exhaust air into the living space or build complex filters. Both were out of the question for me, so here is my setup. IKEA Einkaufsliste/Shopping list: ------------------------------------------- <a href="https://www.ikea.com/de/de/p/stuva-korpus-weiss-00128621/">Korpus/body</a> <a href="https://www.ikea.com/de/de/p/fritids-tuer-weiss-20378614/">Tür 1/door 1</a> <a href="https://www.ikea.com/de/de/p/sindvik-vitrinentuer-weiss-klarglas-90291858/">Tür 2/door 2</a> <a href="https://www.ikea.com/de/de/p/stuva-drehtuer-weiss-00128622/">Dreh-Tür/rotating door</a> <a href="https://www.ikea.com/de/de/p/schubladen-stuva-00128623/">Schubladen/drawer</a> Hardware: ------------- Here the installed hardware. For control, I use Octoprint with some plugins. Optimal is the 5V fan. It can be connected and controlled directly to the Raspi, no further components are necessary. The smoke detector has a digital output and can be connected to the Pi. So it is possible to switch off the printer automatically in case of smoke. If the cable spaghetti is gone, I publish here the setup for the Raspi. The LED Stripes are also not optimal, since these can be stuck badly (silicone). I will mount some more here. <a href="https://amzn.to/39cBZyL">Abluftschlauch" / exhaust hose"</a> <a href="https://amzn.to/3731TCV">Lüfter 5V" / fan 5V"</a> <a href="https://amzn.to/2sjGUx5">Rauchmelder" / smoke detector"</a> <a href="https://amzn.to/2PPp1PE">Raspberry Pi 3+"</a> <a href="https://amzn.to/36Yvhdw">LED Stripe"</a> Kabel / Cable & Zubehör / Accessories: ----------------------------------------------------- <a href="https://amzn.to/2Qg7gI5">Lüfter Kabel 90cm" / fan cable 90cm"</a> <a href="https://amzn.to/374dOQT">LED Stromkabel" / LED power cable"</a> <a href="https://amzn.to/2tKyU8B">Dichtungsband" / sealing tape"</a> Hardware used: * ANYCUBIC I3 MEGA 3D printer * IKEA STUVA GEHÄUSE/ENCLOSURE (WIP) * Raspberry Pi 3+ * Octoprint with some plugins * Abluftschlauch" / exhaust hose" * Lüfter 5V" / fan 5V" * Rauchmelder" / smoke detector" * LED Stripe" Note: This is a translation of the original text. Some details might have been lost in translation.
With this file you will be able to print Anycubic i3 Mega - Ikea Stuva Enclosure / Gehäuse with your 3D printer. Click on the button and save the file on your computer to work, edit or customize your design. You can also find more 3D designs for printers on Anycubic i3 Mega - Ikea Stuva Enclosure / Gehäuse.
