Anycubic Chiron belt hook
thingiverse
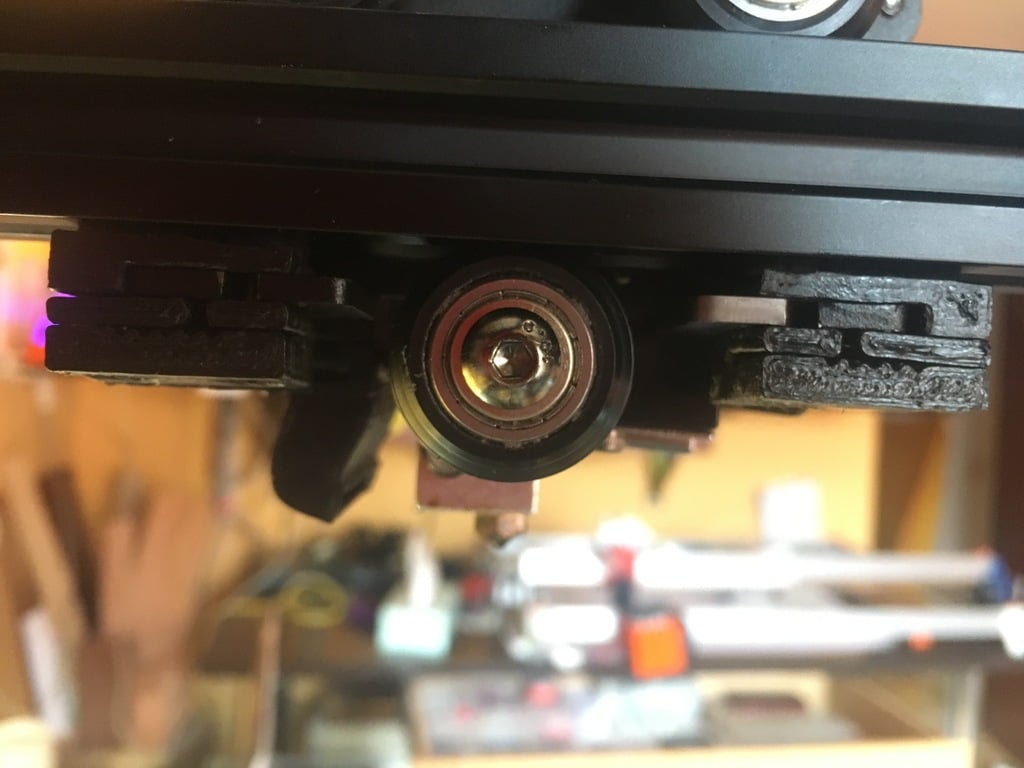
Anycubic Chiron Belt Hook: A Game-Changing Upgrade for Your 3D Printer Inspired by Miguel Sanchez's ingenious blog post on FightPC, I'm excited to share this DIY project that replaces the nylon flange and corrects belt alignment. This upgrade is a must-have for any serious 3D printer enthusiast! To create this essential component, make sure to use ABS material with 100% infill and support. After printing, carefully remove the supports and refine the upper part by sanding or gouging off excess material. Before you start, gather four 15mm M3 bolts (slotted head) and nuts. Accuracy is crucial here, as minor deformations in plastic can cause variations in dimension. Mounting this hook requires patience and some technical know-how. You'll need to reassemble the X tensioner first, so make sure you're comfortable with that process. To ensure a smooth fit, use the original belt size as a reference. With this upgrade, you'll experience improved performance and hassle-free printing. Give it a try and discover the difference for yourself!
With this file you will be able to print Anycubic Chiron belt hook with your 3D printer. Click on the button and save the file on your computer to work, edit or customize your design. You can also find more 3D designs for printers on Anycubic Chiron belt hook .