Antibody Modelling Kit
prusaprinters
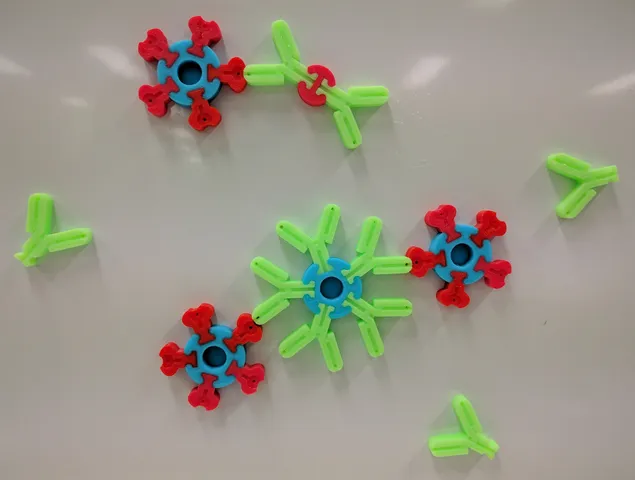
Antibody Modelling Kit It is our immune system that keeps us from getting sick. Central to our immune response are proteins known as antibodies. These Y-shaped molecules are custom made by special cells in the body (B-cells) to bind to specific antigens (another name for molecules the immune system recognizes), especially of bacteria and viruses. By binding, antibodies can often neutralize these pathogens and make them easier to find and destroy by our immune cells. This kit is designed to model the interaction between antibody (also known as immunoglobulin G, or IgG) and antigen (Ag). By inserting magnets, you can stick your models to a magnetic white board, or best of all, simulate antibody binding by floating your models on water. The models do require some carefully placed magnets (3mm diameter x 1mm height cylindrical neodymium magnets) which you can order in the usual places. By using the immunoglobulin adapter pieces we can turn the IgG antibody to the IgA (2-fold) and IgM (5-fold) antibody types, or use them with the antigen pieces to build small 'viruses'. (Obviously not to scale!) This is still very much a work in progress, but hopefully illustrates dynamically some of the basic principles in immune system biology. I am very open to comments and suggestions to improve the model! Assembly Instructions To assemble the model kit properly you will need: Neodymium disk magnets (3mm diameter x 1mm) -2 for every IgG and 1 for every Ag 3mm drill bit - to help clear the magnet hole. Modelling glue - to help keep the magnets in place. Make sure to print the models with minimal infill, - they do need to float after all. There are two main pieces in the kit which we add magnets to: the IgG (antibody) and the Ag (antigen) models and it is*really* important that we insert the magnets the right way to get the binding to work! More precisely, the magnet orientations need to be opposite in the Antibody (IgG) to the Antigen (Ag) models. Looking at the underside of the IgG and Ag models there should be holes just big enough to fit the 3mm magnets (see images). (You may need to clean out the holes with the drill bit). Press a magnet into this hole, remembering to keep the orientation the same for the same model piece. It is easier to handle this with a short stack of cylinder magnets, rather than one at a time. Make sure to reverse the orientation of the magnet for the other set. ie) say, have all the magnets with North facing up for the IgG model and North facing down for the Ag model. Don't worry if you mess a few up; there are small holes through the models which you can use a paperclip to poke out the magnets and try again. Now that the magnets have been inserted, you can slot the IgG and Ag pieces into the various adapters to make larger complexes and start your modelling. Try make some IgA or IgM complexes. https://en.wikipedia.org/wiki/Antibody You can make some viruses by adding Ag pieces to the Virus or IgM adapters. Make sure the magnets are all facing the same way in the models! Once you have the magnets sitting correctly you may want to add a spot of modelling glue to keep them there. Simulating Antibody-Antigen interactions. To simulate Ab-Ag interactions, fill a small tub with water and carefully place the antibody models with the magnets facing down. These should remain floating apart due to the repulsion of the magnets. A few drops of detergent in the water is handy to help with surface tension effects. Next add some 'Viruses' with the Ag models on the surface, again with all the magnets facing down. If all goes well, the Antibodies should start sticking to the Antigens on the virus perhaps even sticking some together. A special thanks to Eleanor and Charlotte, year 10 students who started this project as part of work experience at Melbourne Bioinformatics, Melbourne University. The underside of the IgG model piece. Inserting the magnet into the underside of the Antigen model piece. Notice the reversed polarity of the magent to the IgG piece! Category: Biology
With this file you will be able to print Antibody Modelling Kit with your 3D printer. Click on the button and save the file on your computer to work, edit or customize your design. You can also find more 3D designs for printers on Antibody Modelling Kit.