Anti Wobble Z Nut Mount for Lulzbot Taz 4 or 5 Printers
thingiverse
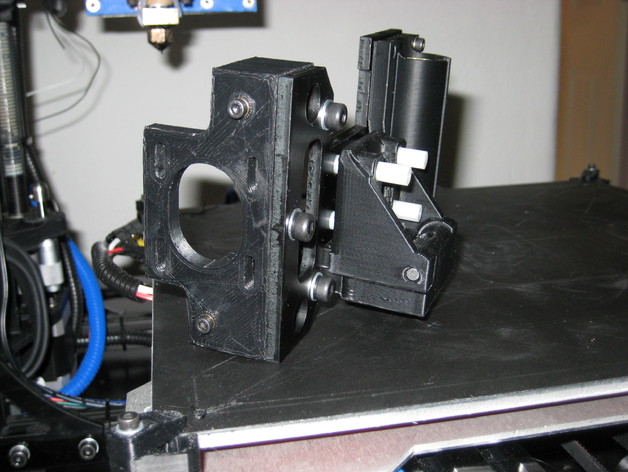
This project aims to eliminate minor Z banding or Z wobble that occurs when printing with stock Taz 4 or Taz 5 printers. This is a bolt-on upgrade requiring no firmware or frame modifications. A build thread can be found at https://forum.lulzbot.com/viewtopic.php?f=16&t=2476. A video explaining the unit in more detail is available at https://youtu.be/yokdL-T7lW4. Edit 1: New files have been uploaded, including a revised bearing holder with correct size feet and cosmetic changes to address reports of STL issues. Users who have previously printed the parts successfully do not need to reprint them. Edit 2: Easier-to-insert Igus bearings (lower file Anti_wobble_z_nut_bottom_8_8) are now available, making it easier to get a smooth, free-floating bearing with minimal effort and optimal printer setup. Print Settings: Rafts: No difference Supports: None needed Resolution: Used 0.50mm nozzle with average layer height Infill: 85% or better recommended Notes: This is a structural piece; ABS prints are preferred, while PLA may not be strong enough for long-term use. Post-Printing Instructions: Required parts: 6 M5 heat set inserts (http://www.mcmaster.com/#94180a361/=zhts4o) 4 steel shafts 3/16" in diameter and 1.75" in length (local source or Ace Hardware) 8 Igus MYI-03-03 Flanged Bearings with a 0.1875" ID x 0.1875" L, sourced from eBay 8 1/4" threaded nylon spacers, at least 1/2" long 8 bolts to match the threaded spacers Instructions: Print the double bearing nut holder and two Upper Mount Block pieces. Using a 1/4" drill, gently bore out four holes in each upper block for 1/4" pins. Insert the steel shafts through these holes, securing them using nylon pins as guides. Clearance the pins by inserting a new pin to clear any drag or wobble, if necessary. Reprint if issues persist. Insert the 3 M5 inserts into each half of the lower block, aligning with the surface. Install 4 Igus bearings in their designated mounting holes, followed by 1/2" shafts for additional support and bearing seating. Assemble both parts together using friction between end pieces to secure the rods. Remove stock Z-bearing holders from your Taz 3D printer. You can also temporarily remove leadscrews at this stage. Position the new mount and reinsert nylon posts, then tighten but not over-tighten, to avoid damage. Reinstall stock bearing hardware and bearings.
With this file you will be able to print Anti Wobble Z Nut Mount for Lulzbot Taz 4 or 5 Printers with your 3D printer. Click on the button and save the file on your computer to work, edit or customize your design. You can also find more 3D designs for printers on Anti Wobble Z Nut Mount for Lulzbot Taz 4 or 5 Printers.