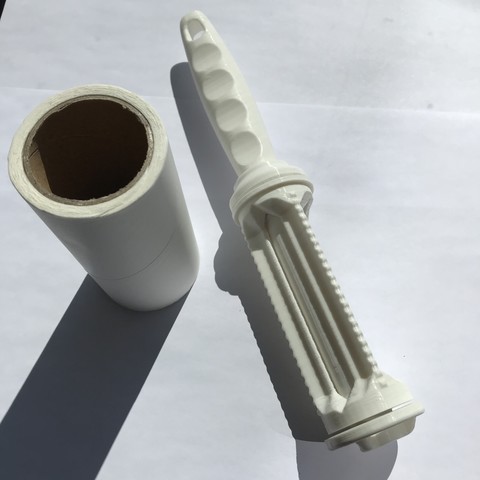
Anti-hair adhesive roller
cults3d
Another small life hack of my creation, totally unpublished, I don't have too many on various sites :)\n\nIf you have pets with long hair like a cat, I guess you know perfectly brushes for removing hair from clothes, curtains, sofas ....\n\nFor my part, having a cat with very (too) long and extremely volatile hairs, I'm obliged to clean every day as soon as I go out.\n\nIt's enough to say that it takes more than intensive :)\n\nToday I propose the design of an anti-hair adhesive brush currently compatible directly in its configuration with IKEA brand rolls that is to say with rollers of inner diameter of about 37-38mm and about 100mm in length.\n\nThose here: https://www.ikea.com/fr/fr/catalog/products/30141126/\n\nHowever, if you want a brush adapted to another roll of another brand, let me know in the comments, I'll add STL files to the brush holder adapted to your needs, it takes me 5 minutes, and you will have to change the roll holder.\n\nINTEREST OF CREATION:\n\nUnlike standard brushes, once mounted, the roll can not get out of its place\nCustom brush with a better grip\nTurns much better than the original one\nBrush stiffened critical places so say you will not break :)\nIt's 3D then it's necessarily better, it's cool it's beautiful and it amazes everyone :)\nNOMENCLATURE OF THE BRUSH:\n\nThe brush consists of 8 pieces:\n\n5 pieces printed in 3D\n\nThe handle in 2 parts (one side hand, one side roll)\nThe roll holder\nThe nut to prevent the translation of the roll\nA reinforcement piece between the two parts of the handle\n2 generic elements:\n\nAn M6 hexagon head screw with a length of 15mm - max. 30mm\nA compatible M6 nut\nExample & dimensions of the screw: https://www.roues-et-roulettes.com/boulonnerie-diametre-6-mm/5722-vis-hexagonale-filetage-total-longueur-m6.html\n\nExample and dimensions of the nut: https://www.roues-et-roulettes.com/boulonnerie-diametre-6-mm/5741-vis-hexagonale-filetage-total-longueur-m6.html\n\nAnd of course, the IKEA roll (or other)\n\n3D DESIGN:\n\nHaving a small print tray 150x150x150mm on my Da Vinci Mini W, I cut the handle in two parts.\n\nA small piece of reinforcement can be printed, it allows you to stiffen the connection between the two parts of the handle, so to sandwich the two ends of the handle. The collage is simply made to superglue (PLA pieces) and kept tight about 1h\n\nThe brush holder is inspired by the original one, it has many small teeth to grip the roll. It does not have any parts cantilever and must be printed WITHOUT supports (angle max of 45 °)\n\nThe nut is quite basic and can just hold the roll once screwed on the handle\n\nGames of 0.15 to 0.2 are present between the pieces in order to assemble them simply. Personally with these values I only have to remove small clusters of print defects and it works perfectly.\n\nPOST PRODUCTION:\n\nAfter printing, after removing the material threads, clumps and printing defects, check that all your parts fit together perfectly, assemble the two parts of the handle with the reinforcement piece together with the superglue (on PLA and let dry about 1 hour while keeping it tight).\n\nIt is up to you to sand the big grain 80 to remove the layers of materials, then go up to 400 grain under water. You will have a completely smooth and soft touch surface and the roll between the two parts will be perfect (You can put some oil or paraffin to improve the rotation)\n\nIf you feel like it, you can sand the rest of the 400 grit brush as well, but it's not necessary for proper operation.\n\nAll you have to do is set the M6 screw in the printed nut, and the M6 nut in the handle\n\nThey must come back forcing a little, so that they do not stand out for use.\n\nTo help with the assembly, you can soak in very hot water for 2 minutes the nut and the screw before positioning them in their places.\n\nThey will be hot and will locally distort the PLA to fit more simply. Tip valid for any assembly of PLA passing ...
With this file you will be able to print Anti-hair adhesive roller with your 3D printer. Click on the button and save the file on your computer to work, edit or customize your design. You can also find more 3D designs for printers on Anti-hair adhesive roller.
