Another ATX Bench Power Supply w Cord Storage
prusaprinters
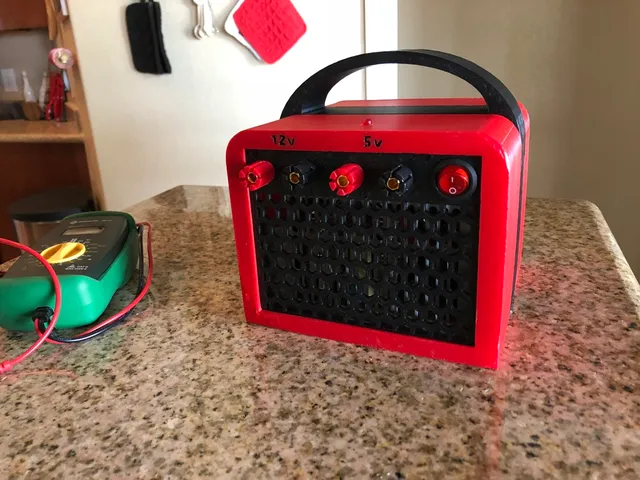
I had built another one of these and am very pleased with it, so I made another with a smaller foot print and 2 negative posts. To save the space, the cables are moved from the front of the power supply to the rear and tucked in to a pocket beneath the handle. You'll need to either drill a hole in the top cover of the power supply to re-route the wires or remove it completely. If you leave the top cover off, it will need to be glued together otherwise it should stay together with pressure. The handle connects to the center piece with a dove tail. This was printed in ABS, but PLA is recommended. I had a harder time getting things together due to slight warping. No supports needed for this one. The grill and cable wrap should be printed in a sturdy material or high infill to take the stresses of using it and need to be glued in to place. The top of the opening for the power supply comes super close to the curve in the case, so if its printed in lower resolutions it may not connect. Check out your slices to see. To make the actual power supply I fished it out of an old CPU and started following a guide posted to makeuseof.com, but wound up using info from a few sites and youtube videos to modify it for my needs. Category: DIY
With this file you will be able to print Another ATX Bench Power Supply w Cord Storage with your 3D printer. Click on the button and save the file on your computer to work, edit or customize your design. You can also find more 3D designs for printers on Another ATX Bench Power Supply w Cord Storage.