Annular Cooling for Ultimaker V2
prusaprinters
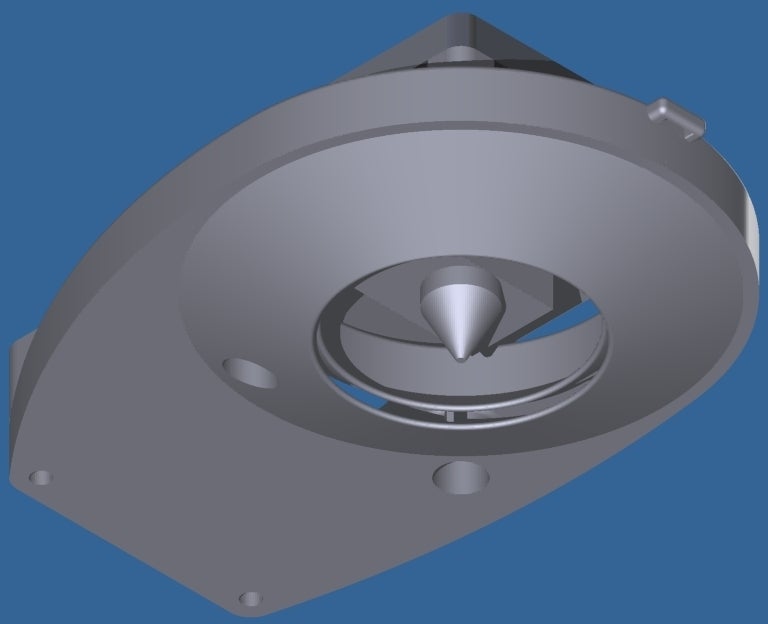
<p>This is a replacement annular cooling for the Ultimaker nozzle. The original cooling shroud, although functional, can sometimes be counterproductive. The unidirectional nature of the cooling stream can sometimes lift the first layer, especially when printing on a raft. The annular cooling nozzle is aimed at the printed object from all directions, thus cancelling any possible lift.</p> <p>This version 2 of my previous design. It has a larger annulus to prevent it from melting, more airflow and simpler geometry. This version has only two parts to print and glue with superglue.</p> <h3>Print instructions</h3><h3>Category: 3D Printer Parts Summary</h3> <p>This is a replacement annular cooling for the Ultimaker nozzle. The original cooling shroud, although functional, can sometimes be counterproductive. The unidirectional nature of the cooling stream can sometimes lift the first layer, especially when printing on a raft. The annular cooling nozzle is aimed at the printed object from all directions, thus cancelling any possible lift.</p> <p>This version 2 of my previous design. It has a larger annulus to prevent it from melting, more airflow and simpler geometry. This version has only two parts to print and glue with superglue.</p> <h3> Instructions</h3> <p>Print both parts with flat faces on the platform. I used 0.1mm layer thickness and 100% fill for strength.</p> <p>You will also need the following:<br/> 2x M3x20mm bolts<br/> 2x M3 nuts<br/> 2x M3 PCB spacer</p> <p>File bolt holes using a needle-file to allow M3 bolts to pass through comfortably.</p> <p>Align through the bolt holes using bolts and glue the two parts using super glue. The use of super glue accelerator is advised.</p> <p>Slide assembly in place under the cooling fan through the innermost prodruding long screws.<br/> Retighten the long screws before securing the assembly in place using 2xM3 PCB spacers. One of the bolt holes is too deep to get the PCB spacer to even get a grip on the long screw. Use a M3 bolt to joint the two PCB spacer and tighten, then use this ellongated spaced to secure the cooling assembly in place. Use a mini-wrench an an allen key to untighten the lower PCB spacer from the top then remove it. The second hole is not that deep, so the secon PCB spacer should have enough grip to tighten using amin-wrench.</p> <p>Secure the rest of the assembly to the fan using 2x M3x20mm bolts and nuts.</p> <p>STEP files included.</p> <p>Enjoy!</p> <p>If you like this design, feel free to donate and ask for improvements:<br/> <a href="https://www.paypal.com/cgi-bin/webscr?cmd=_s-xclick&hosted_button_id=AW57FTXN35YZE">https://www.paypal.com/cgi-bin/webscr?cmd=\_s-xclick&hosted\_button\_id=AW57FTXN35YZE</a></p>
With this file you will be able to print Annular Cooling for Ultimaker V2 with your 3D printer. Click on the button and save the file on your computer to work, edit or customize your design. You can also find more 3D designs for printers on Annular Cooling for Ultimaker V2.