Animatronic Tail by circuito.io
thingiverse
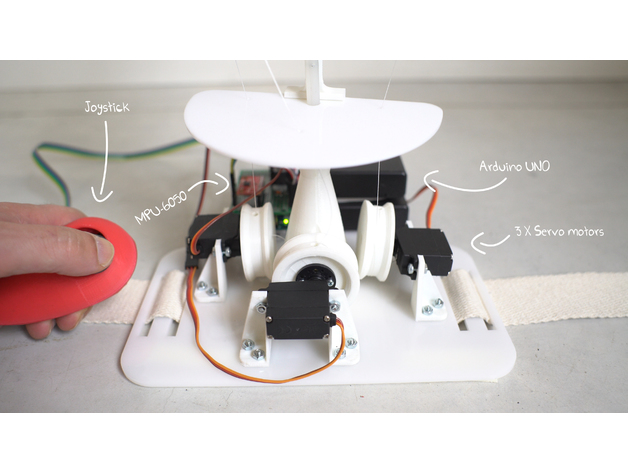
An animatronic tail controlled with gyro and joystick made using circuito.io components can be found at http://bit.ly/circuitoio-tail-components. The full tutorial is on hackster.io: http://bit.ly/circuitoio-tail-on-hackster. Designing This Animatronic Tail My design begins with the spinous process, which serves as the base of each vertebra and connects to the spinal cord in the middle of the tail. There are 11 processes in the tail model. To create movement from side to side, I use a fishing line to connect between the pulley and the servo motor. Three pullies - one for each side and one for the top servo - need to be printed. The Bar mount is connected to the main plate of the tail and runs through it, carrying the spinal cord. Three Servo Mount right parts are needed, as they hold the servo motor from its right side. Similarly, three Servo Mount left parts must be printed, holding the servo motor from its left side. At the end of the tail is the Tail tip part, which needs to be printed once. For laser cutting, I used a file containing 11 vertebrae and one main plate. Spinal Cord Details I chose a flexible Nylon 6/6 Round Rod for the spinal cord. Its dimensions are 1x 0.6cm diameter x100cm length. Hardware Components * Screws: 22 M3 screws, each 10mm long with bullets * Fishing line: 3.5 meters of spectra fiber string, made by PowerPro (powerpro.com)
With this file you will be able to print Animatronic Tail by circuito.io with your 3D printer. Click on the button and save the file on your computer to work, edit or customize your design. You can also find more 3D designs for printers on Animatronic Tail by circuito.io.
